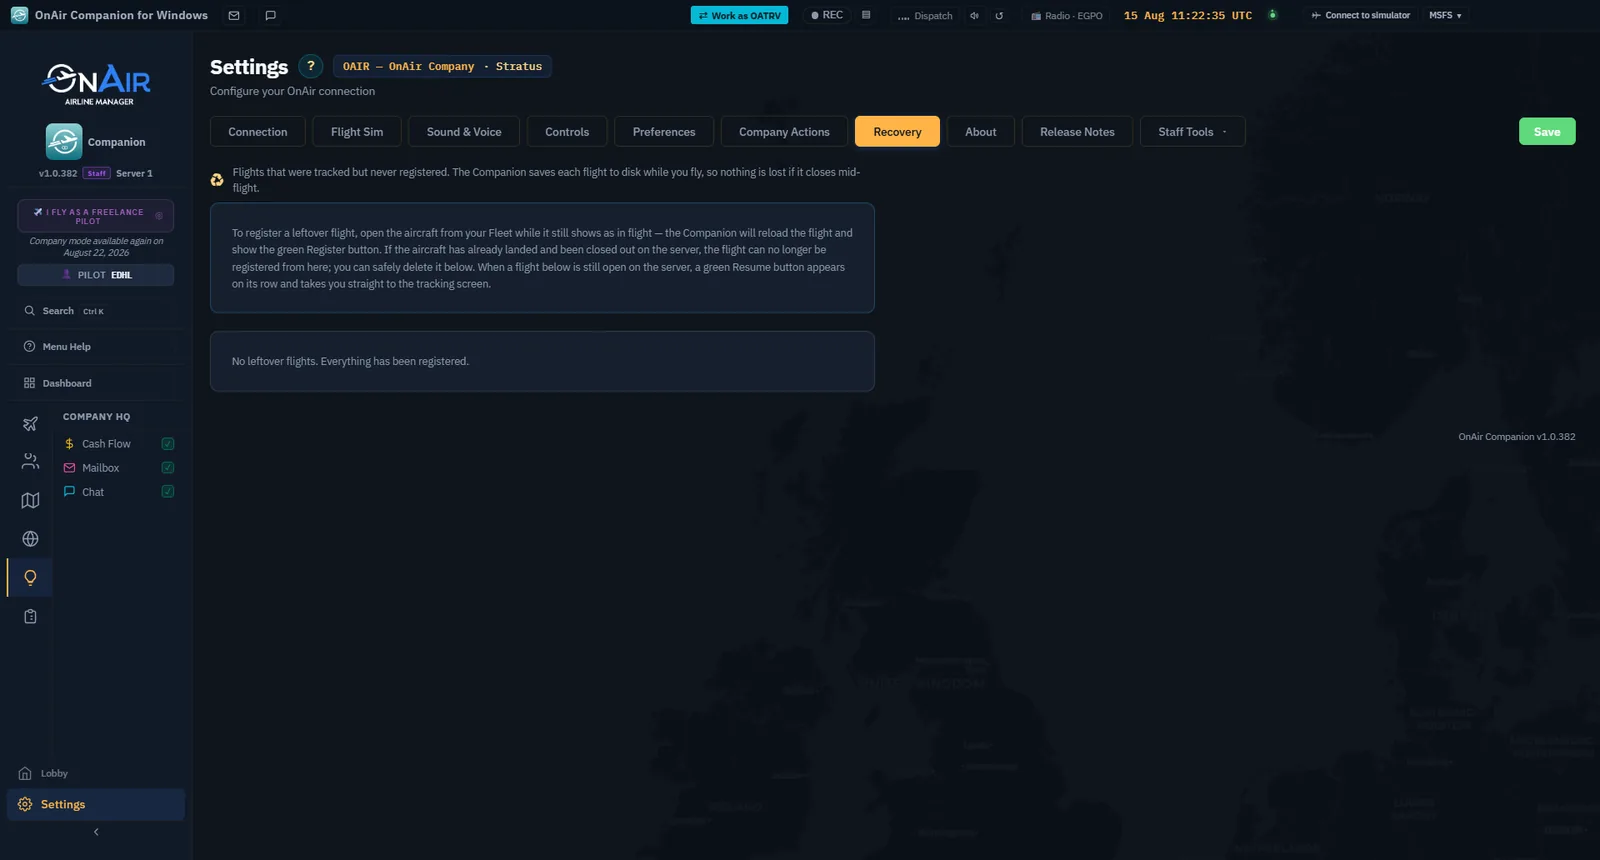
Follow the chapters in order from installation and simulator setup through Onboarding and Freelance flying to company management, repeatable operations and industry. Each lesson explains what to do and in what order.
Screenshots record real Companion states. Explicit screenshot placeholders identify flights, deliveries, construction and production outcomes still to be demonstrated. Dates, prices and company figures are examples, not promises. Small interface crops are kept compact for readability.
Localized screenshots use the language selected in Companion. Company names, server journal entries and interface strings not yet translated by the application remain as actually displayed.
Before you can fly a single mile, you need a running OnAir Companion on your PC. This chapter walks you through downloading the installer, getting past Windows SmartScreen, logging in with your OnAir account, picking the company you'll fly for in the Lobby, and understanding what happens when an update is waiting for you at launch.
1.1 Install & launch the Companion
Download the Companion
The OnAir Companion is a desktop application for Windows. It runs alongside your flight simulator (or on its own, in Tycoon mode) and is the only tool you need to fly missions, run a company, and progress in OnAir.
Head to the official OnAir website and grab the latest installer from the Download section. The file is a single signed .exe (NSIS installer) named along the lines of OnAir-Companion-Setup-x.y.z.exe.
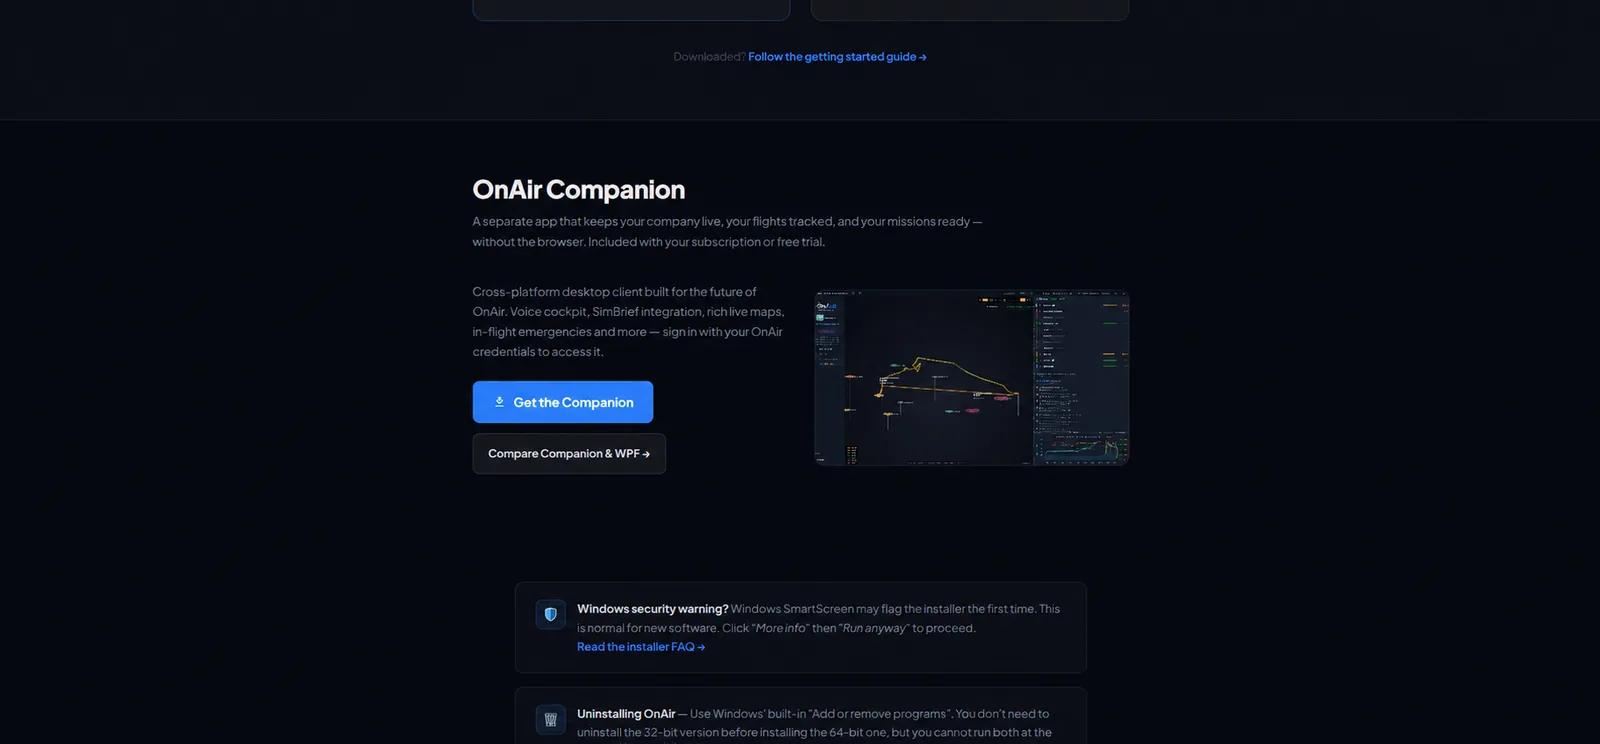
Companion download section on the official website; the page reflects the release available at capture time.
Note — There is no separate "freelance" or "career" download. The same Companion handles both modes; you pick your mode later, when you create a company in the Lobby.
Install (Windows SmartScreen)
Double-click the installer you just downloaded. Depending on your Windows configuration and the installer's reputation, you may see one or both of these prompts. If neither appears, continue with the installer:
A User Account Control prompt asking for elevation — click Yes.
A blue Windows protected your PC SmartScreen banner. This warning is not shown on every installation.
If the SmartScreen banner appears:
Click More info.
Confirm that the publisher is OnAir Company — this proves the file is the real one.
Click Run anyway.
Warning — If SmartScreen does not show a publisher line, or shows a different publisher, stop and re-download from the official site. Don't run anything that can't prove who signed it.
The installer is a standard NSIS wizard: pick the install folder (the default is fine), wait a few seconds, and let it create a desktop shortcut.
Log in to OnAir
Launch the Companion. The first thing you'll see is a loading splash, followed by the Login screen.
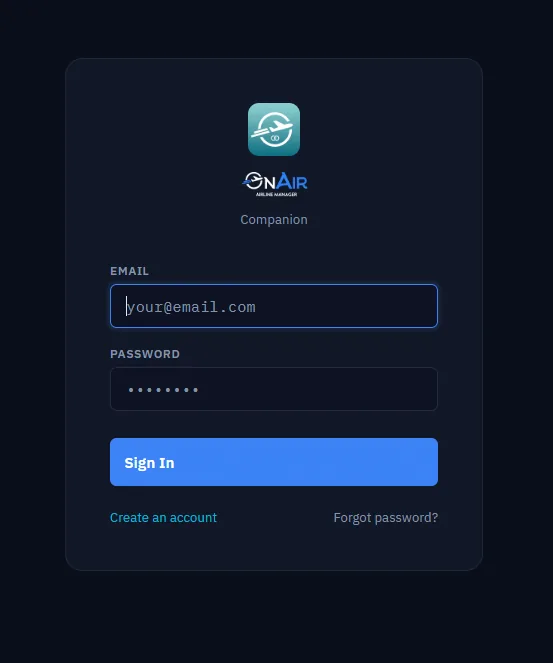
Sign-in form.
Type in the email and password you used when you registered on the OnAir website. If you don't have an account yet, click Register on the OnAir site first — the Companion does not create accounts, it only signs you in.
What happens behind the scenes once you click Login:
The Companion checks that the OnAir servers are up. If a maintenance window is active, you'll see a friendly maintenance splash with a Recheck button instead of being thrown into a confusing error.
Two large reference databases — the airport database and the cargo/charter database — start downloading in parallel with your login. You'll see a progress bar for the airport DB and an indeterminate bar for cargo/charter.
Once both databases report ready and your login succeeds, you move on to the Lobby.
Note — The very first launch is the slowest, because both reference databases are downloaded from scratch (a few hundred megabytes, depending on coverage). Subsequent launches are nearly instant — only the deltas are fetched.
If your credentials are saved from a previous session, the Companion logs you in automatically and skips the form entirely — you'll go straight to the loading splash and then to the Lobby.
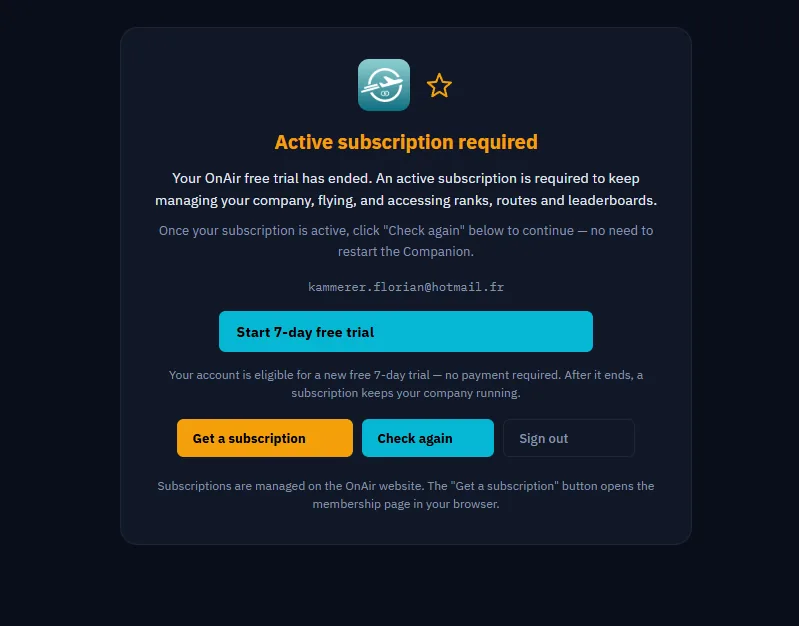
If the Active subscription required screen appears, read the available trial or subscription options. After updating access, use Check again.
Account access — the subscription screen and its available actions.
The Lobby — choose a company
After login, you land in the Lobby.
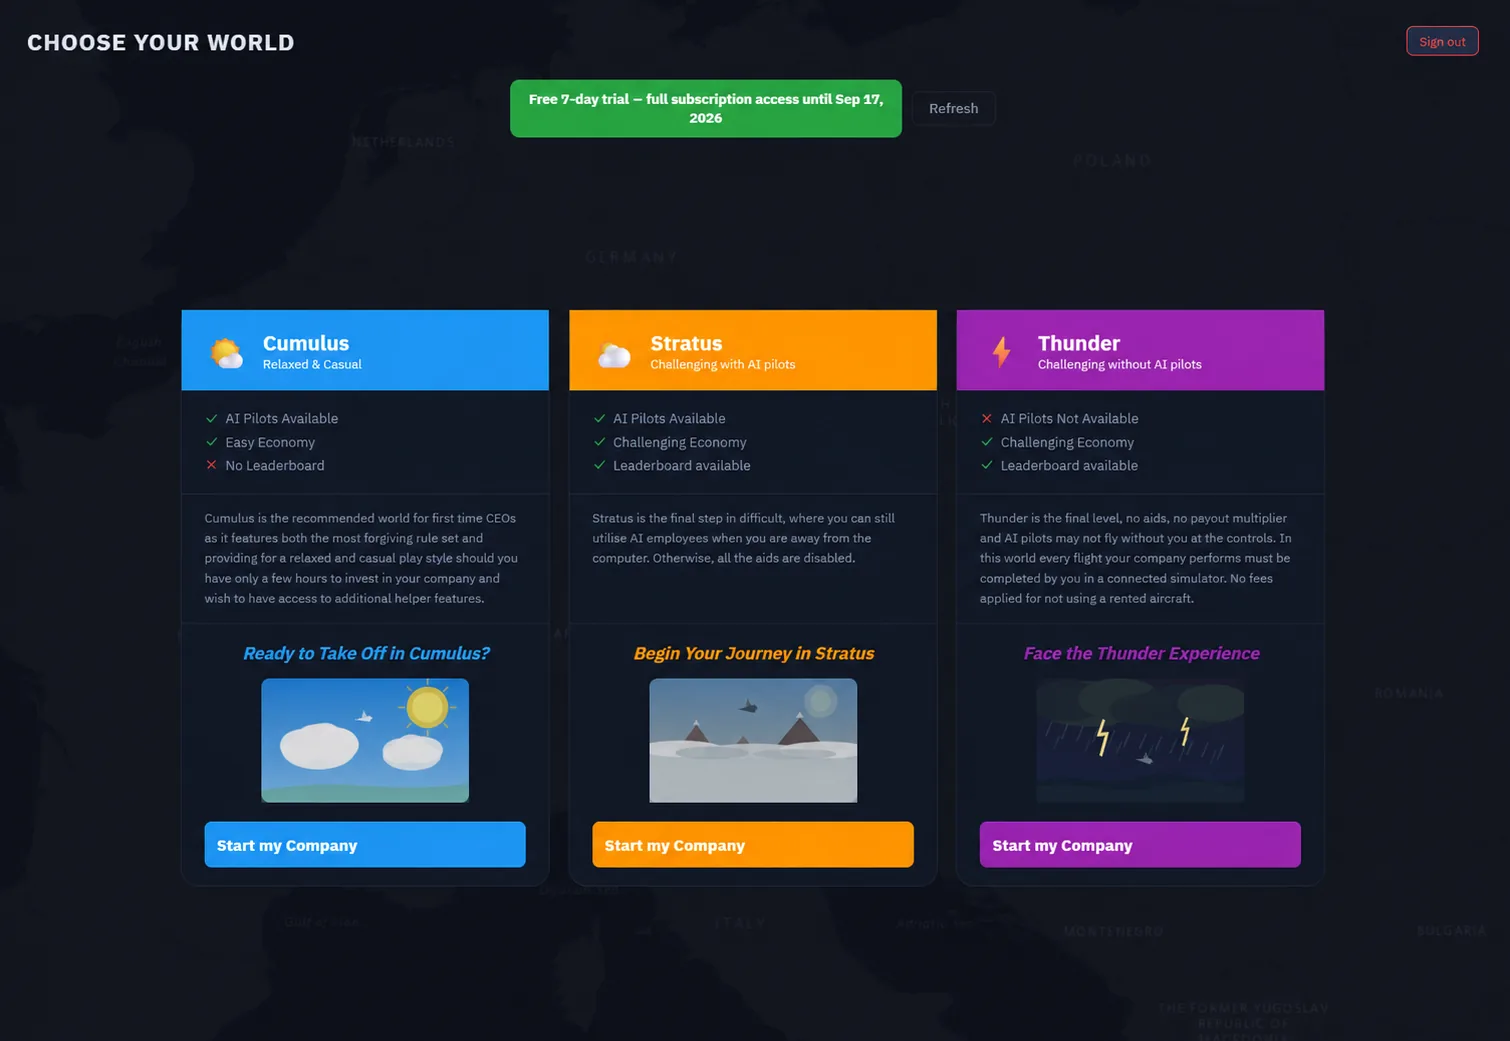
Choose a world in the Lobby: Cumulus, Stratus or Thunder.
The Lobby is where you decide which company you fly today. It is laid out around three things:
World tabs across the top. OnAir runs several independent worlds — separate economies, separate fleets, separate companies. Each world has its own tab. This creation flow permits one personal company per world; it checks for an existing company before creating another. Pick the tab for the world you want to play in.
Your company cards. Each card represents one of your companies in that world: company name, current cash, last activity, and a big button. If the company is paused (you stopped playing a while back), the button reads Resume; tapping it opens a confirmation dialog before re-activating the company. If it's the active one, the button is just Resume with no confirmation.
The news carousel. Up to five rotating announcements from the OnAir team — patch news, events, server status. Worth a quick read before you dive in.
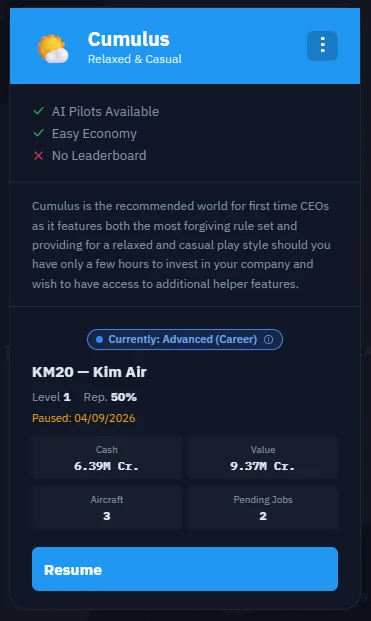
A company card with its Resume action. The button alone does not establish whether the company is paused.
Create your first company
If you've just registered and have no company yet, the tab shows an empty grid with a Create Company card. Click it.
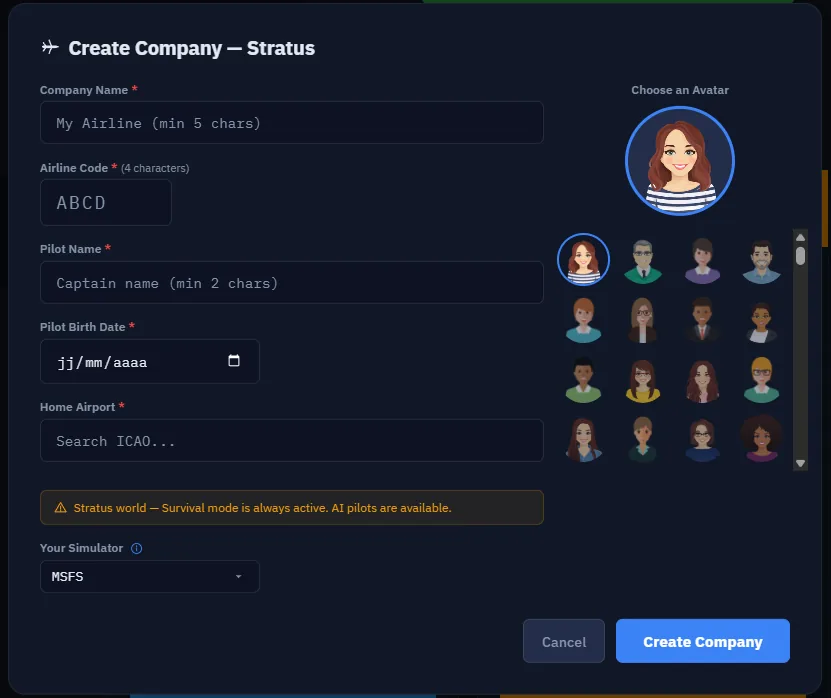
Create Company: company and pilot details, avatar, base region and simulator selection.
You'll be asked for company and pilot details, a home location and simulation settings:
Company name and airline code, with an availability check for the code.
Pilot identity and avatar, and a home airport.
Simulation and world settings offered by that world. Survival worlds constrain difficulty; Thunder does not permit AI flights.
There is no Freelance/Advanced selector in this creation form. The separate Career transition is described in the final section of this chapter.
Confirm, and the Companion creates the company on the server. A few seconds later, the Lobby refreshes and your new company card is sitting there, ready to Resume.
Note — Once you click Resume, the Companion loads the company's full state (fleet, jobs, mailbox, finances) and drops you on the Dashboard — the topic of §1.3.
Auto-update at launch
The Companion checks for a new version every time it starts, and then every four hours while it's running. If a newer build is available on your channel, the download starts in the background and a small banner appears in the app.
The banner walks through three states:
Update available — A newer version was found. The download starts immediately and the banner shows a percentage.
Download complete — The new installer is ready. Click Restart to update to apply it now, or just keep flying — the update will install automatically when you next quit the Companion.
What's new — On the next launch after an update, a one-time What's New modal shows you the release notes. You only see it once per version.
Note — Most players are on the public auto-update channel. A small group of testers run on the staff channel, which gets builds a few days earlier. You stay on the public channel unless OnAir staff explicitly moves you over.
Warning — Don't kill the Companion while a download is mid-way: you'll just lose the progress and have to start over on next launch. Let the bar finish.
You now know how to…
Download the OnAir Companion from the official site.
Get past Windows SmartScreen safely, by checking the publisher before clicking Run anyway.
Log in with your OnAir account and let the airport / cargo databases finish loading on the first run.
Navigate the Lobby — world tabs, company cards, news carousel — and either Resume an existing company or Create a fresh one in Freelance mode.
Recognize the auto-update banner and decide when to restart.
You're now staring at the Dashboard of a freshly created freelance company. Before you go hunting for your first job, the very next thing to set up is the link between the Companion and your flight simulator.
The Companion isn't worth much until it can "see" your simulator. This connection is what enables real-time tracking, fuel and weather autoset, automatic detection of the loaded aircraft and addon, and the final flight registration.
This is Step 1 of the welcome banner. Once the SIM pill is green, the step turns green on its own and you can move on to finding your first job.
The SIM pill — your status at a glance
At the top-right of every Companion screen, just left of the VATSIM LIVE chip, a SIM pill shows the state of the connection to the simulator at all times. It has four states:
Color
Label example
Meaning
Neutral
Sim not connected
No connection attempted yet, or you manually disconnected.
Orange
Connecting…
The Companion is handshaking with the bridge.
Red
Sim not detected
The last connect attempt failed — hover the pill for the exact reason.
Green
Cruise · A320neo V2
Connection established — the pill shows the current flight phase and aircraft name.
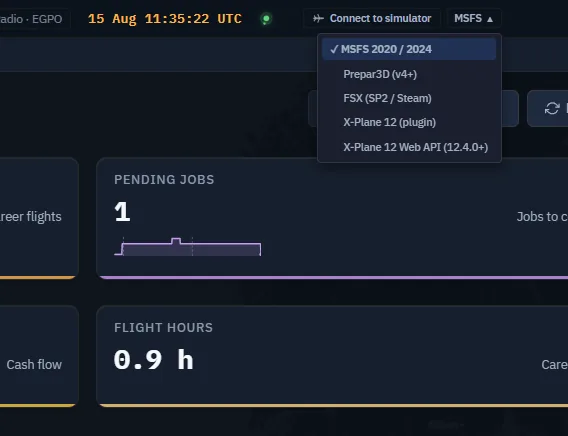
A small chevron sits next to the pill: when the connection is green it opens a live SimConnect debug panel, and an adjacent dropdown lets you swap the active simulator (MSFS, MSFS 2024, P3D, FSX, X-Plane plugin, X-Plane Web API) without going into Settings.
The title-bar Connect to simulator control before connection.
Click the pill at any time — it's the fastest shortcut to retry a connection. If your sim just finished loading, a single click flips the pill green. Click it again to disconnect manually.
The title-bar simulator menu, open: the five supported simulators, with the active one ticked.
Choose your simulator
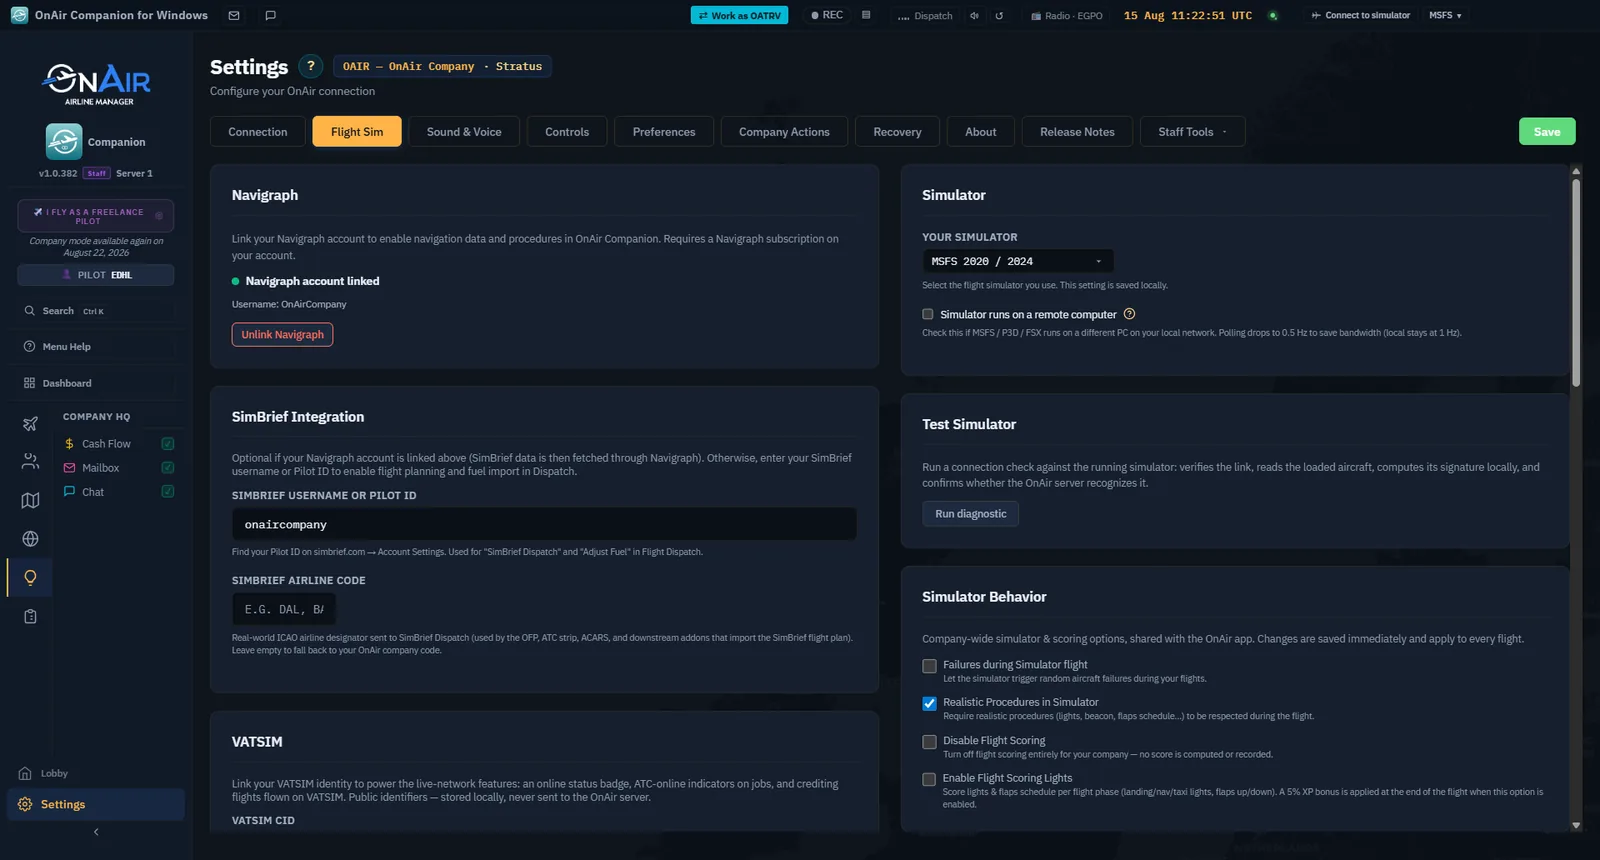
If this is your first launch, open Settings → Flight Sim from the Settings button at the bottom of the sidebar. The Companion offers five simulators in the Your simulator picker:
MSFS 2020 / 2024 — one entry covers both releases; the Companion works
out which one is running on its own, so there is nothing to pick between them.
Prepar3D (v4+) — v4 and later.
FSX (SP2 / Steam) — FSX-SE or the boxed release with SP2.
X-Plane 12 (plugin) — the Companion's classic plugin (works for X-Plane 11 too).
X-Plane 12 Web API (12.4.0+) — the modern HTTP-based link introduced with X-Plane 12.4.0.
If you'd rather not fly through a simulator at all, see Without a simulator (Tycoon mode) below.
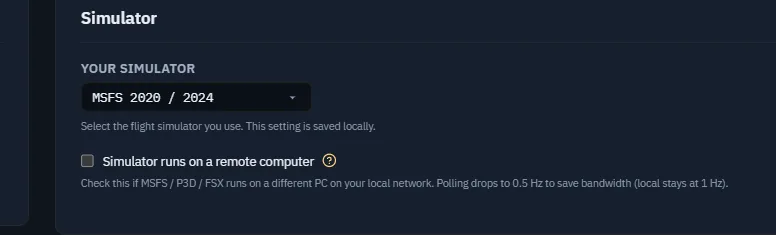
The same choice from Settings, Flight Sim tab — this is where it is saved locally.
The picker writes your choice live — there's no Save button to chase. The titlebar dropdown stays in sync with whatever you pick here, and the other way around.
Auto-realign on connect — When the Companion connects to a sim, it reads the running application name and quietly realigns the picker if it doesn't match what you had selected. So if you had MSFS 2020 selected but launched X-Plane and clicked the SIM pill, the picker will switch to X-Plane and remember it.
Microsoft Flight Simulator (MSFS 2020 / MSFS 2024)
MSFS embeds SimConnect by default, so there's nothing to install on the same machine.
On the same machine as the Companion
Launch MSFS (or MSFS 2024).
Wait until you reach at least the main menu — ideally, load an aircraft on a parking spot.
Click the SIM pill in the Companion.
The pill turns green within a few seconds.
Settings, Flight Sim tab, configured for a local MSFS.
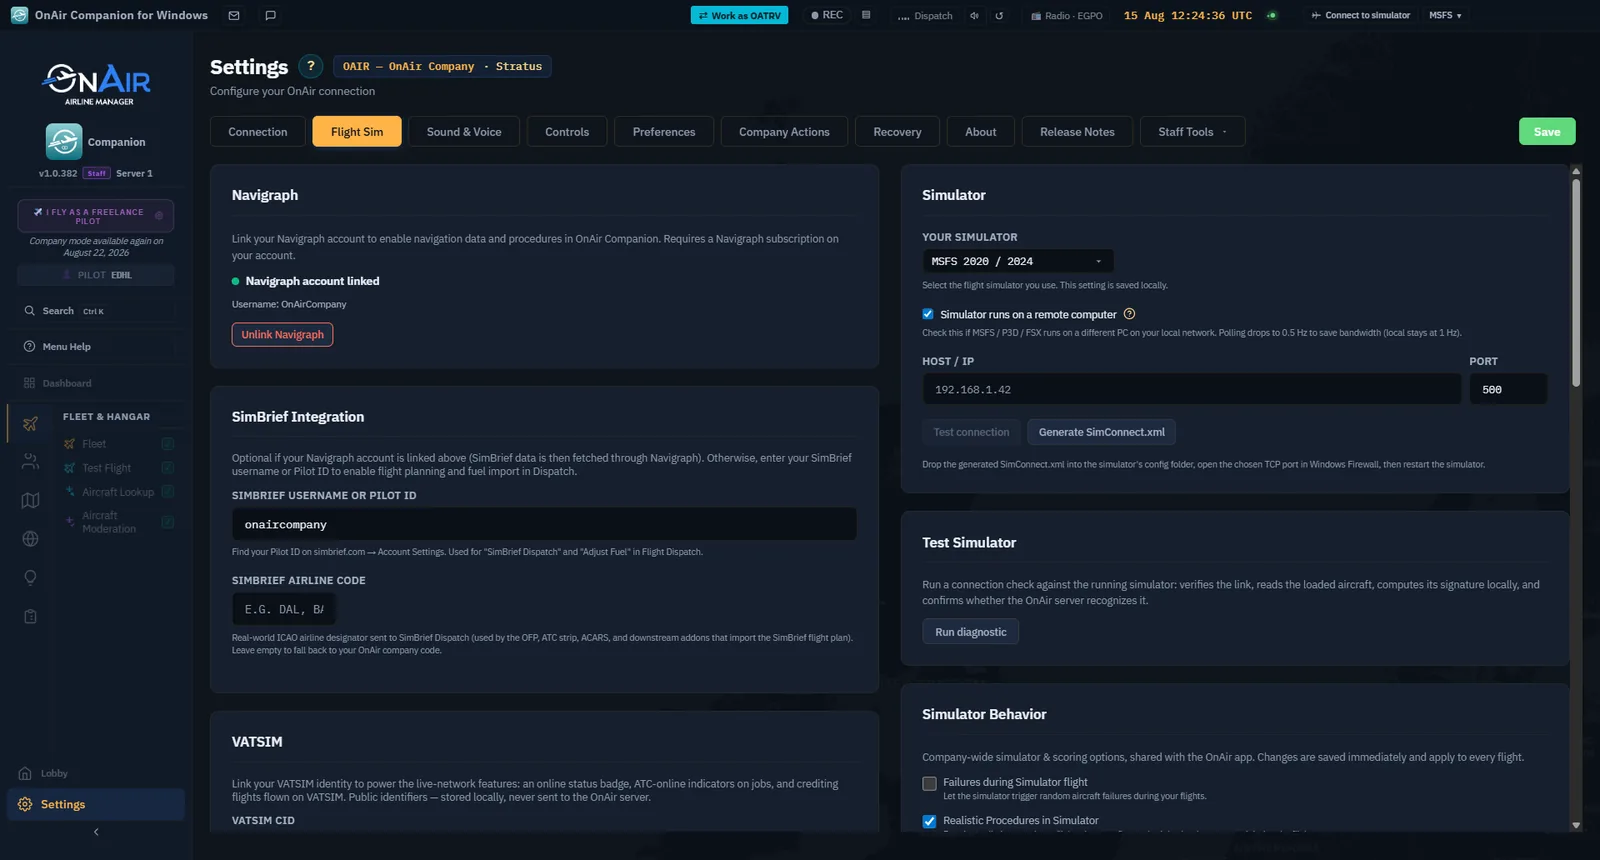
On another PC on the network (remote SimConnect)
If MSFS runs on a dedicated PC and the Companion lives on another machine:
In Settings → Flight Sim, tick Simulator runs on a remote computer.
Click Generate SimConnect.xml: a helper modal produces the config file required by MSFS.
Copy this file to the simulation PC, in the folder the helper points to (typically %APPDATA%\Microsoft Flight Simulator\ for MSFS 2020 or %APPDATA%\Microsoft Flight Simulator 2024\ for MSFS 2024).
Open the TCP port (default 500) in the Windows firewall on the simulation PC.
Restart MSFS so it picks up the new SimConnect.xml.
Back in the Companion, enter the Host / IP of the simulation PC and the matching Port.
Click Test connection: a green message validates the link.
Tick "Simulator runs on a remote computer" and a Host/IP field appears, with Test connection and Generate SimConnect.xml beside it.
One generation is enough — the SimConnect.xml is portable. If you reinstall the Companion but keep the same sim PC, the file stays valid.
macOS / Linux — On non-Windows hosts, the remote toggle is forced on: there is no local SimConnect bridge to talk to, so MSFS must live on a separate Windows machine and you must enter its IP.
X-Plane 12 — plugin or Web API
X-Plane offers two ways to talk to the Companion. Pick one — they do the same job.
Option A — X-Plane 12 plugin (works for X-Plane 11 too)
This is the classic link: a small plugin that the Companion can install and update for you.
In Settings → Flight Sim, choose X-Plane 12 plugin.
Use the X-Plane folder browser to point at your X-Plane install directory.
Click Install / Update plugin. The Companion copies the plugin into <X-Plane>/Resources/plugins/ and the status pill flips to Up to date.
Restart X-Plane if it was already running.
Click the SIM pill. It turns green within a few seconds.
For a remote setup, enable the remote toggle on the same page and enter the simulation PC's hostname — the plugin sends its telemetry over the network, no file to generate.
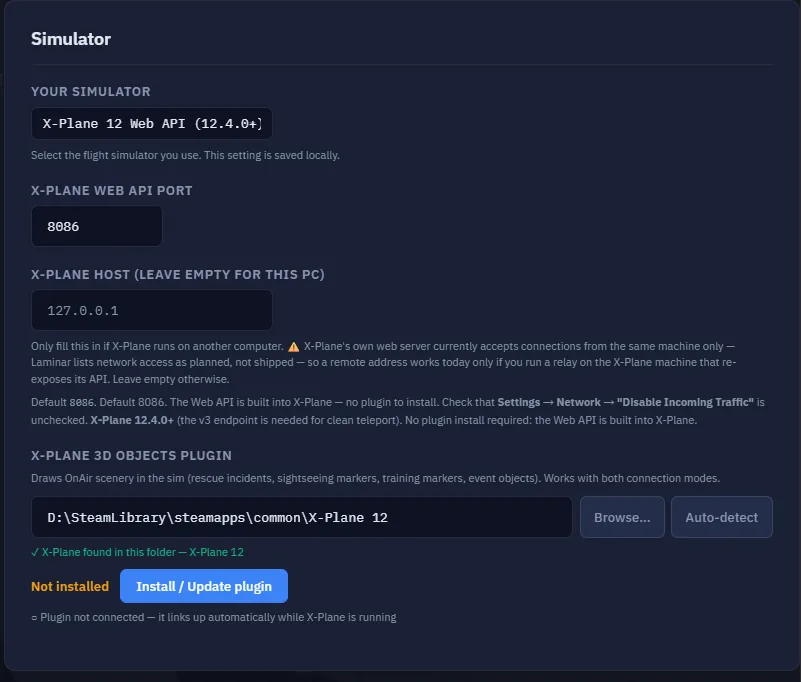
Option B — X-Plane 12 Web API (12.4.0+)
X-Plane 12.4.0 added a built-in HTTP API the Companion can use directly, with no plugin to install.
In Settings → Flight Sim, choose X-Plane 12 Web API.
Enter the port X-Plane exposes (default 8086).
In X-Plane, open Settings → Network and make sure the "Disable incoming" option is unchecked — the Companion needs to be allowed to talk to the sim.
Click the SIM pill. It turns green within a few seconds.
X-Plane Web API selected, with connection settings and plugin information visible.
Plugin or Web API? — Both work. The plugin is the most battle-tested route; the Web API is lighter and avoids the install/update cycle. If you're brand new to OnAir, the plugin is the safe default.
Prepar3D / FSX
Prepar3D (v4, v5, v6) and FSX (FSX-SE / FSX) both rely on the same SimConnect mechanism as MSFS.
In Settings → Flight Sim, choose Prepar3D or FSX.
Launch the simulator and load (or park) an aircraft.
Click the SIM pill.
For a remote setup, the procedure is identical to MSFS: tick Simulator runs on a remote computer, generate the SimConnect.xml, drop it on the sim PC, open port 500, restart the sim, then enter Host / IP + Port and click Test connection.
Where does SimConnect.xml go? — For P3D, the helper modal points at the version-specific %APPDATA%\Lockheed Martin\Prepar3D vN\ folder; for FSX, at %APPDATA%\Microsoft\FSX\ (or the FSX-SE equivalent). The Companion picks the right path for you — just follow the on-screen folder.
Without a simulator (Tycoon mode)
You can browse and manage your company without a live simulator connection. That alone does not change the company's without-simulator setting (NoSimulator) or turn a Freelance flight into an AI flight.
Where the world permits AI flying, eligible aircraft and crew can execute flights on the server. The server progresses and completes those flights; you cannot simply declare an arrival and credit a flight manually. Freelance loaners cannot use the AI dispatch path, and Thunder requires human flights.
To return to simulator flying, check both the company's simulation setting and the connection setup described above. Selecting a simulator in the title bar only selects the connection; it does not override the company's operating mode.
The Test Simulator panel — 5-step diagnostic
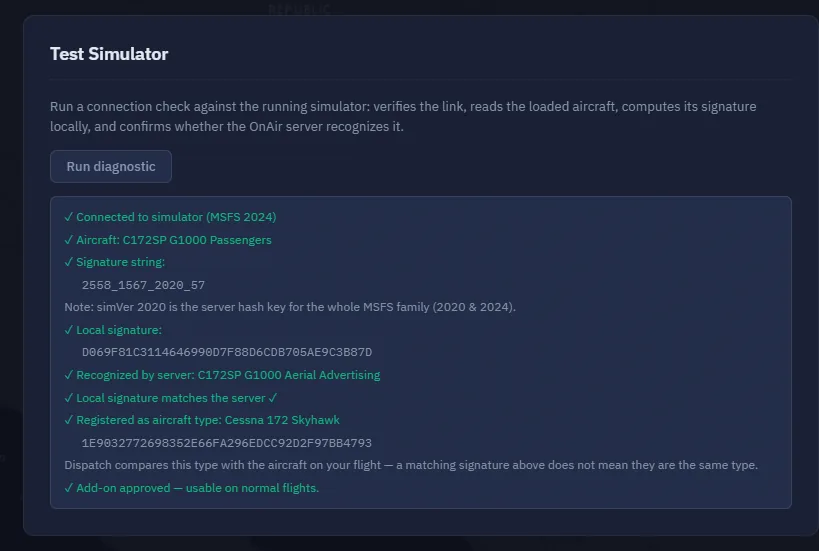
Open Settings and locate Test Simulator in the simulator settings, then click Run diagnostic. The diagnostic checks the selected simulator in five stages:
Connect — can the bridge reach the simulator at all?
Aircraft — is an aircraft loaded and are its core SimVars readable?
Systems — are systems (engines, fuel, electrical, gear) reporting plausible values?
Local signature — local hash of the loaded addon, used by the moderation system.
Server match — does that signature match what the OnAir server has on file for this addon?
Each step turns green or red as it runs. A red row tells you exactly which layer is broken, which is far more useful than the SIM pill alone when you're troubleshooting a stubborn remote setup or a freshly installed addon.
Completed simulator diagnostic. Read the recognised aircraft and signature messages for your own installation.
It's not working — diagnosing
Symptom
Probable cause
Action
Pill stays neutral ("Sim not connected")
You haven't clicked the pill since launching the sim.
Click the pill once the sim is at the menu.
Pill stays orange ("Connecting…") for more than ~15 s
Bridge or remote port is reachable but never finishes the handshake.
Make sure the sim is fully loaded (not on a black loading screen). Disconnect and retry.
Pill red, local MSFS / P3D / FSX
Sim isn't exposing SimConnect (rare), or the wrong sim is selected.
Restart the sim with focus on its window; double-check the picker matches what's running.
Pill red, remote SimConnect
Firewall is blocking the port, IP is wrong, or SimConnect.xml wasn't deployed on the sim PC.
Ping the sim PC's IP from the Companion's PC; open port 500; re-generate and re-copy SimConnect.xml.
Pill red, X-Plane plugin
Plugin missing, outdated, or X-Plane was restarted before the install finished.
Open Settings → Flight Sim, hit Install / Update plugin, then restart X-Plane.
Pill red, X-Plane Web API
Wrong port, or "Disable incoming" is enabled in X-Plane's Network settings.
Match the port in the Companion to X-Plane's, then uncheck Disable incoming in X-Plane Settings → Network.
Pill green but the aircraft / airport looks wrong
Aircraft just spawned, SimVars not yet served.
Move the aircraft or start an engine — the data refreshes within seconds.
Run the Test Simulator panel first — when you're stuck, Settings → Flight Sim → Test Simulator tells you which of the five layers is failing in plain language. It's almost always faster than guessing from the pill colour.
One sim at a time — Don't try to keep MSFS and X-Plane both running and switch the picker mid-flight. Pick one, connect, fly. The titlebar dropdown is for "I always fly X-Plane on Tuesdays and MSFS on Wednesdays" convenience, not for hot-swap mid-flight.
You now know how to…
Recognize the state of your sim connection at a glance from the SIM pill.
Configure MSFS 2020, MSFS 2024, Prepar3D, FSX, X-Plane 12 (plugin or Web API), or stay in Tycoon mode.
Set up a remote connection when the sim lives on another PC.
Run the Test Simulator diagnostic and read its five steps.
Diagnose a red pill from the symptom table.
Step 1 of the welcome banner turns green as soon as the Companion logs at least one successful connection. Time to see the screen you'll come back to every session.
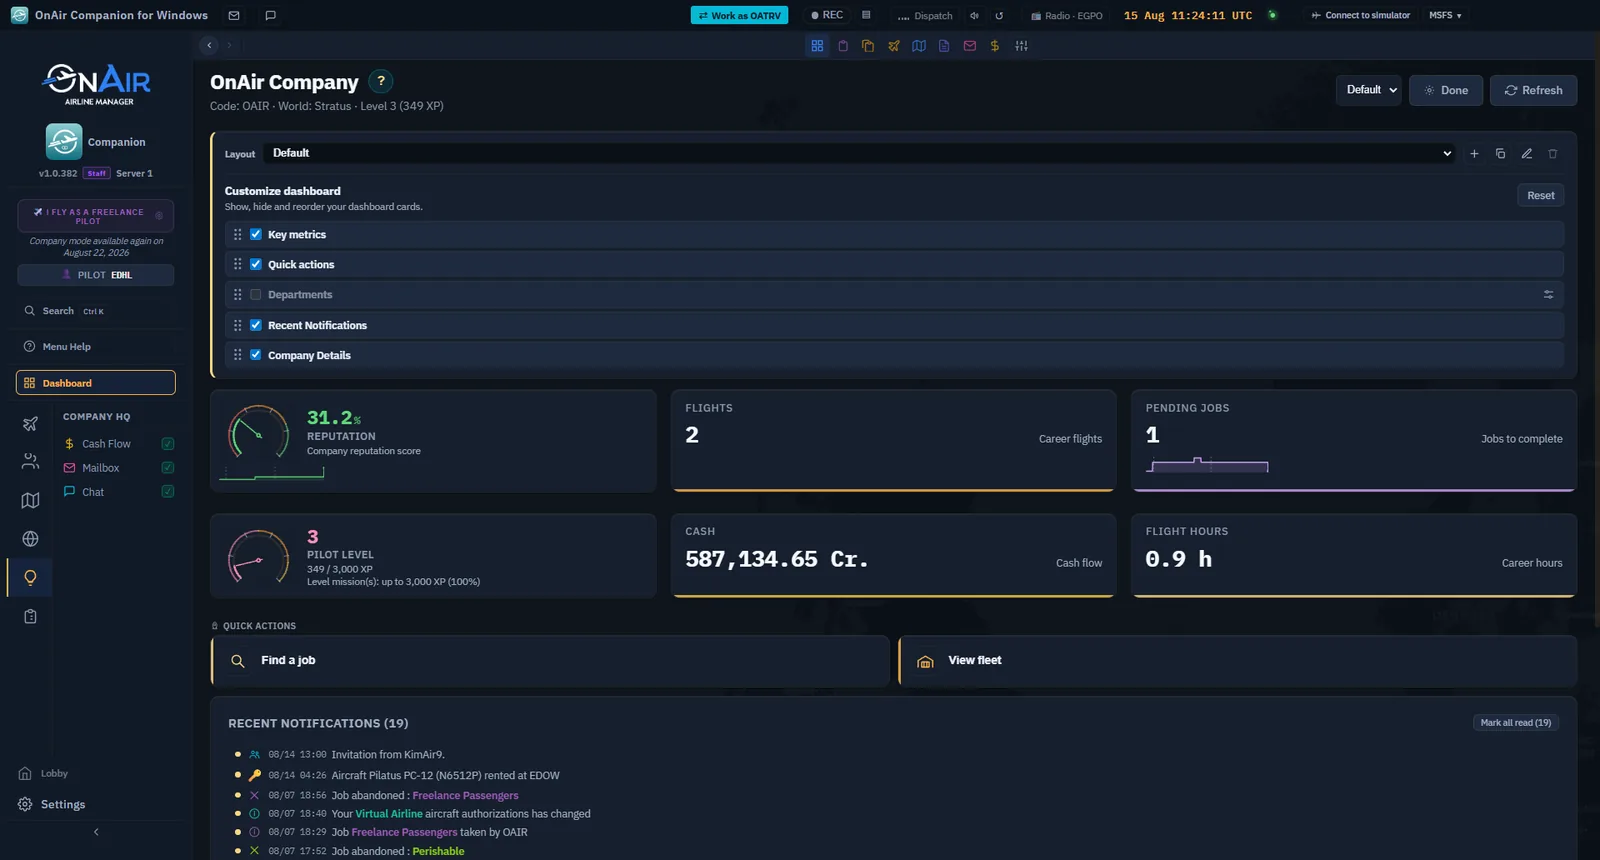
The Dashboard is your home page — the screen you land on when you resume your company. Since the Operations Hub redesign it is a personalizable board of widgets: a scrollable column of cards (departments, quick actions, stats, notifications, company details) that you can reorder, hide, and tune. It also doubles as your map of the whole app: the sidebar on the left and the Departments widget both list every menu you'll use, organized the same way.
The big picture
When you land on the Dashboard, you're looking at a column of widgets, stacked top to bottom. On a fresh freelance company the default order is:
The welcome banner (until your 3 onboarding steps are done — see The Welcome Banner below).
The stats grid — six tiles covering money, progression and workload.
The Quick Actions row — one-click task launchers.
The Departments widget — big shortcut tiles mirroring the sidebar.
The Notifications widget — your live event feed.
The Company details widget — identity and settings of your company.
Every one of these (banner aside) is a widget: you can hide it, move it, or tweak it from the Edit button in the header (the Dashboard layout editor below). If a flight is live, a blue Resume your flight banner also appears near the top and jumps straight back to the tracker.
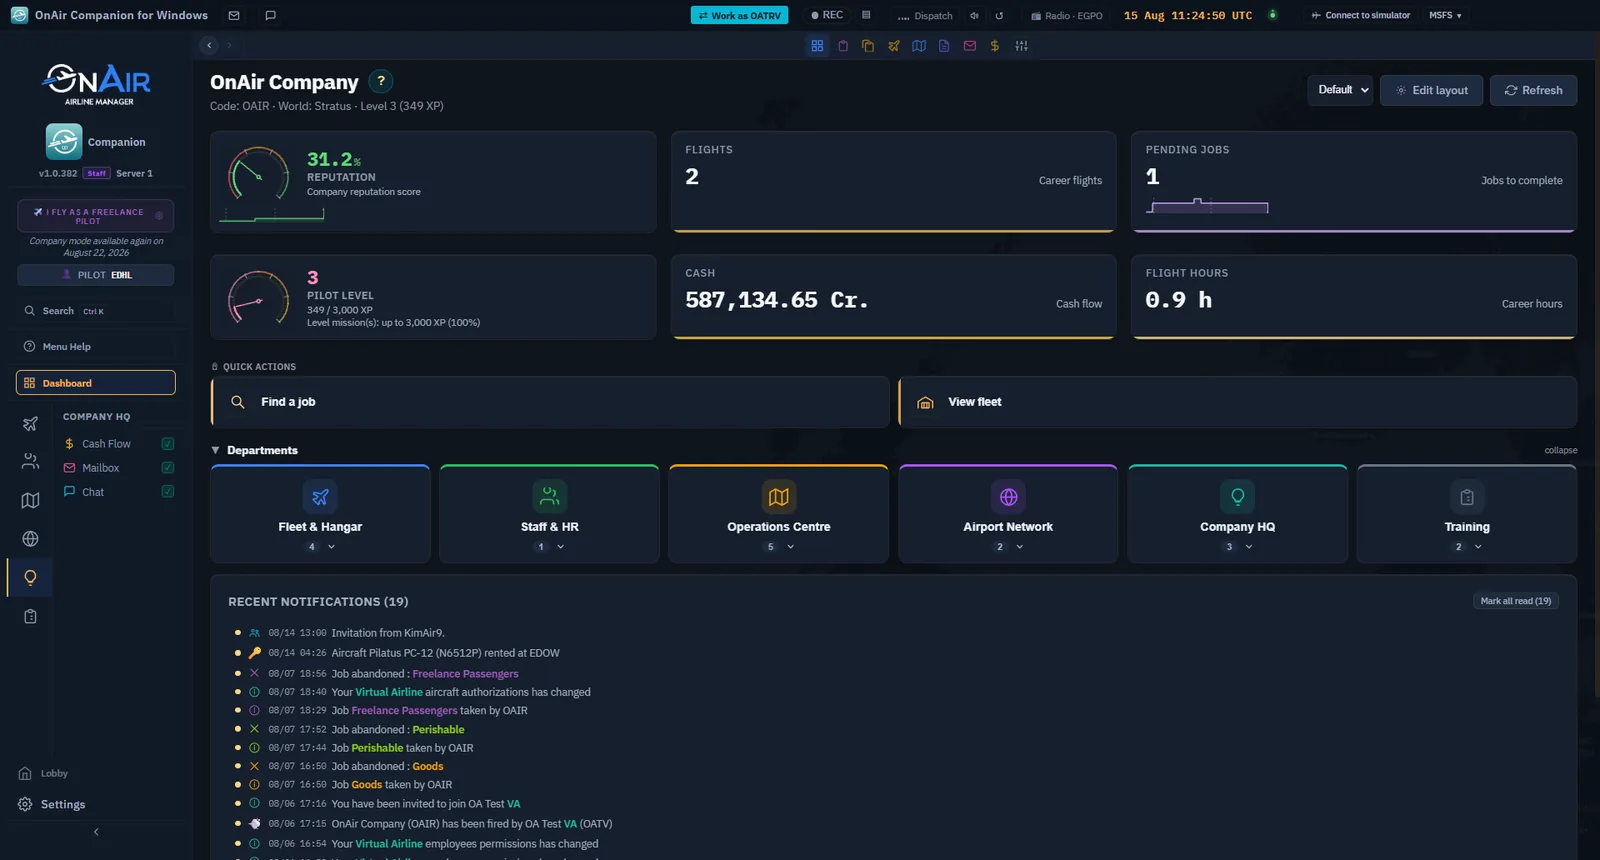
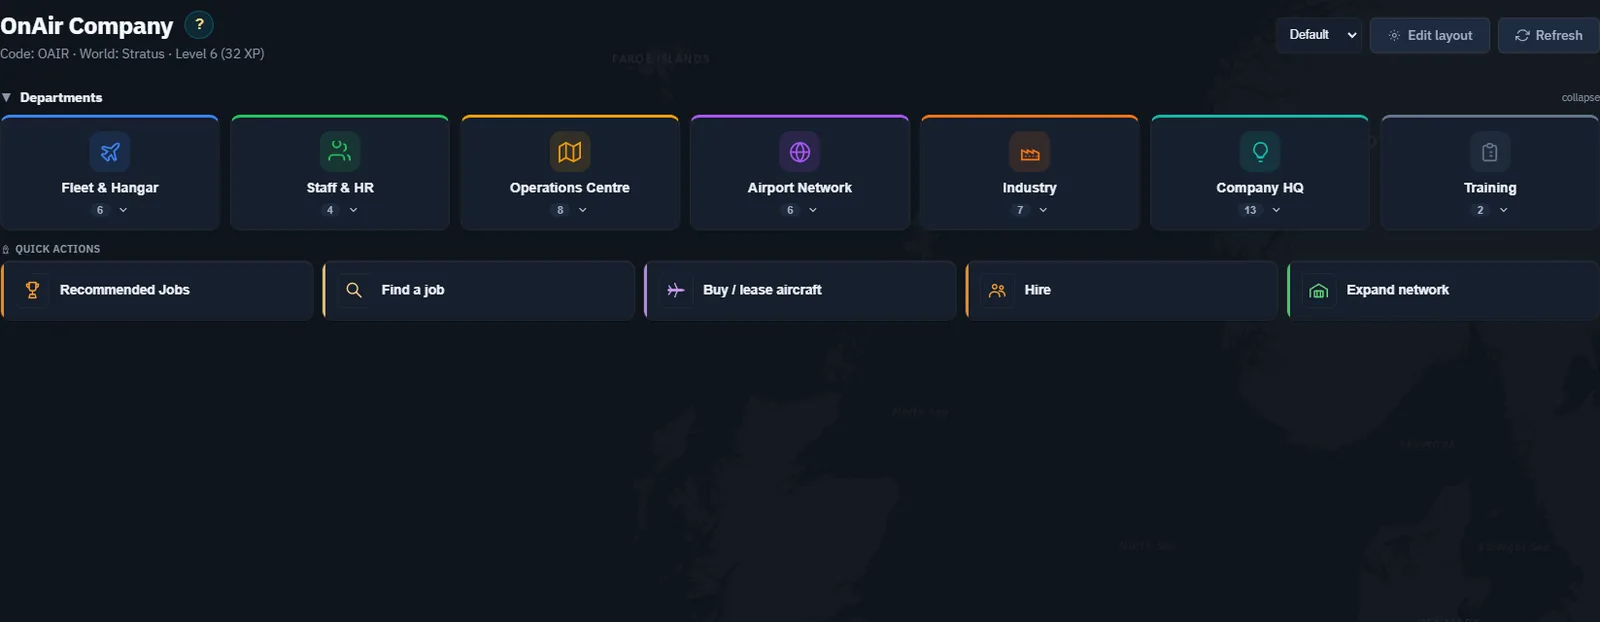
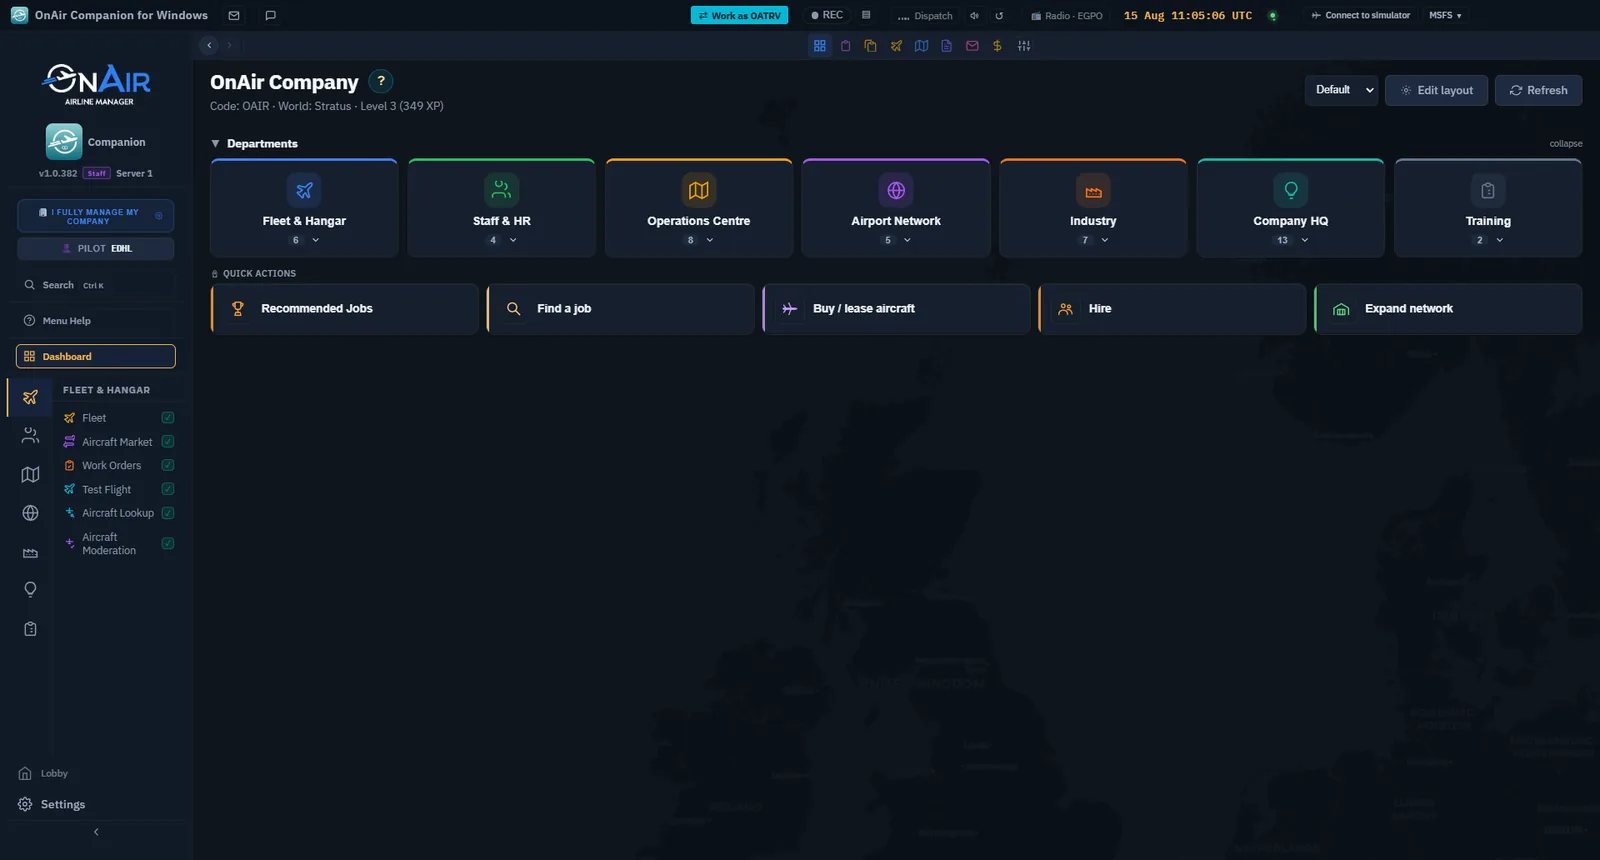
The Dashboard in Freelance mode: the header, the Departments tiles and the Quick Actions row.
The page header & the global pills
At the top of the page sits the page header — the same pattern you'll find on every screen:
The page title — on the Dashboard this is your company name, with code, world and level on the line below; every other page shows the page's own name. Next to it, a ? button opens contextual help for the current screen.
The company pill — your airline code, company name and world. If you belong to a Virtual Airline, clicking it lets you switch identity.
The layout selector + Edit button — Dashboard-specific: pick a saved layout preset, or open the editor to customize the board (the Dashboard layout editor below).
The Refresh button — reloads the page data.
Two global pills live in the app's title bar (visible on every page, not just here):
SIM pill — the connection state of your simulator: grey (idle), red (error), green (connected). See §1.2.
Tracking pill — appears only while a flight is being tracked; shows the live phase and jumps back to the tracker from anywhere. See the Fly & register section.
The page header: company name and its "?" help button, then code, world and level, with the layout picker and Refresh on the right.
Tip — the command palette — Press Ctrl+K (Cmd+K on Mac) anywhere to open a search palette: type a page name and jump straight to it. Faster than the sidebar once you know your way around.
The sidebar — map of every menu
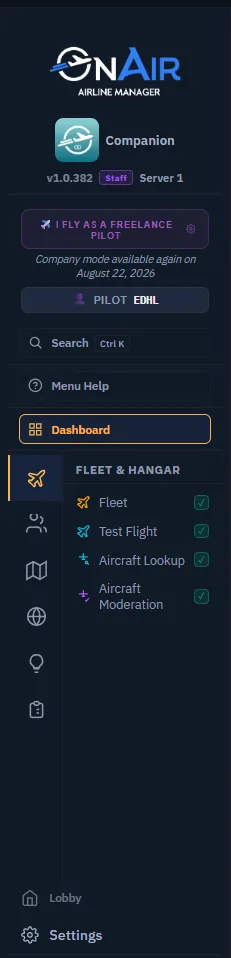
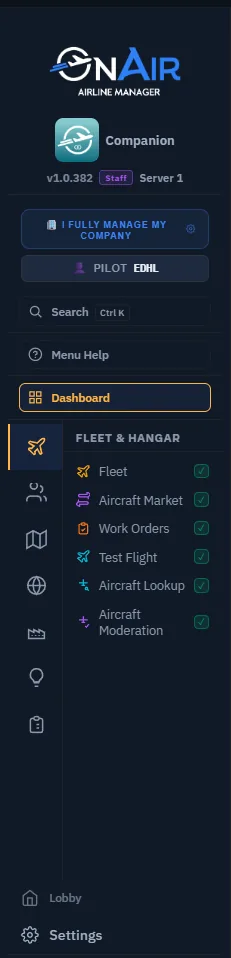
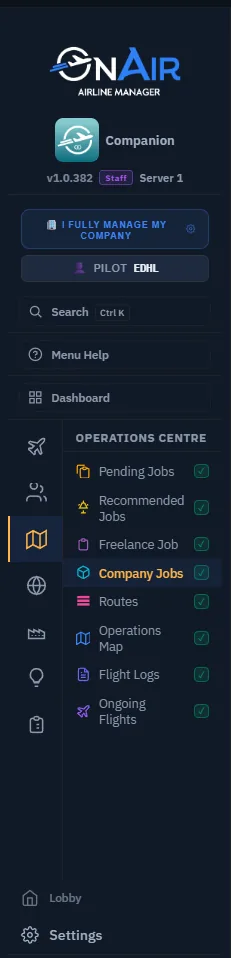
The left sidebar is organized in departments — the same taxonomy in Freelance and Career mode, so nothing moves when you graduate. Freelance simply shows the subset of pages a solo pilot needs.
At the very top, above the departments, sits a standalone Dashboard button — your home is always one click away. At the very bottom, a Settings button opens the app settings (the Daily Tools reference).
The departments and what's inside, in Freelance mode:
Department
Menu
What it's for
Covered in
Fleet & Hangar
Fleet
Your current (loaned) aircraft.
the Daily Tools reference
Staff & HR
Ranks
Your progression — Pilot Ranks + Routes Ranks.
the Daily Tools reference
Operations Centre
Freelance Job
The jobs hub: charters, routes, tours, VA.
the Find your first job section
Airport Network
Airport Lookup
Any airfield: runways, METAR, jobs.
the Daily Tools reference
Company HQ
Cash Flow
Income and outflows, line by line.
the Daily Tools reference
Training
Flight Training
Practise a manoeuvre outside a paid flight.
the Daily Tools reference
Two pages are deliberately not in the sidebar:
Flight Dispatch — always reached by acting on something: the Dispatch button on a Fleet row, Fly Now on a job, or Resume on a flight in progress. It needs a selected aircraft, so it can never be opened on its own. See the Dispatch section.
Tours — reached from the Tours card on the Freelance Job page. See the Find your first job section.
The Freelance sidebar: the "I fly as a freelance pilot" pill, and Fleet & Hangar reduced to the four pages a solo pilot needs.
Note — In Career mode the same departments simply gain more entries (Aircraft Market, Work Orders, Employees, FBOs, Industry…). The structure — and your muscle memory — stays identical. See chapter 6, Growing into Career mode.
The Welcome Banner (the 3 steps)
Until you've completed your first flight, a banner at the top of the Dashboard tracks the 3 milestones that get you airborne:
Connect your simulator — turns green when the SIM pill has been green at least once.
Find your first job — turns green when at least one job sits in your Pending Jobs queue, or a tour is in progress.
Fly & register — turns green once your first flight has been registered after landing.
Each step is clickable and carries its own ? for inline help. You don't have to click anywhere to validate a step — it turns green on its own when its condition is met. The banner disappears once all 3 steps are green; if you close it manually, a confirmation asks first (it won't come back). It also carries a link to the OnAir Discord if you'd rather ask a human.
These 3 steps map directly to the chapters of this guide:
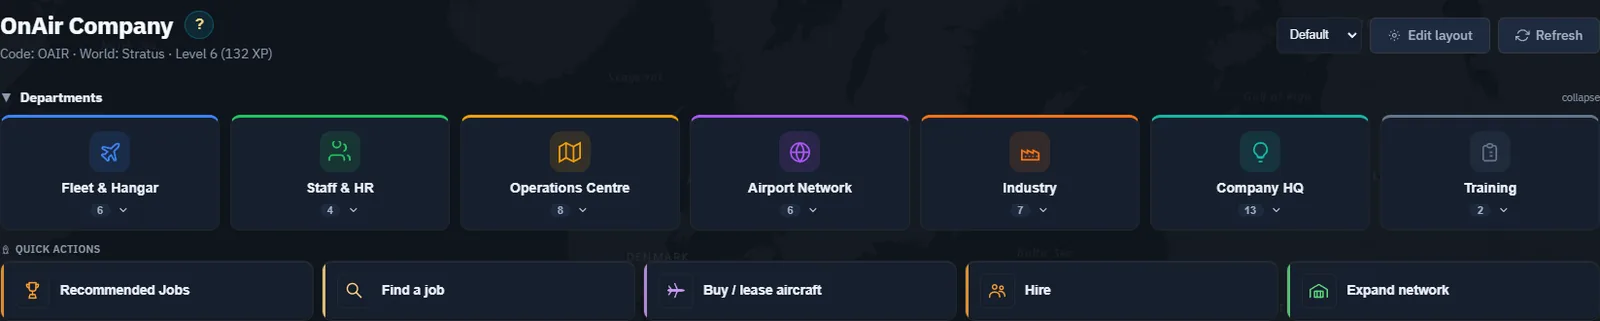
Departments and Quick Actions provide navigation shortcuts. Their visibility and position depend on your Dashboard layout. If Departments is not shown, open Edit layout and tick Departments to display it:
Departments — one large tile per sidebar department. Click a tile and a flyout opens listing that department's pages as chips; click a chip to navigate. It's the same map as the sidebar, in a more visual form — and while it's shown, the sidebar can auto-collapse to give the board the full width (that behaviour is a widget option, see the Dashboard layout editor below).
Quick Actions — a row of task-oriented buttons. In Freelance mode: Find a job (opens the Freelance Job page) and View fleet (opens Fleet).
Quick Actions and Departments displayed in a configured Dashboard layout.
The stats grid
The stats grid gives you the at-a-glance state of your career — six tiles in two rows. Every tile is clickable and opens the matching page.
Tile
Type
Reads
Reputation
gauge
your reputation 0–100 % (red < 40 %, orange 40–75 %, green > 75 %).
Flights
counter
total registered career flights.
Pending Jobs
counter
jobs accepted but not yet flown.
Pilot Level
XP gauge
progress within your current level — the gauge warms up as you near the next one (pink → orange → gold).
Cash
counter
your available funds.
Flight Hours
counter
total career flight hours.
The six key-metric tiles: reputation, career flights, pending jobs, pilot level, cash and career hours.
Notifications & Company details
Two more widgets complete the default board:
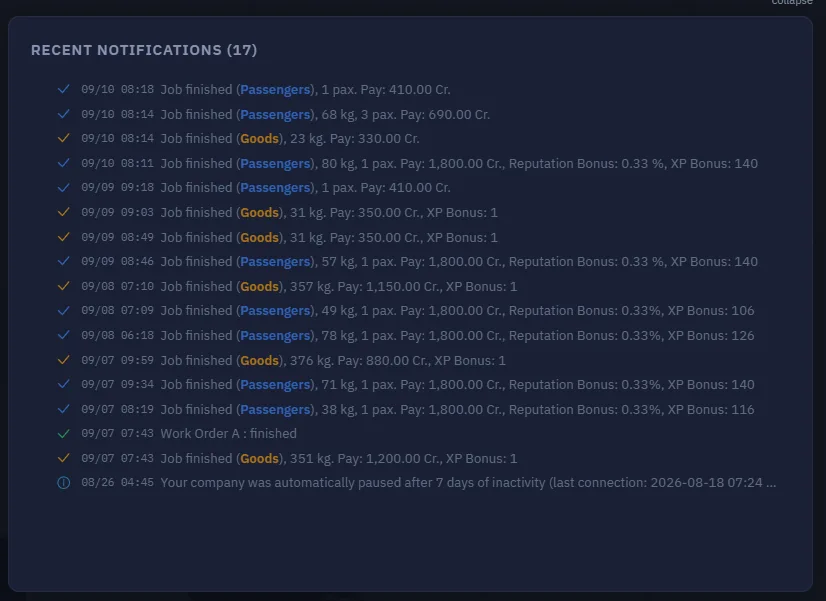
Recent Notifications — the live feed of everything the server flags: job finished, level-up, fuel event, mailbox arrival, world event… Each row has a type icon, a timestamp and a one-line description; unread entries carry a dot, a mark-all-read action sits in the header, and clicking a row navigates to the relevant page. The list scrolls inside the card — it's the full feed, not a teaser.
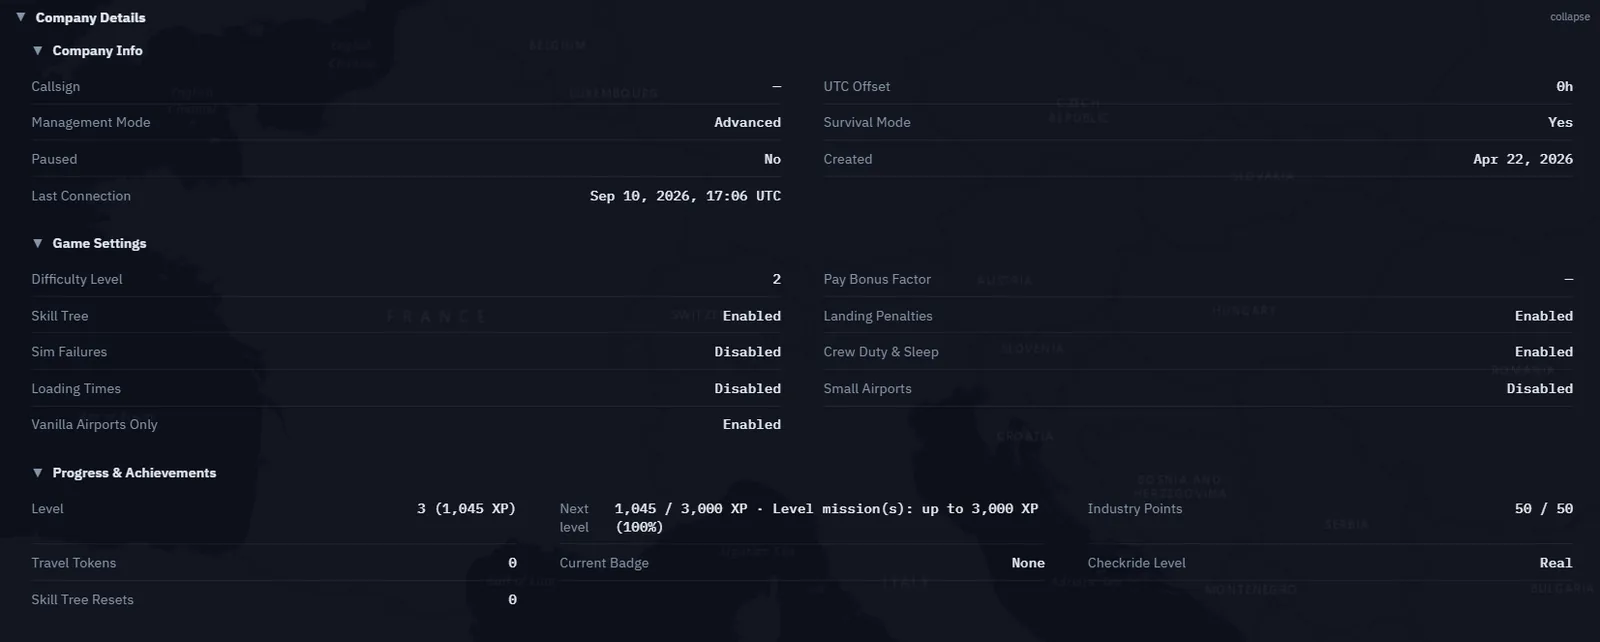
Company details — a collapsible card (closed by default) with three sub-groups: Info (callsign, UTC offset, mode, creation date, last connection), Settings (difficulty, pay bonus factor, penalties…) and Progress (level + XP, travel tokens, badge…). Open it when you need to check a company setting; your daily loop won't need it.
Recent Notifications from an example company.Company Details in an Advanced company; available details depend on the current mode.
Make it yours — the layout editor
Click Edit layout in the header to open the layout editor:
Show / hide any widget (the Departments widget, for example, is a matter of taste — some prefer the sidebar alone).
Reorder widgets by dragging them up or down.
Widget options — some widgets expose settings; the Departments widget can auto-collapse the sidebar while you're on the Dashboard.
Layout presets — save named layouts and switch between them from the header selector (e.g. a minimal "flying day" board vs a full "management" board).
Your layout is remembered per company and per mode — your freelance board and a future career board live separately.
The layout editor: tick a widget to show it, drag the grip to reorder. Hiding one never moves the others.
You now know how to…
Read the page header and the two global pills (SIM, Tracking).
Navigate with the sidebar departments, the Departments widget, or the Ctrl+K palette — and know which chapter covers each menu.
Use the welcome banner as your onboarding checklist.
Launch your two most common tasks from Quick Actions.
Follow your notifications and check your company details.
Customize the board — hide, reorder, tune and save layouts.
The Dashboard tells you what is. To make new things happen — and to tick Step 2 of the welcome banner — head to the Freelance Job page.
Continue with Chapter 2 — Start in Onboarding Mode to understand your starting capital and mode choices, then Chapter 3 — Complete Your First Freelance Charter.
Chapter 02
Start in Onboarding Mode
Onboarding lets you learn to fly OnAir missions and build a cash reserve before running a company. After installing Companion and connecting your simulator, this chapter explains the starting phase, the one-time financial reward when you unlock Advanced, and the choices to review before leaving it. You can read it now and remain in Onboarding while completing the first Freelance lessons.
Step 1. Recognise your company's starting mode
Enter your company from the Lobby and check the sidebar badge. Onboarding Mode means that this company has not yet unlocked Advanced management. It uses the Freelance flying experience, with company management paused. Onboarding belongs to the company: another company on your account can already be in Advanced.
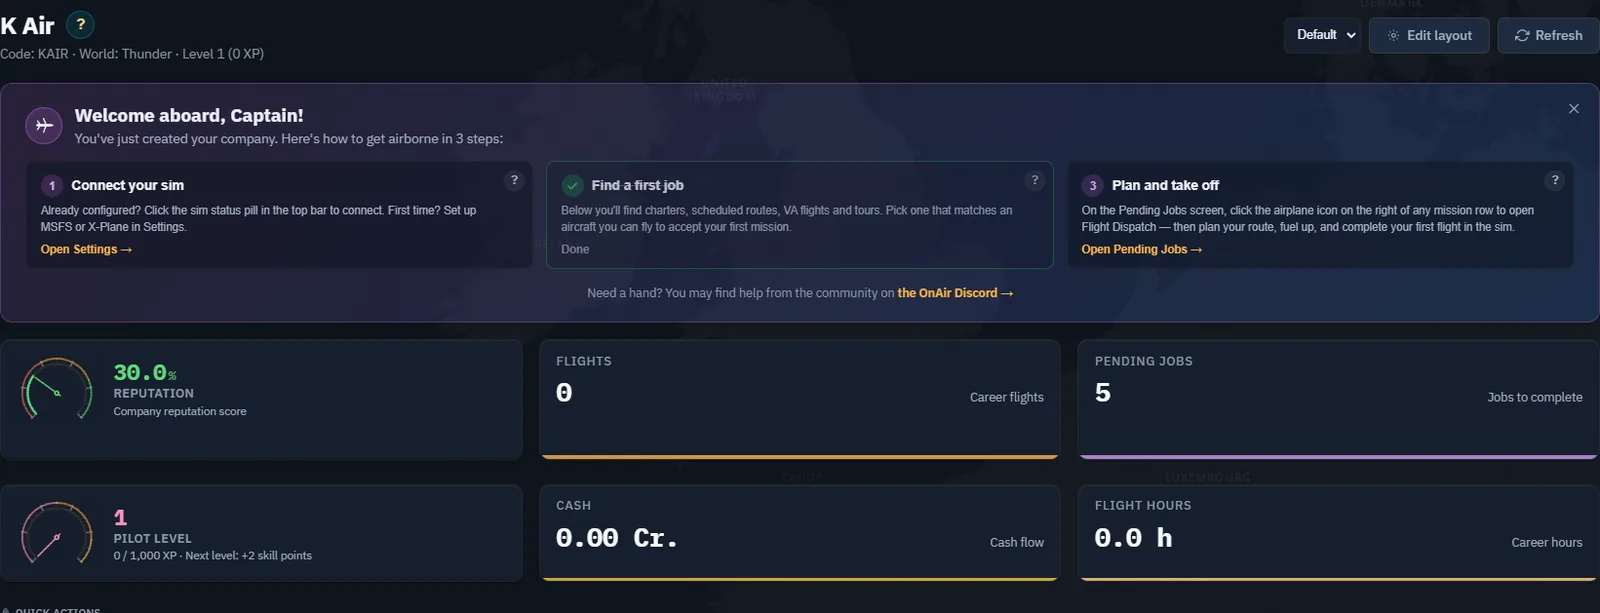
OB01 - KAIR on Thunder, captured on 10 September 2026 before any Advanced unlock. The welcome panel leads through simulator connection, finding a job and dispatch. Its cash is still zero. Staff accounts may display additional tools; those are not part of this learning path.
The welcome panel is a guide, not proof that a flight has been completed. Use Chapter 1 to check your simulator connection, then continue to Chapter 3 for your first charter. Opening a page or dismissing a welcome card does not earn flight revenue.
Step 2. Fly before taking on company overheads
Start with a Freelance charter suited to an aircraft you can actually fly. The job supplies the operational package; you do not first need to buy a company aircraft or hire a crew. Scheduled Freelance routes provide another learning path, with their own rank and completion rules. Tours and eligible VA jobs can also appear in the Freelance experience.
The onboarding phase keeps regular company overheads out of this first exercise: you are not running payroll, scheduling fleet maintenance or financing your own FBO network. Complete the mission, register the flight and inspect the actual payment. An accepted job's advertised reward is not yet cash in your account.
CAPTURE TO COMPLETE - OB02, real flight required. On a company still in Onboarding, capture the accepted charter and its reward, then the registered flight and corresponding Cash Flow entry after actually flying it. Record the opening and closing cash balance. Do not use an Advanced-company payment to illustrate an onboarding earning.
The small Cessna exercises in this volume deliberately keep the first operation manageable. They demonstrate a method, not the maximum size of aircraft or route supported by OnAir. The later company-route chapter includes an A380 example.
Step 3. Understand exactly what is doubled
The standard first-unlock calculation in the inspected server code is:
Cash after unlock = current cash + matching cash bonus + starting equity.
The matching bonus equals your current cash, so this is also 2 x current cash + starting equity. Your existing balance remains; the server credits one additional copy of it and the separate equity amount. It does not add twice the balance on top of the original balance.
Component
Example on Realistic difficulty in a survival world
Current cash before unlocking
25,000 Cr.
One-time matching cash bonus
25,000 Cr.
Starting equity
10,000 Cr.
Cash after standard unlock
60,000 Cr.
This is an arithmetic example, not a captured payment. If you earn another 5,000 Cr. before unlocking and nothing else changes the balance, the standard starting total rises by 10,000 Cr. The reward is calculated at the transition; there is no separate permanent x2 multiplier applied to every future Advanced job.
Use current cash, not lifetime revenue, company value, aircraft value or the sum of unfinished job rewards. No minimum cash balance is tested by the inspected first-unlock quotation: zero cash produces a zero matching bonus, with starting equity still added.
Step 4. Check the starting equity for your difficulty
The inspected starting-cash function returns the following amounts. Difficulty and the world's survival setting are separate inputs; read your own company settings and live quotation.
Difficulty
World survival setting
Starting equity
Easy
Either
470,000 Cr.
Classic
Either
170,000 Cr.
Realistic
Off
70,000 Cr.
Realistic
On
10,000 Cr.
Difficulty also sets the starting reputation (70% / 50% / 30%, which then evolves with your flights) and a loan capacity multiplier (×1.5 / ×1 / ×0.7) that stays for the life of the company. Stratus and Thunder companies are created as Realistic. It does not decide AI pilots: AI flights depend on the world, and Thunder forbids them.
These are the rules verified in source on 10 September 2026. The current server quotation remains the amount to review before confirming. The matching onboarding bonus, difficulty-based equity, individual job bonuses and optional Airliner financing are different components. Do not combine them into an assumed universal multiplier. The inspected implementation does not grant an additional fixed 100,000 Cr. for using Companion.
Step 5. Open the quotation without committing
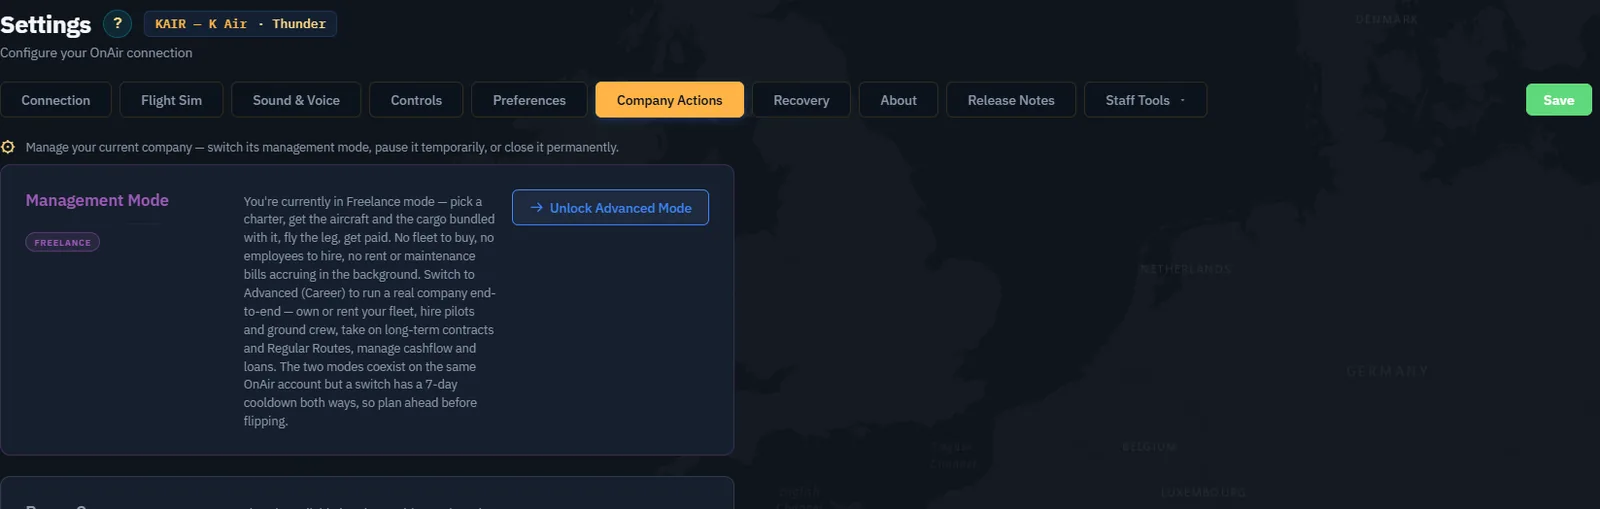
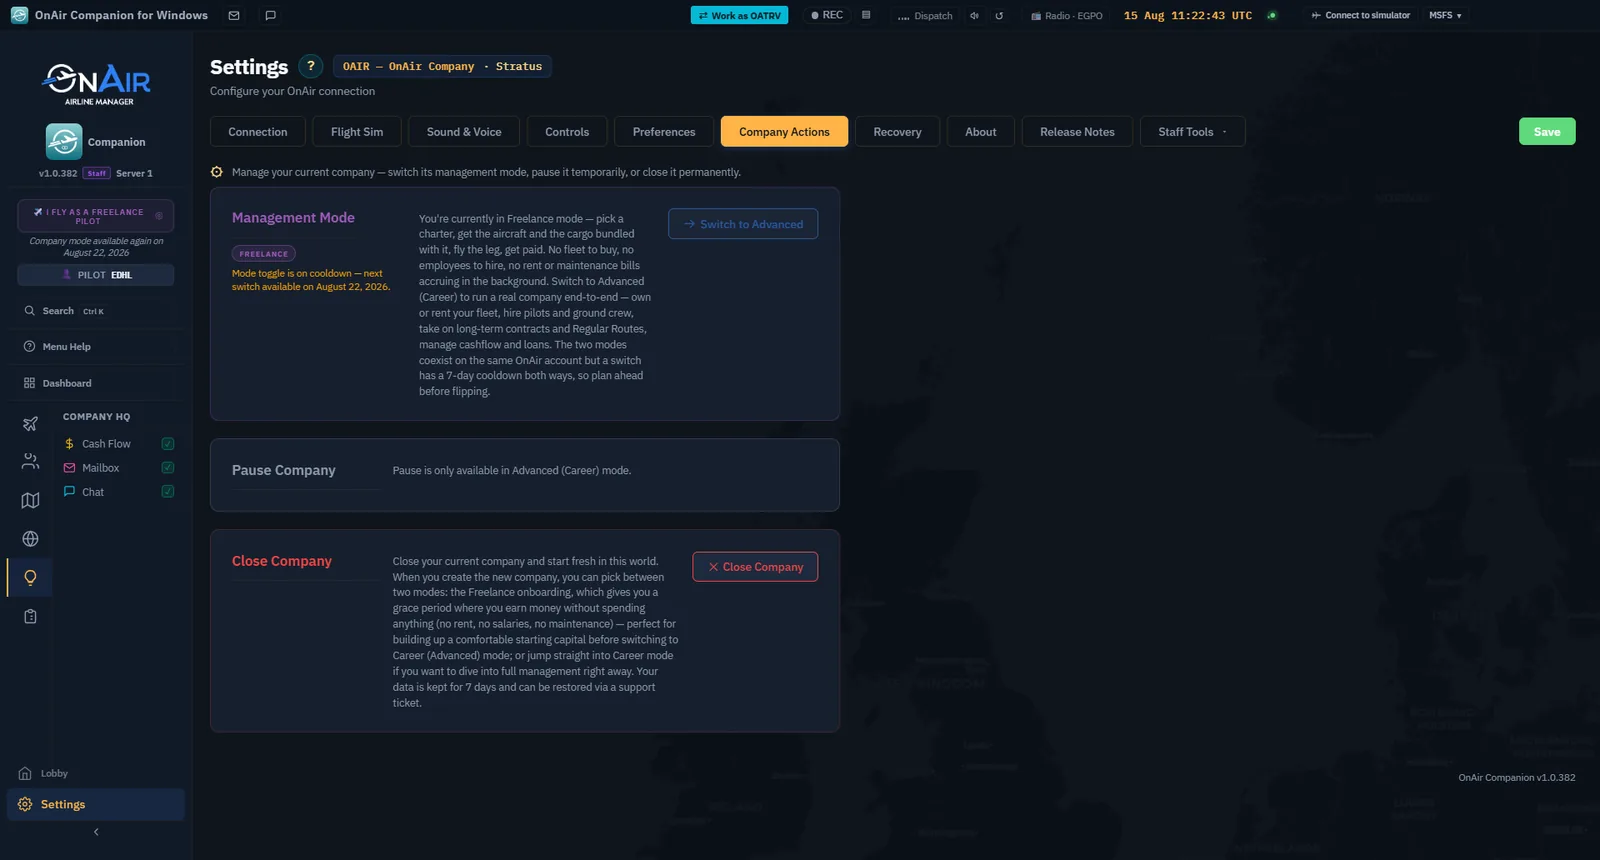
Open Settings, then Company Actions.
Find Management Mode. It may say Freelance here while the sidebar says Onboarding Mode: the first describes the underlying mode, the second its first-time state.
Select Unlock Advanced Mode.
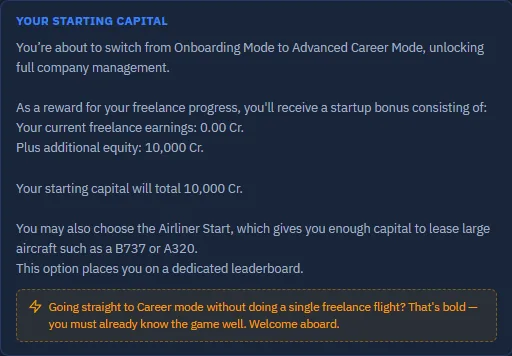
Read Your Starting Capital, including current earnings, additional equity and total.
Choose Maybe later if you are still practising or only checking the proposal.
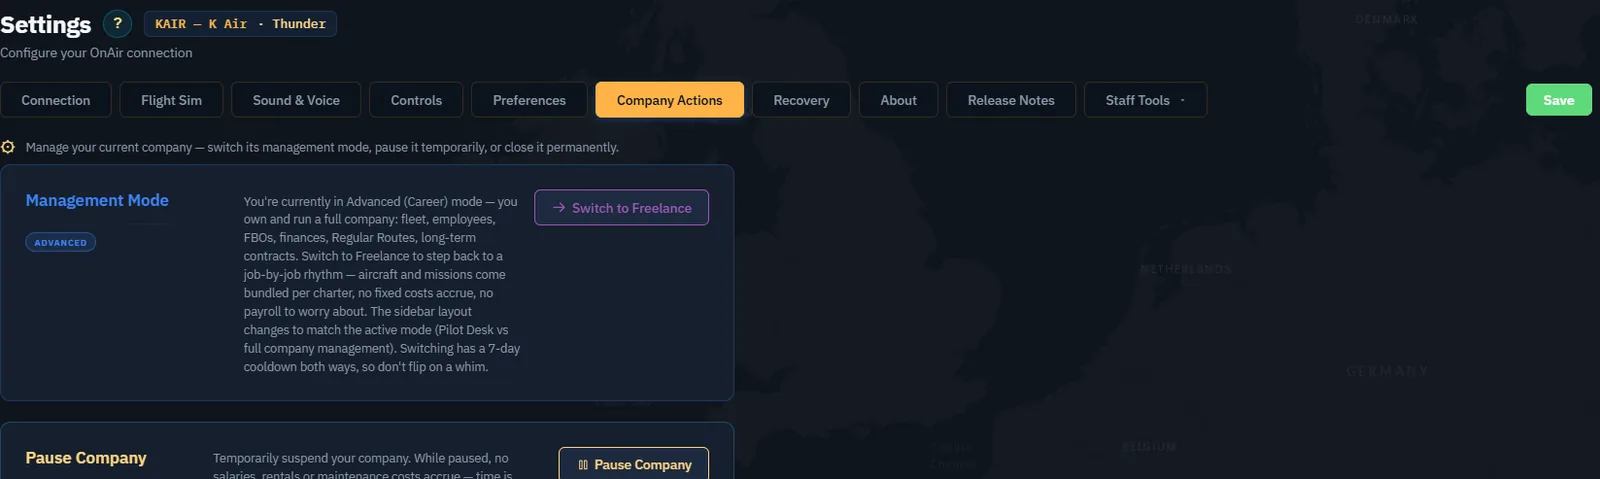
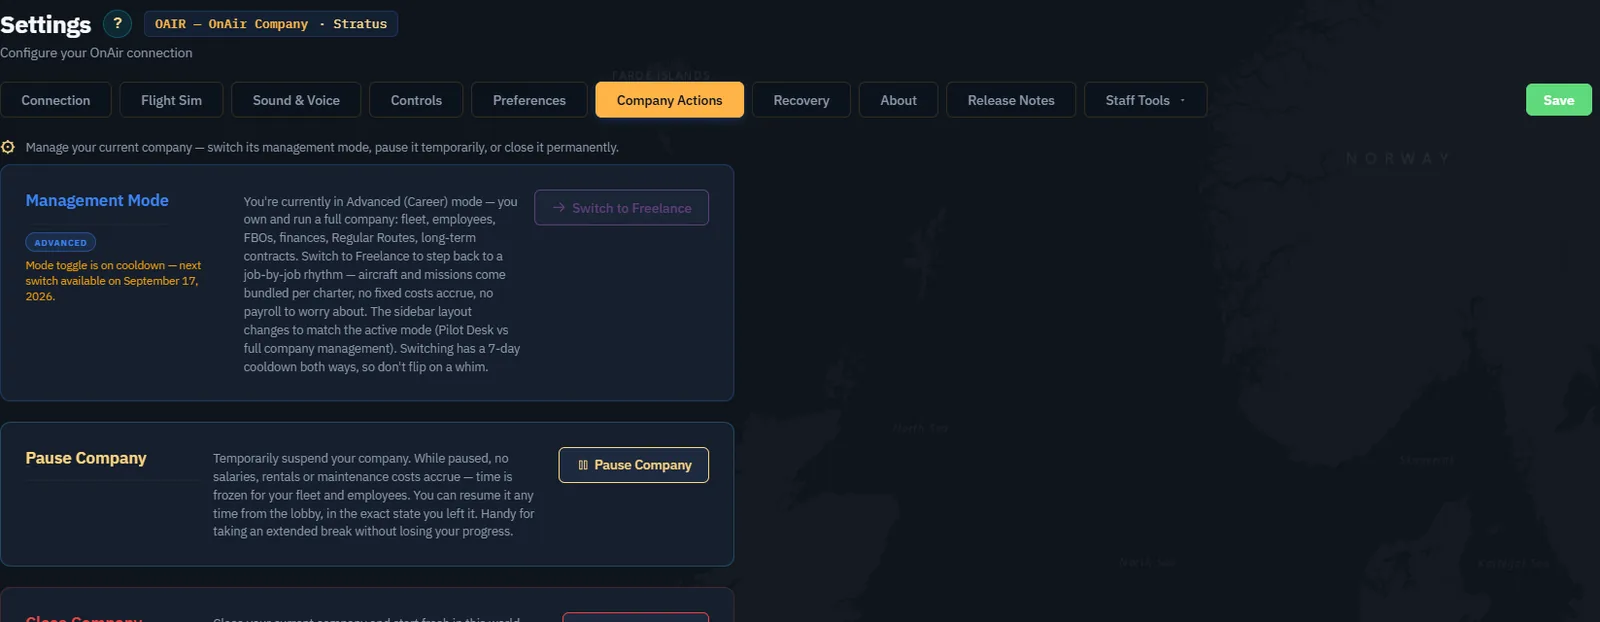
OB03 - The real Company Actions page offers Unlock Advanced Mode. Closing the company is a different action and is not required to leave onboarding.OB04 - KAIR's live server quotation: 0 Cr. current earnings, 10,000 Cr. equity and 10,000 Cr. total. This confirms the zero-balance case on Thunder at Realistic difficulty. After recording this proposal, the owner authorised the standard unlock. The resulting ledger is shown below.
This is a genuine first-unlock proposal. The returning-company confirmation shown in Chapter 6 has a different purpose and does not offer the onboarding bonus again.
Step 6. Decide whether Airliner Start fits your plan
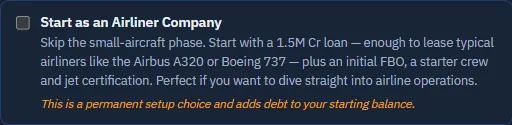
The optional Start as an Airliner Company choice adds a different starting package. The inspected server setup takes a 1,500,000 Cr. loan, establishes a home-airport FBO, hires one pilot and two cabin crew, grants jet certifications to the player and starter crew, brings a company below level 3 up to level 3, and grants initial finance, FBO, passenger and hiring skills. The interface also identifies a dedicated leaderboard.
OB05 - The real, unchecked Airliner option. It explicitly describes the loan and permanent setup choice. It remained unchecked during the confirmed standard unlock; no loan was taken.
Loan proceeds add cash and debt. They are not part of the matching onboarding reward and should not be counted as earned profit. This package helps finance leasing an airliner; it does not give you ownership of an A320 or B737. Check the actual loan schedule, fleet terms, staffing and operating reserve before proceeding.
For this volume's small-company exercise, leave the option unchecked. Standard Advanced flying requires the appropriate aircraft-class certification; Freelance flights alone do not earn these ratings. The Airliner package's explicit jet-certification grant is a separate provision.
Step 7. Leave onboarding when you are ready
You do not need to unlock Advanced merely to continue this book. First practise connection, dispatch, tracking and flight registration, then build a reserve and choose a realistic first company operation. Chapter 6 walks through that operating decision.
When ready, reopen the quotation, review its current amounts and confirm the first unlock. Inspect the Advanced badge and Cash Flow afterwards. For a standard start, reconcile the original cash, the owner's equity entry and the special transition-bonus entry. For an Airliner start, reconcile loan proceeds and setup transactions separately as well.
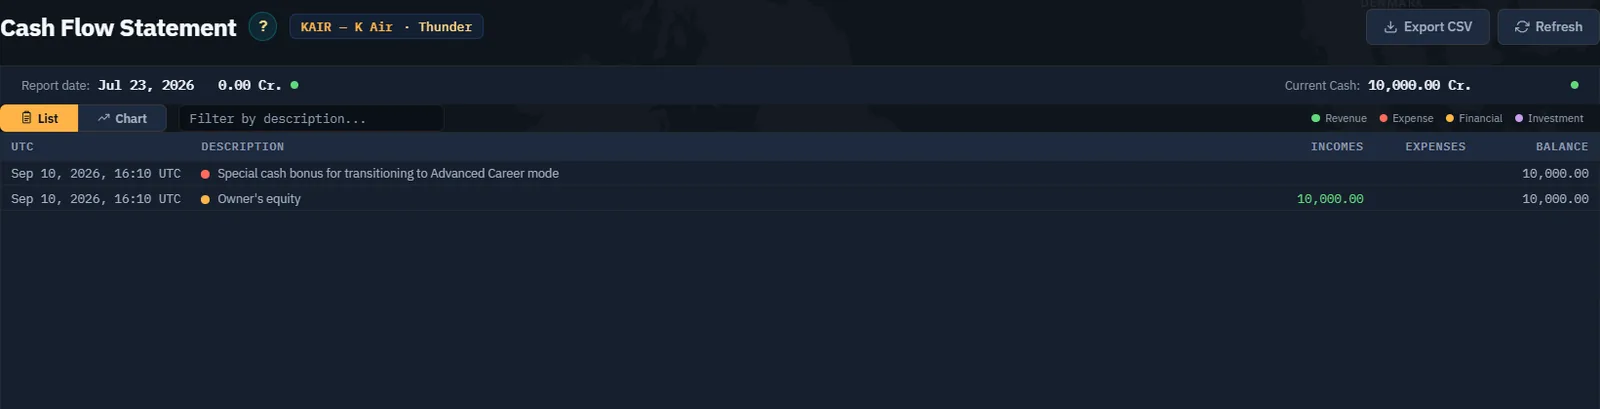
On 10 September 2026 at 16:10 UTC, we confirmed KAIR's standard first unlock with the owner's permission. Cash Flow then showed 10,000 Cr. current cash, an Owner's equity receipt of 10,000 Cr., and the special transition-bonus row with no income amount because the starting balance was zero.
OB06 - Actual post-unlock receipts. The matching bonus is zero in this example; the entire 10,000 Cr. increase is owner's equity. No flight, aircraft purchase or Airliner loan was required for this transition.OB07 - KAIR now shows Advanced in Company Actions. This first unlock displayed an available Switch to Freelance button without a dated lock message. We did not switch again.
CAPTURE TO COMPLETE - OB08, non-zero onboarding balance required. On another authorised company still in onboarding, complete real Freelance flights, then record a non-zero balance, the unlock quotation and the actual bonus credited after an authorised first transition. KAIR verifies the zero-balance case; the 25,000 Cr. calculation earlier is a source-checked example, not a second live test.
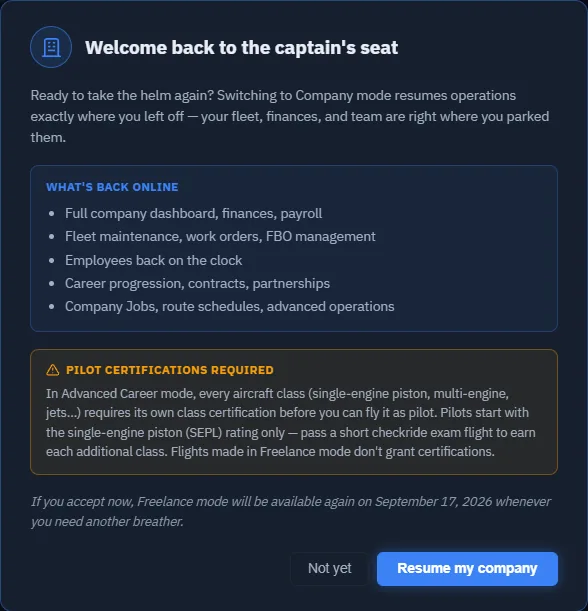
The bonus is a one-time opportunity for that company. After Advanced is unlocked, ordinary switches between Advanced and Freelance do not repeat it or recreate onboarding. The normal production rule for later mode changes is a seven-day interval; read the date actually shown by the app. The first unlock uses a separate server operation, so do not infer an exact first return date from an old screenshot.
Before a later return to Freelance, inspect the confirmation and outstanding commitments. The inspected mode-change code pauses the company, ends rentals of aircraft owned by another company and removes accepted unpaid non-career missions. A return to Advanced is therefore not a promise that every rental or pending job is preserved.
Checkpoint: you can identify onboarding, explain 2 x current cash + equity, distinguish the optional loan from a bonus, and inspect the first-unlock proposal without accepting it. Continue with Complete Your First Freelance Charter.
Official reading and verification
Use the live quotation shown in the app for your company to verify the amounts before confirming the transition.
Chapter 03
Complete Your First Freelance Charter
The Freelance Job page (sidebar: Operations Centre → Freelance Job) is your mission entry point — the single screen where every paid flight you can take as a freelance pilot is reachable in two clicks. This chapter walks you through the four cards of the hub (Charters, Regular Routes, Virtual Airlines, Tours), the deep-search pages they open, the All Pending Jobs queue where everything you've accepted waits to be flown.
3.1 Find your first job — the Freelance Hub
Welcome banner — Step 2 This section completes Step 2 of the welcome banner on your Dashboard. Once you've finished it, the step turns green automatically — as soon as a single job lands in any of the four categories.
The Freelance Job page — 4 cards explained
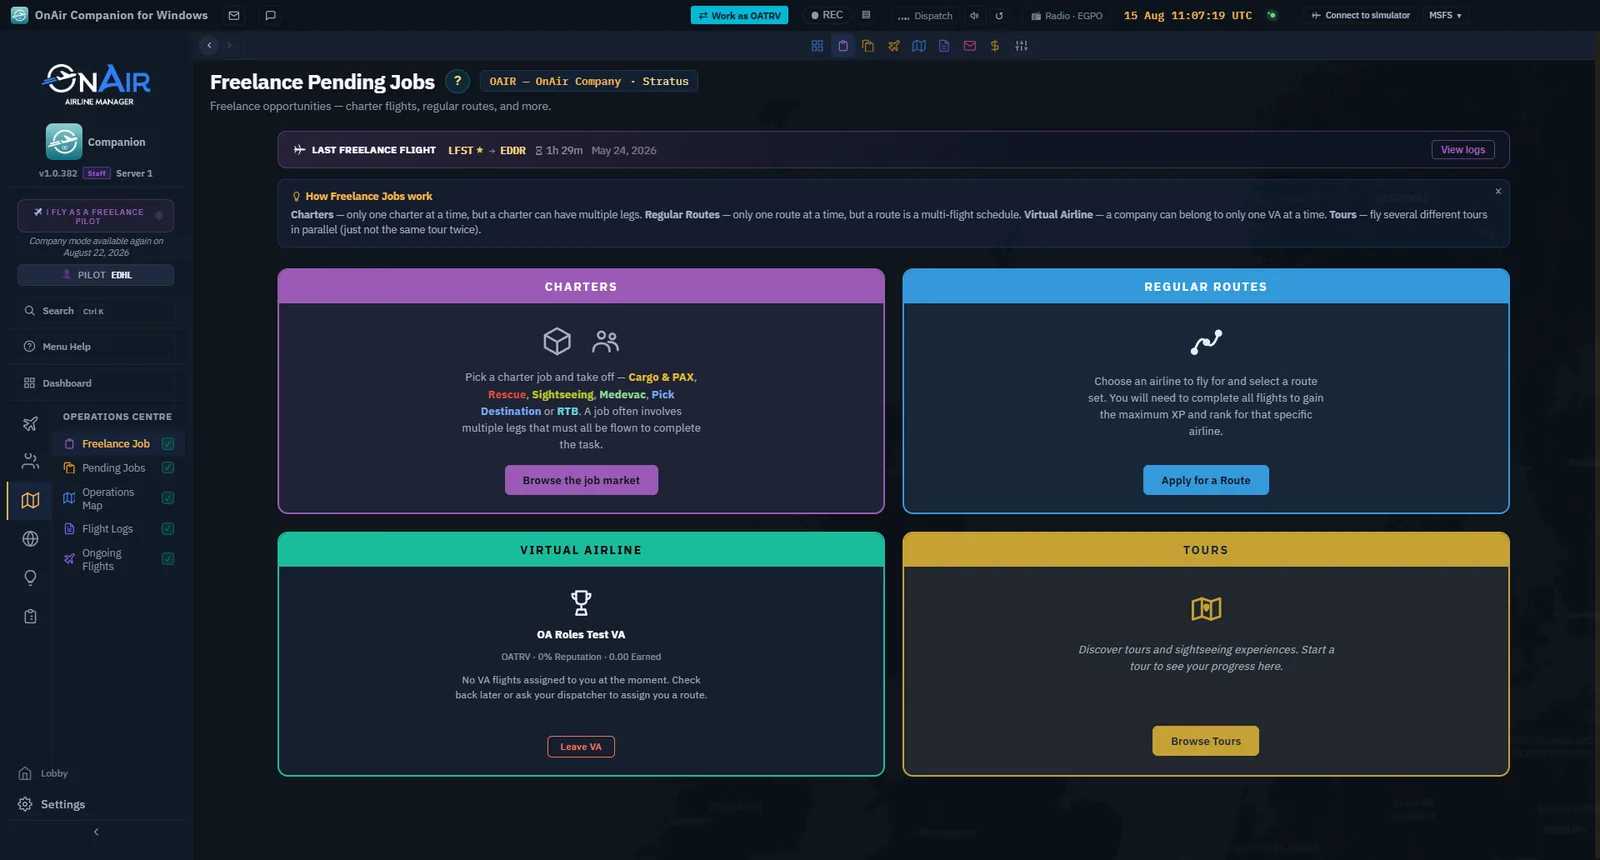
The sidebar entry is Freelance Job, but the page itself is titled Freelance Pending Jobs, with the subtitle "Freelance opportunities — charter flights, regular routes, and more." A Last freelance flight strip runs across the top — where you last went, how long it took, and a link to its log — then a collapsible How Freelance Jobs work panel, then a 2×2 grid of four cards, one per source of paid flying:
Charters — one-shot cargo or PAX missions you pick yourself.
Regular Routes — scheduled flights for a real-world airline.
Virtual Airlines — flights assigned by a VA you've joined.
Tours — themed sequences of legs flown at your own pace.
Each card has the same skeleton: an empty state with a single CTA when you have nothing in progress, and an active state with a flight ticket, data blocks, and actions once something is underway.
The Freelance Job page: your last flight on top, then the four ways to find work — Charters, Regular Routes, Virtual Airline and Tours.
Each card answers a different question. The empty CTA sends you to a deep-search page (covered in sections 4.2 through 4.5). The active state shows what's in progress and lets you fly, abandon, or view legs without leaving the page. If a card holds more than one item (several charters, several tour legs), the header shows arrows (◀ 1/3 ▶) to flip between them.
Tip — Combine all four — Nothing stops you from holding 1 charter, 1 route, and 2 active tours at the same time. Start simple, then layer.
Charters — Browse, Take & Fly, Add to Pending
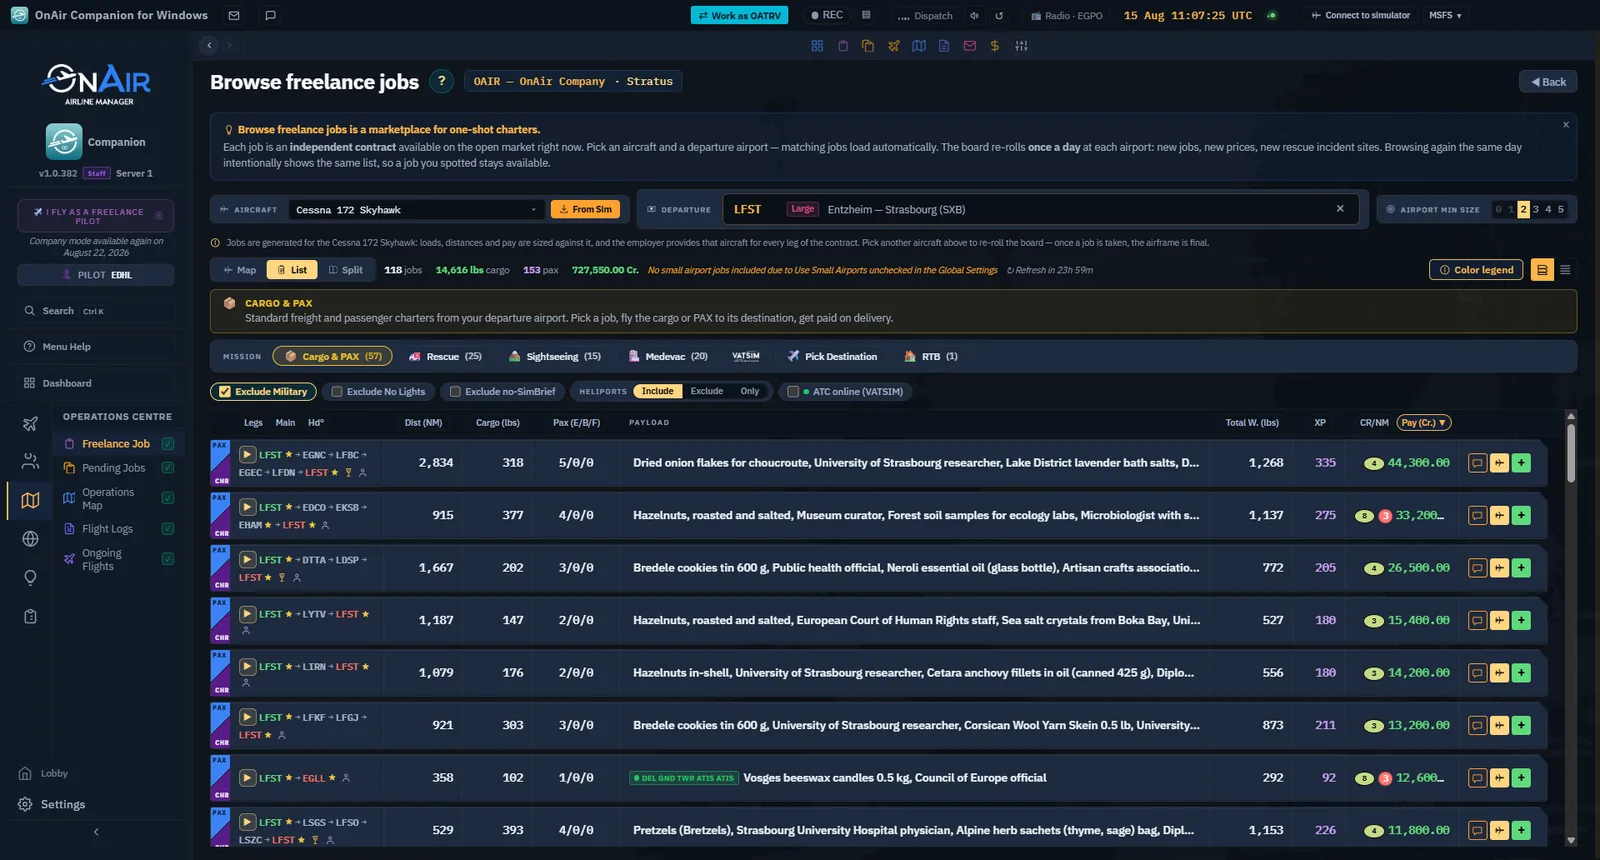
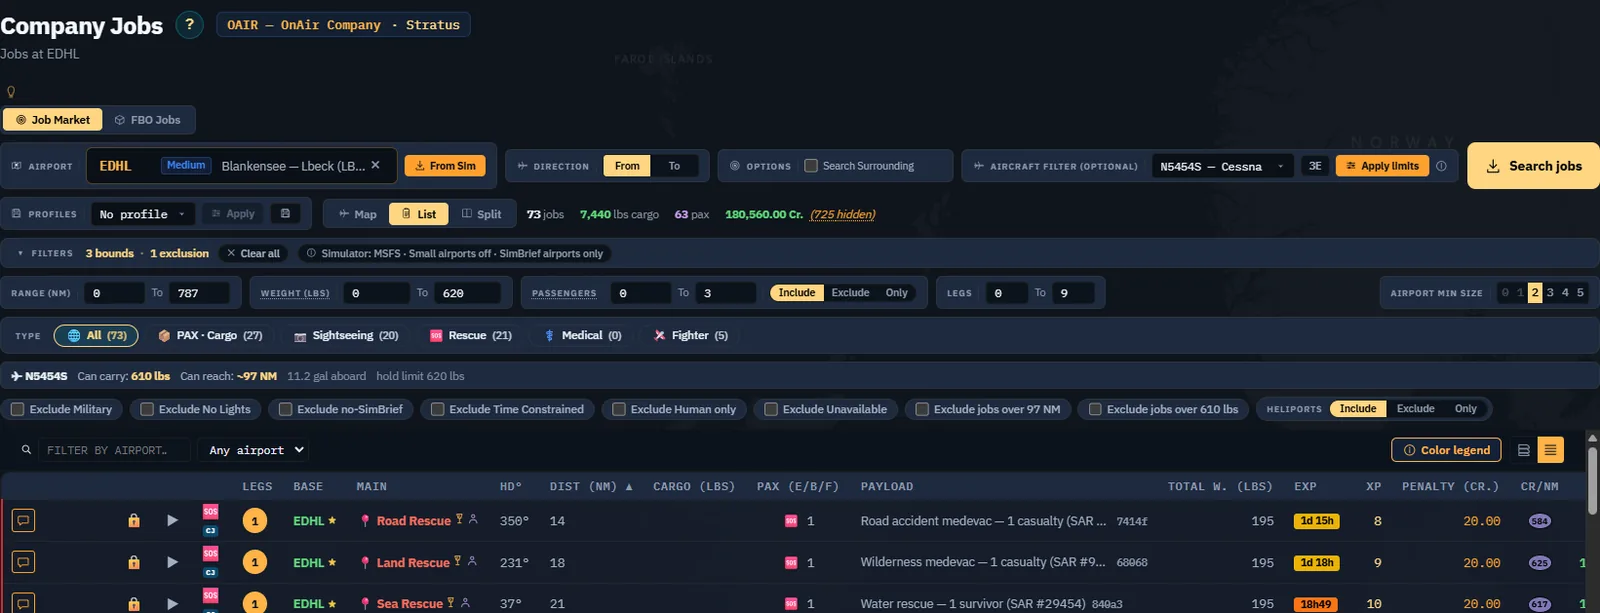
Click Browse the job market on the Charters card. You arrive on Browse freelance jobs, a compact one-pager where everything you need fits in a single viewport — no scrolling required to start a mission.
The charter search: pick an airport, then browse what is on offer there.
Step A — Pick an aircraft. The Aircraft field is a single dropdown that merges four sources, deduplicated by aircraft type:
Your fleet — listed bare (no suffix). If you own one, it's the default pick.
From previous flights — types you've flown before, with the suffix · From previous flights.
From simulator — the type currently loaded in your sim, with the suffix · From simulator.
Browse all aircraft types — opens the full catalogue (search by name
or ICAO, filter by class). Pick any type to see the jobs it would unlock: you do not need to own it, to have flown it, or to have the simulator running. Use it to answer "what would I be able to fly if I bought this?" before spending a credit. The type you pick is remembered and joins the dropdown with the suffix · catalogue.
To the right of the dropdown, an inline orange "Sim" pill runs a one-shot import from the running simulator — it identifies the aircraft (server-side hash on masses + fuel capacity) and resolves the departure airport closest to your GPS position. One click, both fields filled.
Step B — Confirm the departure and minimum runway size. Type 3–4 letters in the Departure field; autocomplete suggests airports. Min Size is a segmented control 0 → 5 (0 = grass strip, 5 = international). Sizes below your aircraft's minimum, or below your company's UseSmallAirports policy (see the Daily Tools reference — Settings essentials), are locked grey and unclickable.
Step C — Pick a mission category. Seven chips, all live — some are gated by the aircraft you picked (a chip greys out when your aircraft doesn't qualify):
Chip
Aircraft gate
Notes
📦 Cargo & PAX
none
Default. Generates ~25 mixed cargo + PAX legs around your departure.
🚑 Rescue
≤ 18 seats
Urgent medical evacuations with a search-and-rescue flavour.
🏔 Sightseeing
≤ 24 seats
POI overflight circuits — bonus for flying low and slow over the sights.
🏥 Medevac
≤ 21 seats, < 50 000 lb
Time-critical patient transport — +50 % pay, but a late-delivery penalty.
✈️ Pick Destination
none
Single leg, you choose the destination ICAO inline (free flight).
🏠 RTB
none
Single leg back to your declared home airport.
📡 VATSIM Events
none
Charters generated around live VATSIM events — the departure picker becomes a VATSIM airport search.
Step D — the list fills itself. There is no "search" button to press: missions load automatically when you enter the page, and reload whenever you change the aircraft, the departure, or the category. Change a filter, watch the list refresh.
Each chip carries the count of what is on offer right now — Cargo & PAX (57), Rescue (25) — so you can see where the work is before clicking.
The board re-rolls once a day, per airport — and this is the single most useful thing to know about this page. Browsing the same airport again the same day shows you the same list on purpose: a job you spotted at breakfast is still there at dinner. New jobs, new prices and new rescue incident sites arrive on the next roll, and a countdown in the toolbar (Refresh in 23h 59m) tells you when. So there is no point re-opening the page hoping for something better — but there is also no rush to grab a job before it evaporates.
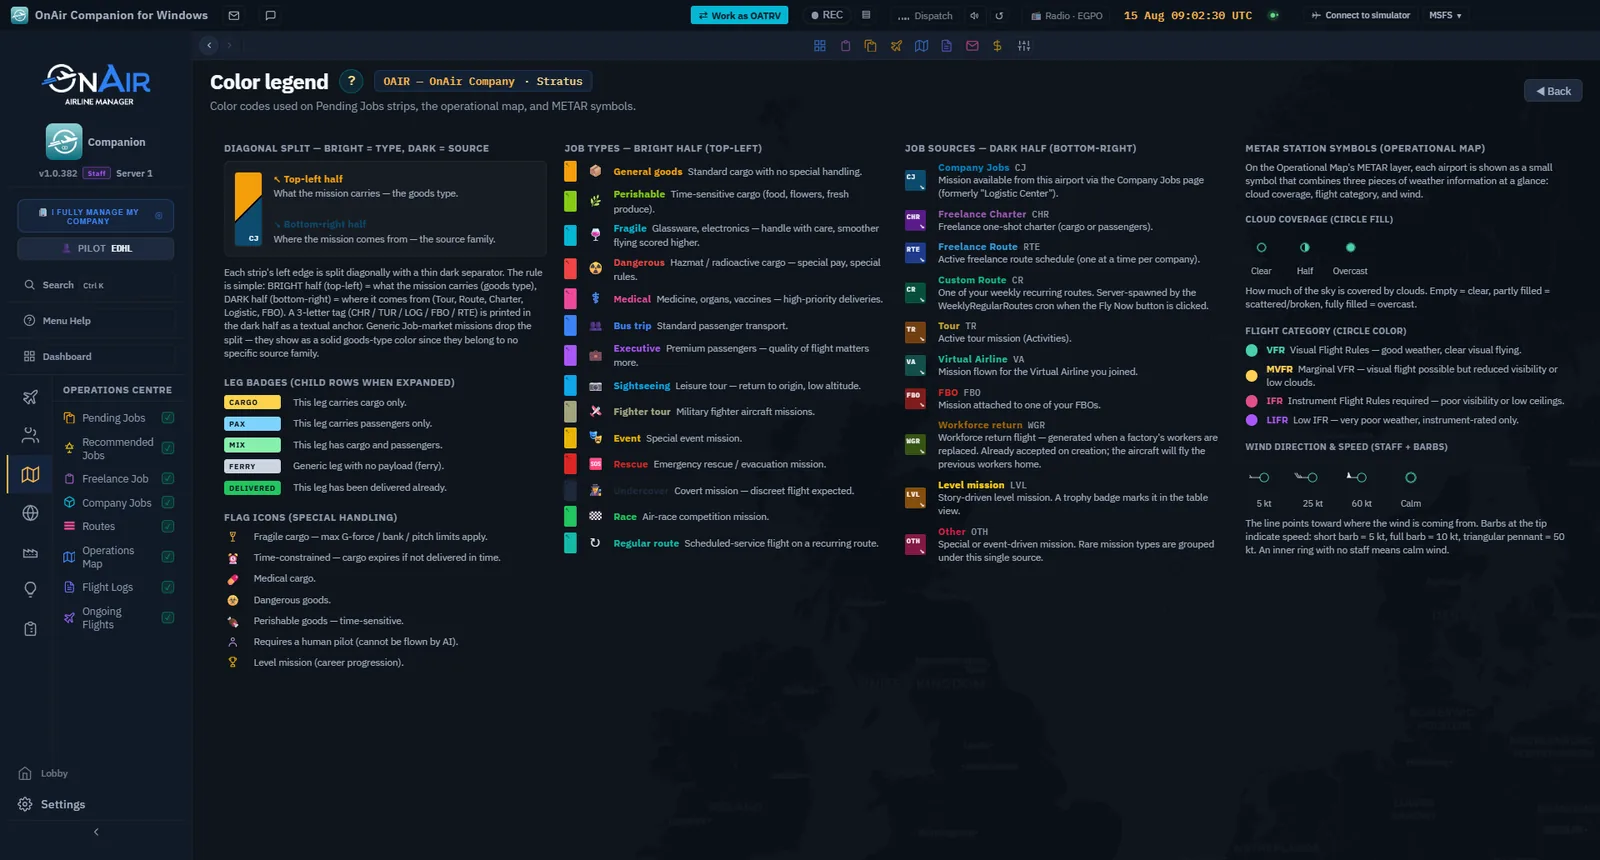
Step E — Read a flight strip. Each mission renders as a strip with a two-tone color stripe on the left edge: the top half is the goods type (perishables, dangerous goods, mail, generic cargo…), the bottom half is the source family (Charter here, but the same rule lets you scan All Pending Jobs at a glance — see the All Pending Jobs section below). A Color Legend page reached from the page header documents every color used.
Two action buttons sit on each mission:
Button
Effect
Take & Fly (cyan jet)
Accepts the mission and opens Flight Dispatch directly with the aircraft prepared.
Add to Pending (green +)
Accepts the mission, you stay on the list to take more. The mission lands in All Pending Jobs.
A Map | List | Split toggle above the list switches between the strips, a world-map view with arcs between airports — click an airport to filter, click an arc to see mission details — and a split view showing both at once.
A row of narrowing switches sits under the mission chips: Exclude Military, Exclude No Lights, Exclude no-SimBrief, a Heliports Include / Exclude / Only selector, and ATC online (VATSIM). They filter what is already on screen; they do not pull a new board.
Only one active charter mission at a time — If you click Take & Fly with an already-active mission, the Companion will first ask you to abandon or complete the old one.
Regular Routes — Apply for a schedule
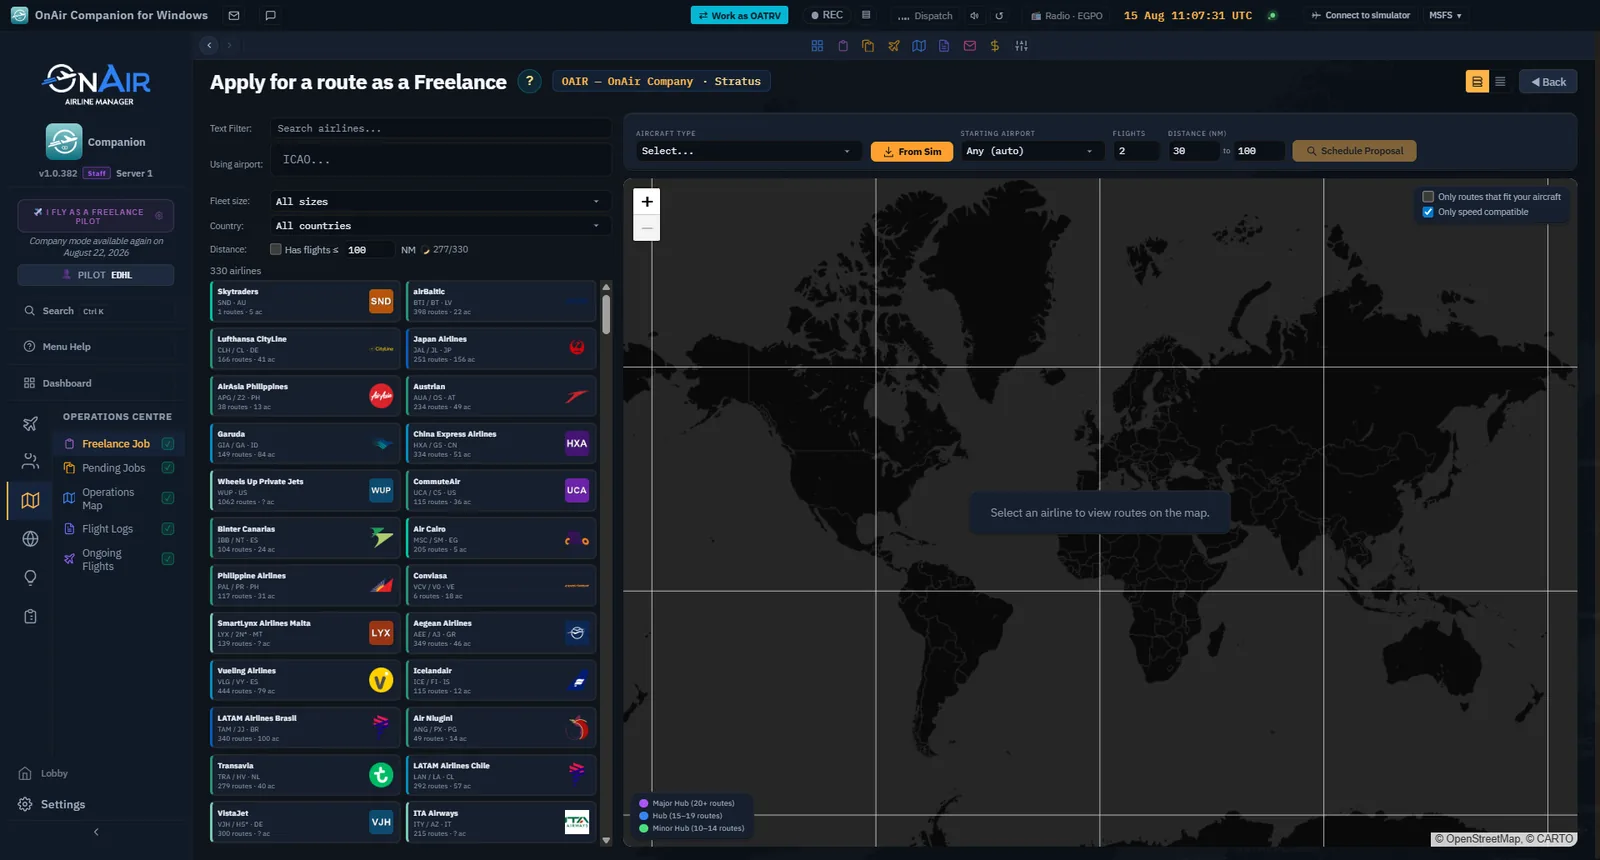
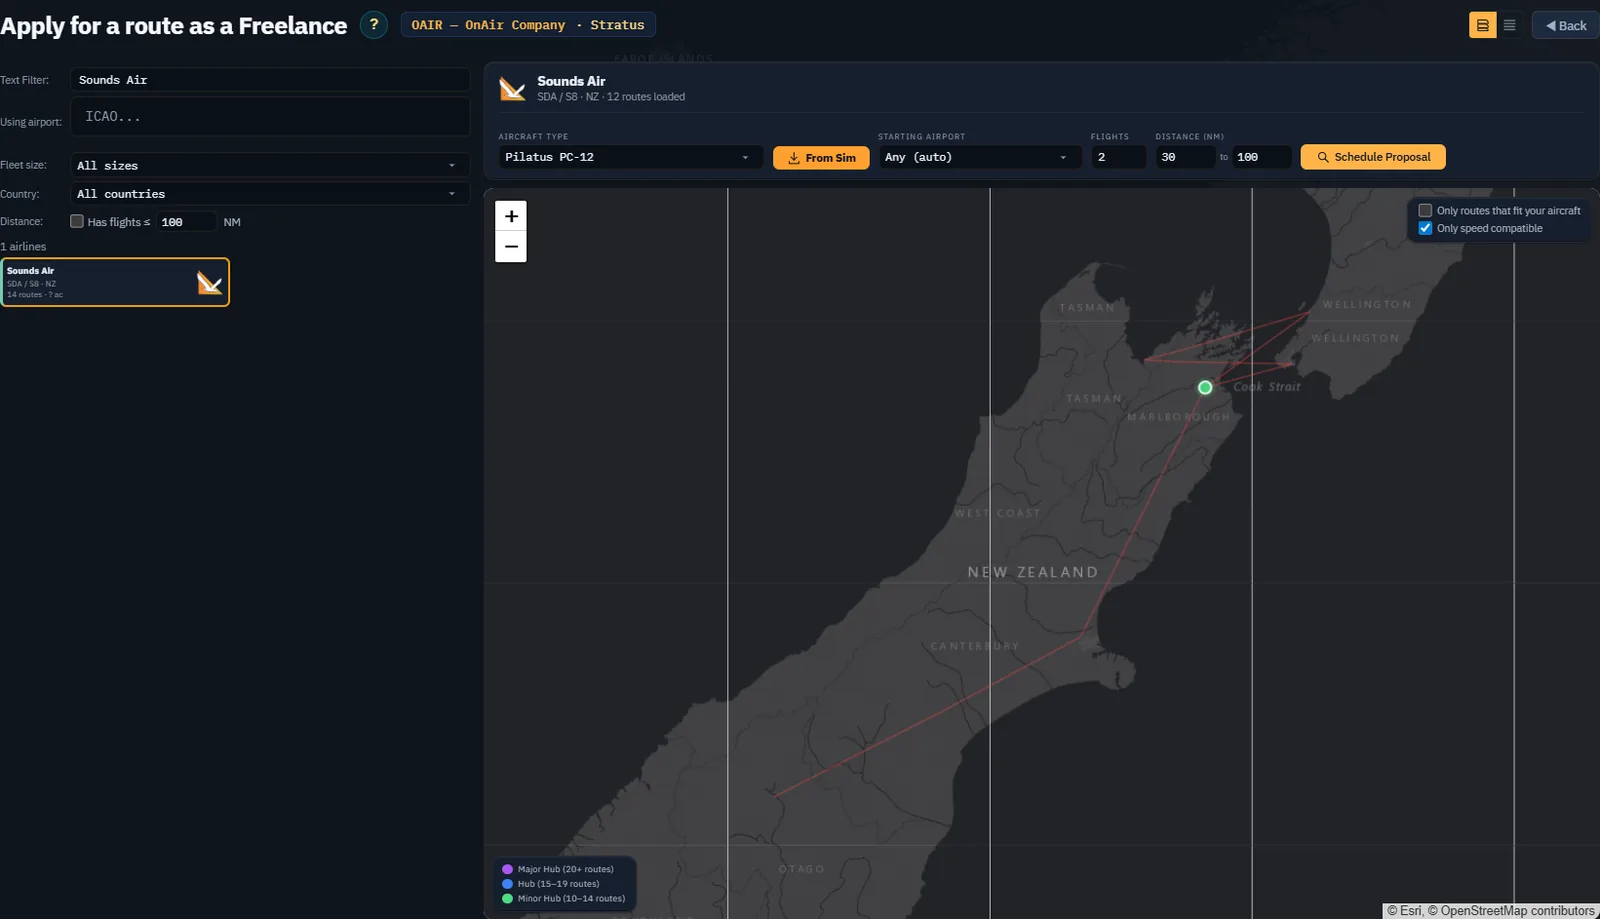
Click Apply for a Route on the Regular Routes card. You arrive on Freelance Routes, where you select a real-world airline and accept one of its scheduled sequences (generated from FlightRadar24 data).
Freelance Routes: choose the airline you want to fly for before picking a route set.
Step A — Choose an airline. The screen lists worldwide airlines — the five you used most recently are pinned at the top so returning to "your" carrier is one click. Two filters narrow the list:
By origin hub — enter your home airport ICAO to see only airlines departing from your location.
Distance ≤ N NM — a numeric cap on each route's leg distance. The page auto-scans silently on mount with the persisted value (default 100 NM, stored locally), with a small spinner while the scan runs. Change the value and the scan re-runs; subsequent sessions are near-instant thanks to the IndexedDB cache.
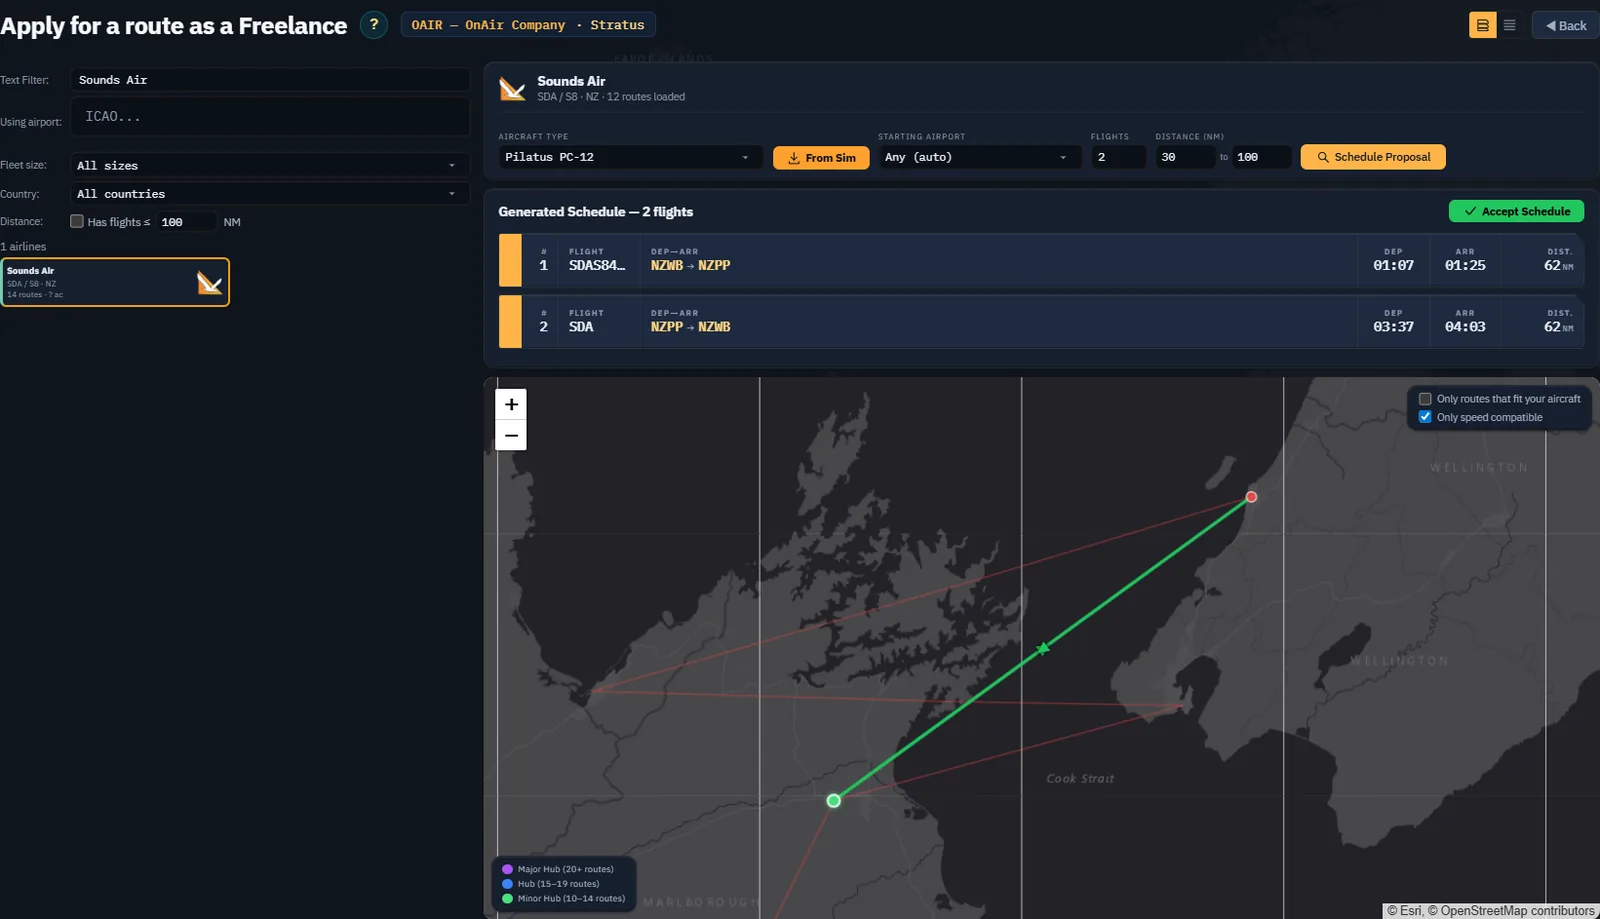
Step B — Choose a schedule. Click on an airline: the Companion generates a few schedule proposals (typically 5–10 flights over 1–7 days), with for each:
The number of legs and total distance.
The proposed aircraft type.
A possible red speed triangle if the aircraft's cruise speed can't hold the schedule. You can still fly the leg, but you lose the on-time rank bonus.
Click Accept Schedule on the proposal you like: the server saves the schedule, creates the freelance aircraft, and the first flight goes to InProgress. You're redirected back to the Freelance Job page, and the Regular Routes card now displays your next flight to fly: airline panel (logo, rank), flight ticket (flight number, aircraft type, times, METAR), data blocks (Pay, Duration, Avg Speed, Distance), and four actions — Skip, Show legs, Route Map, Fly Now.
Rank grows leg by leg — On-time flight = +10 (or +12 on an official schedule). Late flight (more than 20 min) = +5 or +6. Skipped flight = no gain.
Virtual Airlines — Apply & join a VA
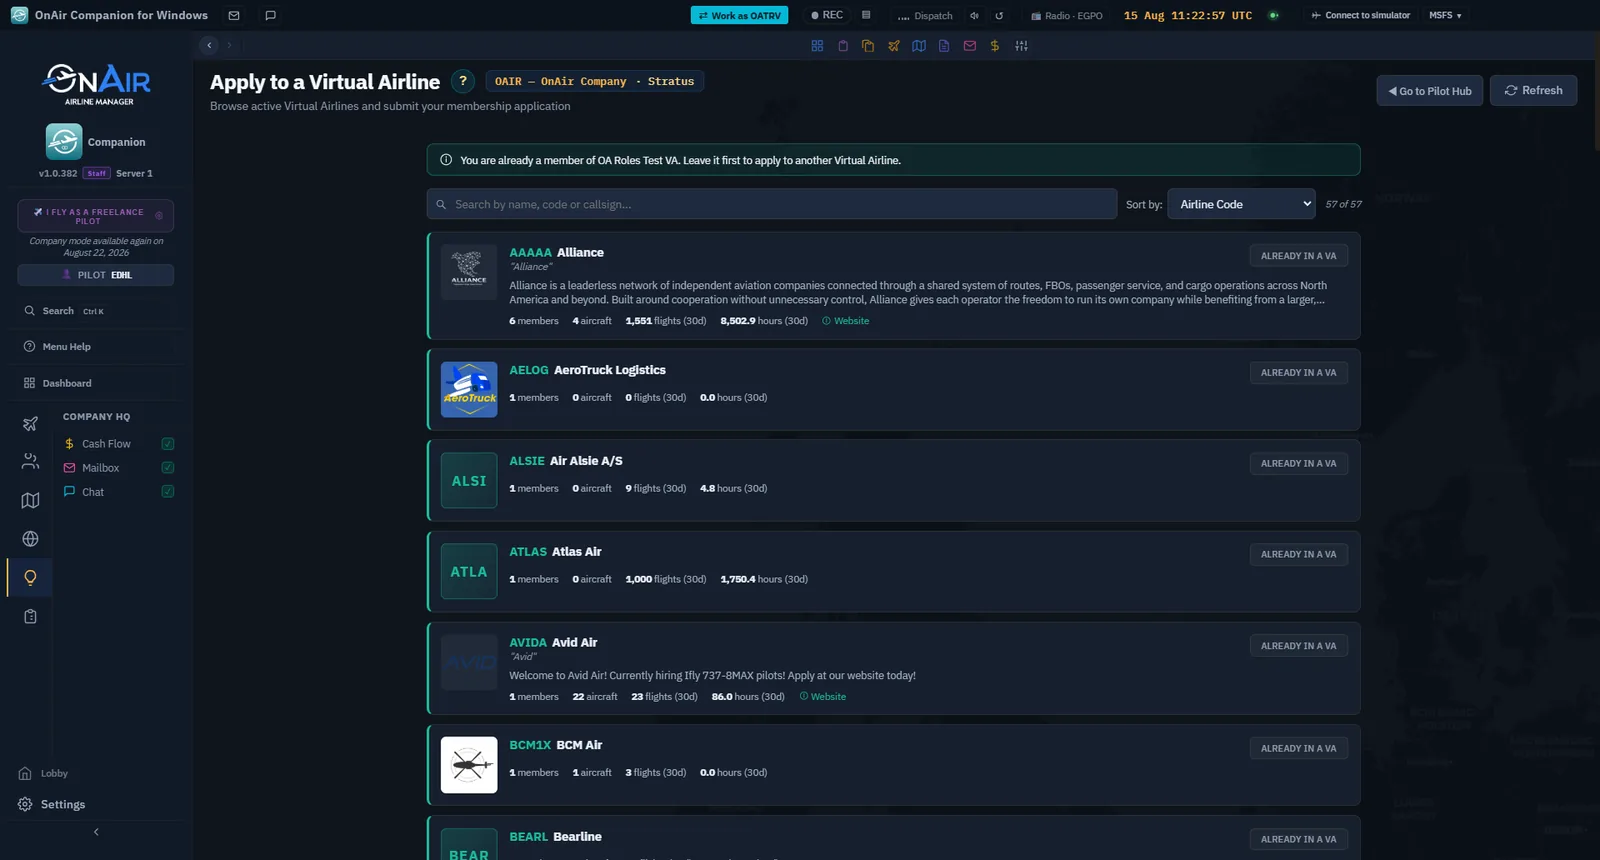
From the Virtual Airlines card click Browse VAs. You arrive on the Apply VA page — a directory of Virtual Airlines accepting freelance pilots.
The Apply VA page, where you ask to join a virtual airline.
Browse the VAs, click on one you like, read the description, and apply. The VA owner receives your application and accepts or rejects it.
Once accepted, you no longer choose your flights: the VA assigns you missions according to its schedule. The card shows the ticket for the next assignment with a Fly Now button (and a Ferry option when the aircraft isn't where it should be). If you have a pending application, the card displays its status with a Withdraw button.
VA = a more structured commitment — Unlike charters where you choose each mission, in a VA you fly what the VA assigns. It's more social (shared roster, common livery, internal ranking) but less flexible. Switching between your personal company and the VA happens via the clickable pill in the top bar.
Tours — Multi-leg adventures
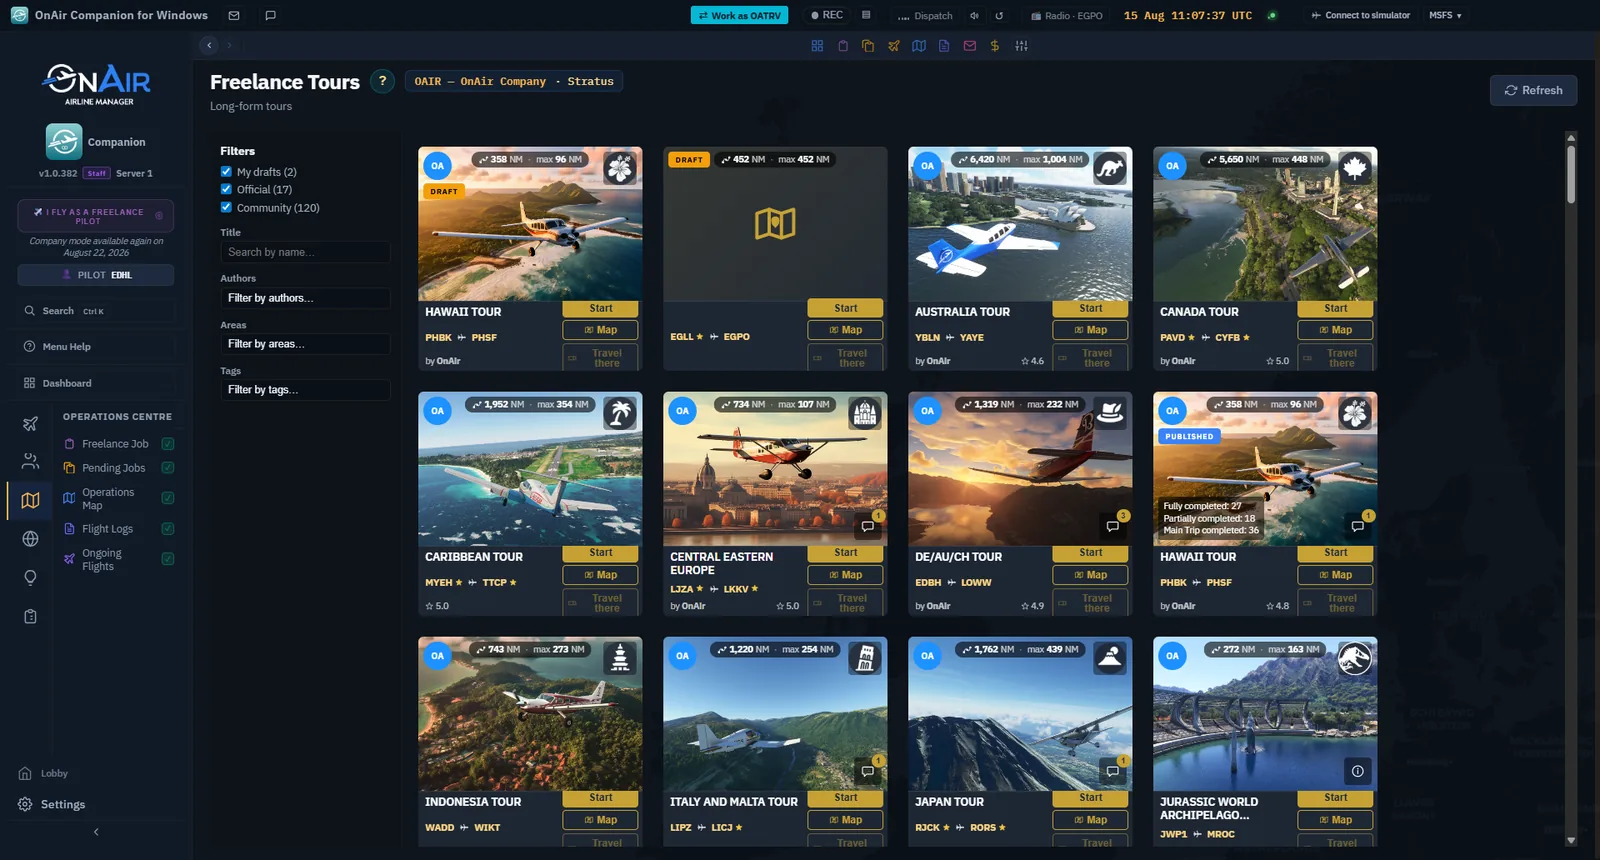
Click Browse tours on the Tours card. That opens the Activities page (Tours have no rail entry of their own).
The Activities page, on its Tours tab.
Tours are themed multi-leg POI itineraries — volcanic islands, alpine passes, former military bases, coastal lighthouses. The page is more than a grid: a filter sidebar splits the catalog into Official, Community and VA tours, with a title search and Authors / Areas / Tags filters to dig through the community library. Cards carry ratings and comment counts, and show how far the tour's start is from you.
Choose one that tempts you and click Start tour — it goes to InProgress and you're taken back to the Freelance Job page, where the Tours card now shows it. From there a Fly button launches the next suggested leg, a Description button opens the tour brief, and a Browse More button in the card header lets you start another tour in parallel.
You fly the legs in any order, at your own pace. Progress is tracked per leg.
Tip — Travel tokens — If a tour starts far from where you are, the tour card offers a transport-to-start button that spends a travel token to reposition you instantly. Tokens are a limited resource shown in your Company details (§1.3).
No late penalty on a Tour — Take six months to finish a 30-leg tour if you like. It's exploration, not a race.
Later, in Advanced Career: Find Similar Jobs
Find Similar Jobs is not available in Freelance mode. You will not find this button in Search Charters or All Pending Jobs.
Later, in Advanced Career, open an aircraft's flight preparation screen. In the charter cargo section, a small target icon offers a search for additional jobs to an existing load's destination. It is shown only for an undelivered load whose destination is known and differs from the departure airport. Clicking it opens a window over dispatch to search the market for the same departure and destination. Use Add to flight on a suitable offer. After successful acceptance, the airport Cargo / Passengers list refreshes without leaving dispatch. Acceptance does not itself load the aircraft: check the selected load, capacity, restrictions and expiry before flying. In the older client, the same target icon instead opens the jobs page filtered for that departure and destination.
All Pending Jobs — your accepted-jobs backlog
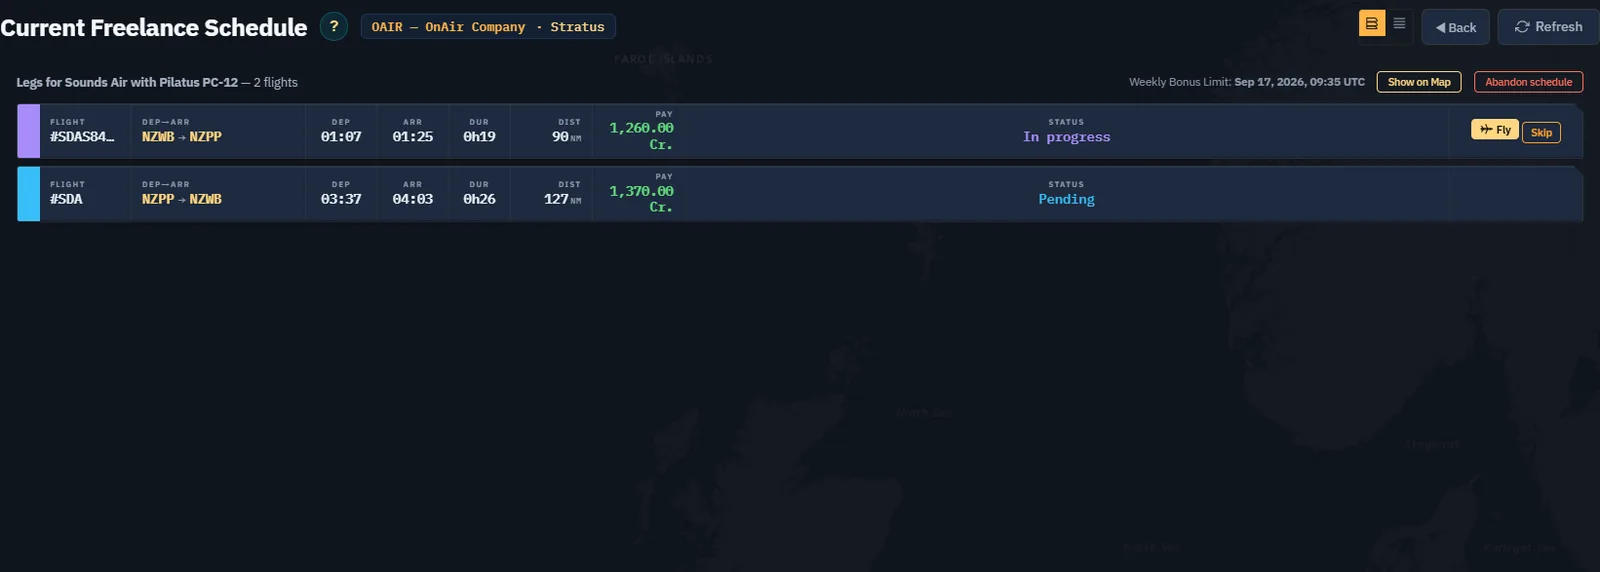
Where the Freelance Job page is where you pick jobs, All Pending Jobs (sidebar: Operations Centre → Pending Jobs) is where you manage everything you've already accepted. It's the unified queue: every charter, every route leg, every tour leg you've taken but not yet flown lands here, in one sortable list.
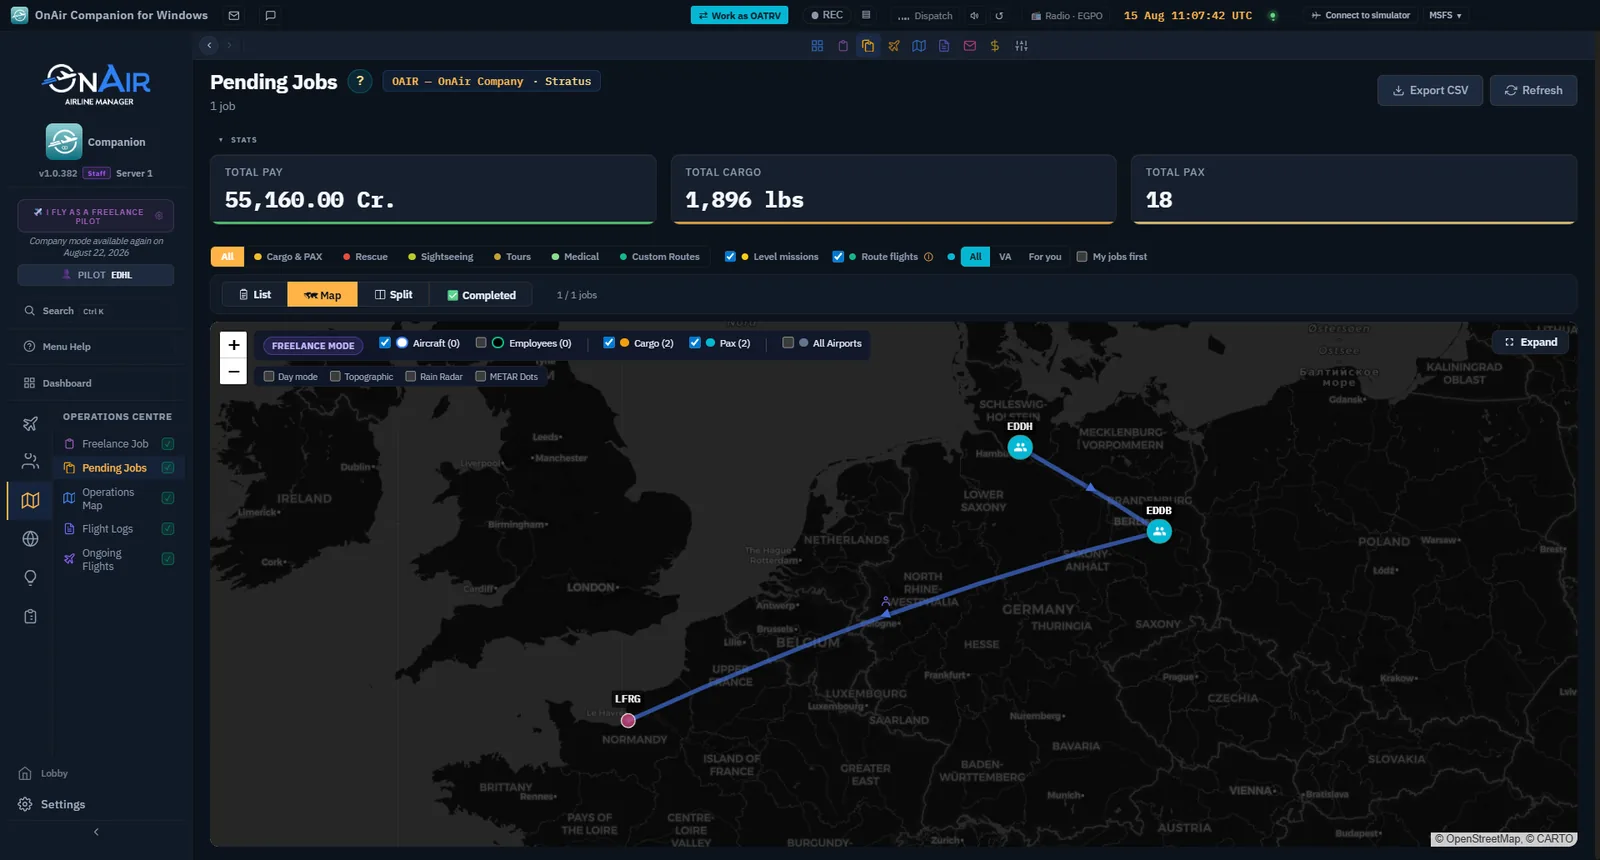
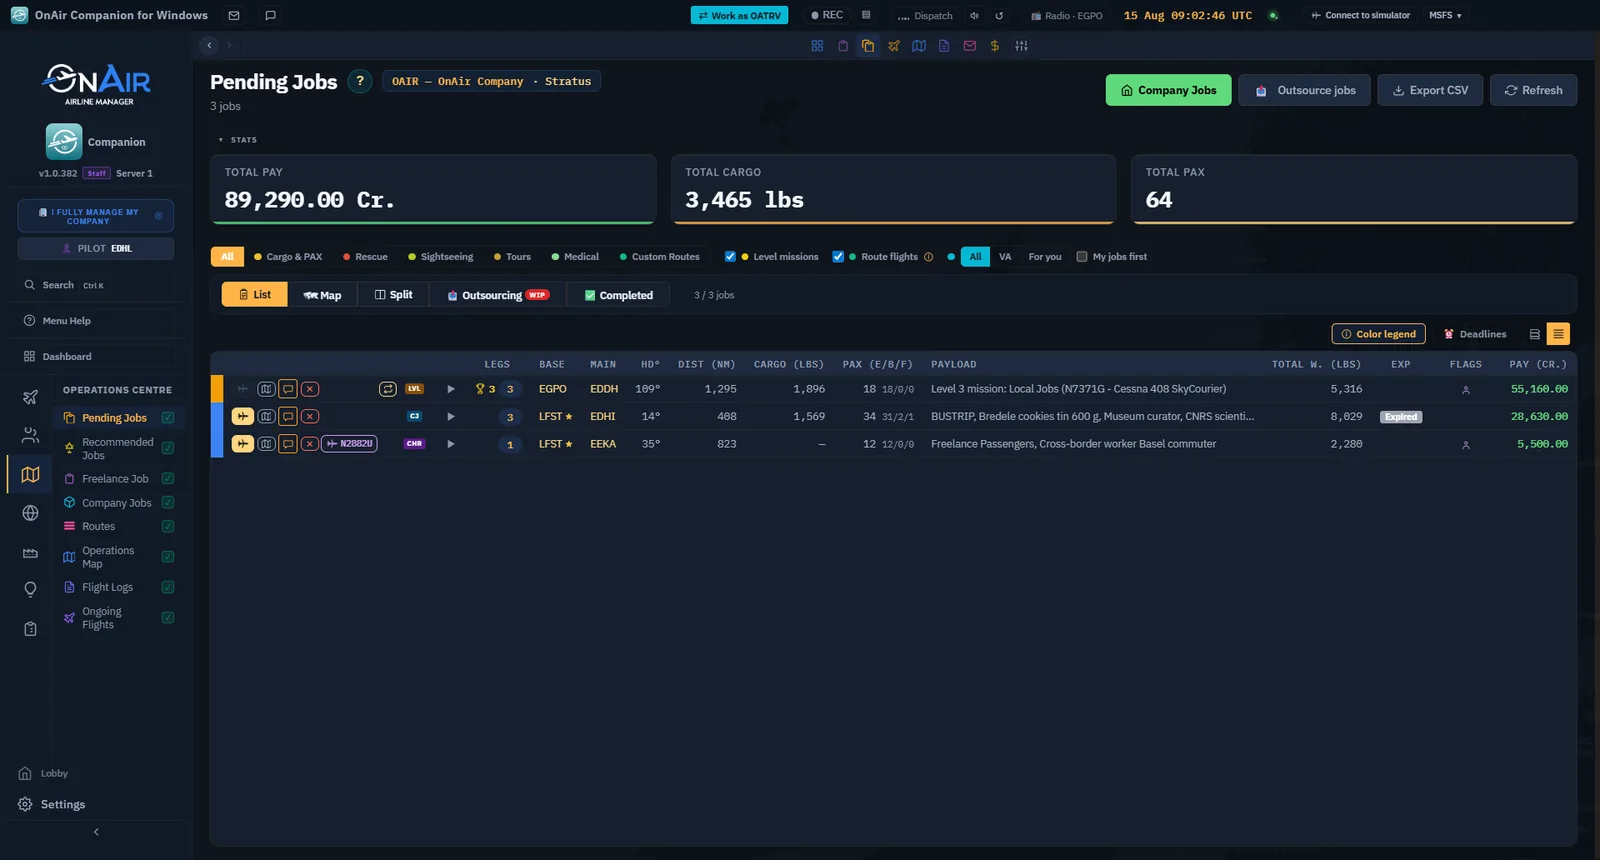
Pending Jobs: everything you have accepted and not yet flown.
Filter pills — by mission type. The pills at the top filter by what the mission is, not where it came from: All / Cargo & PAX / Rescue / Sightseeing / Medical / Tours / Custom Route, plus a Level missions checkbox to show or hide the level-up missions the game offers as you progress.
Source badges — where it came from. To the left of each mission, a lettered badge identifies its source family (the same family that colours the bottom half of the stripe):
Badge
Source
CHR
Freelance Charter (a classic charter mission).
RTE
Regular Route (one leg of an airline schedule).
TR
Tour leg.
LVL
Level mission (offered by the game as you level up).
In Career mode more families join the list (Company Jobs CJ, FBO-generated FBO, Custom Route CR…). The Color Legend page (button in the page header) documents the full mapping.
Reading a row. Beyond route and pay, rows carry a payload description, total weight, an expiry badge, and small constraint flags when the load is special — fragile, perishable, medical, dangerous goods, time-constrained, human-only. Worth a glance before you dispatch: those flags are the difference between a routine hop and a race against a countdown.
Per-mission actions. The main buttons on each row:
Fly (plane icon) — opens Flight Dispatch on this mission. If the aircraft is already airborne (a flight you started elsewhere), this jumps you straight to the tracker instead — the same shortcut as the top-bar Tracking pill.
Briefing (📄) — opens the mission's narrative briefing (see the Dispatch section for briefings at dispatch).
Map — shows the mission's legs on a map.
Decline (red cross) — declines the mission.
Decline on an RTE (Regular Route) leg — The cross is replaced by a Route button that takes you back to the route schedule. Declining a single route leg can corrupt the schedule (the aircraft may be deleted early). To drop a route leg, use Skip (per leg) or Abandon (the whole route) from the Route Map, not Decline.
Multi-leg groups. When a row is a multi-leg group (a Regular Route schedule, a Tour) and you expand it, the legs are listed individually underneath with their own values. The Legs badge on the parent shows the total leg count.
Color stripes. Every row carries a two-tone color stripe on its left edge — the same visual language used on Search Charters (above): top half = goods type, bottom half = source family. One glance tells you what kind of cargo and what kind of job you're looking at, without expanding the row.
You now know how to…
Reach the Freelance Job hub and recognize the four cards (Charters, Regular Routes, Virtual Airlines, Tours) and their empty / active / in-flight states.
Generate and accept a charter mission on the compact Search Charters page, using the unified aircraft dropdown, the orange Sim import pill, and the chip-based mission selector.
Read a flight strip's two-tone color stripe and open the Color Legend page.
Apply for a Regular Route from a real-world airline schedule.
Join a Virtual Airline and understand the commitment that comes with it.
Start a themed Tour and fly its legs at your own pace.
Recognise that Find Similar Jobs belongs to Advanced dispatch, not Freelance charter search.
Manage your accepted-jobs backlog from All Pending Jobs, tell sources apart with the CHR / RTE / TR / LVL badges, and avoid the Decline trap on route legs.
Now to turn that accepted job into an actual flight in your simulator.
You have a job in hand. Now you head to Flight Dispatch to prepare the flight: confirm the aircraft, set the route, size the fuel, brief yourself on what you're carrying — then launch into the tracking conditions, the pre-flight checklist that must turn green before the tracker arms. Dispatch is the gate between "I accepted a job" and "I'm tracking a real flight".
Welcome banner — Step 3 This section is the first half of Step 3 of the welcome banner on your Dashboard. The second half (the flight itself + the register) is in the Fly & register section. Once you start tracking and land successfully, the step turns green automatically.
Opening the Dispatch screen
Flight Dispatch is not in the sidebar — it always works on a specific aircraft, so you reach it through an aircraft's action buttons:
Take & Fly / Fly Now on a job card or a Pending Jobs row — Dispatch opens with the aircraft and the route already filled in.
The Dispatch button on a Fleet row — that is its label there, one per aircraft (Dispatch N1825N). Resume replaces it while a flight of that aircraft is in progress.
When you arrive via Take & Fly, most of the form is already populated — you review, tweak, and launch.
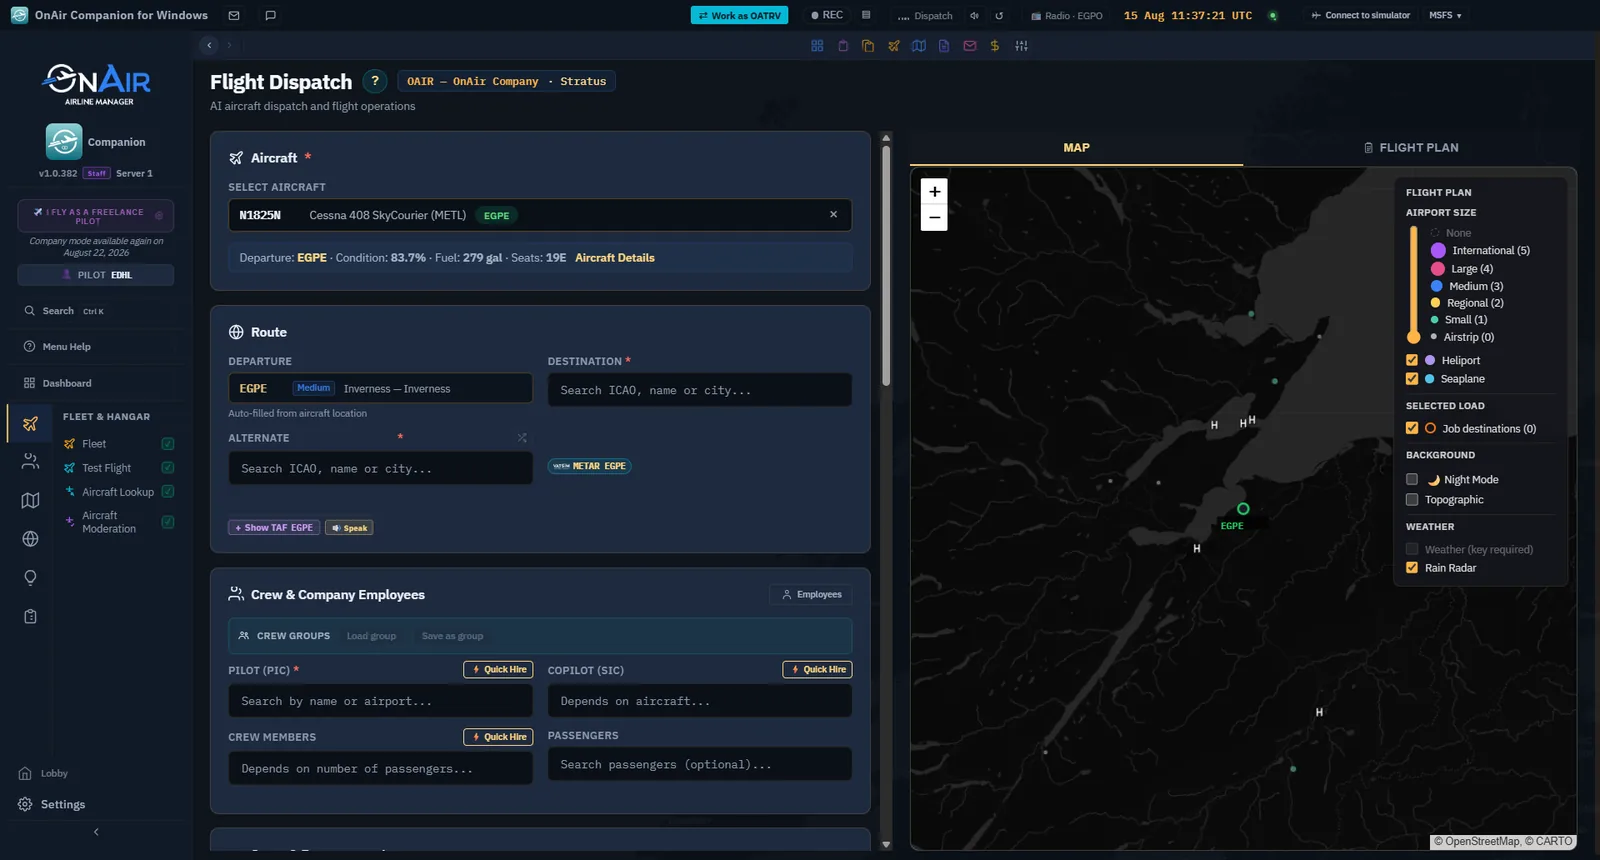
Flight Dispatch as it opens from a Fleet row: the aircraft already selected, the departure auto-filled from where it stands, and the map on the right.
Already-flying aircraft go straight to the tracker — If you click a Fly / Track / Resume button on an aircraft that's already in the air (e.g. a flight you started in the sim from another screen), the Companion takes you straight to the tracking view rather than the dispatch form.
The dispatch map
The right half of the screen is a live map of your flight plan: departure, destination and alternate joined by great-circle legs — and once you've pulled a SimBrief OFP (see below), the actual navlog waypoints replace the direct leg. The map carries the same comfort features as the big world map: day/night terminator, topographic overlay, rain and cloud overlays, and an airport-size slider to declutter.
It's not just decoration: one glance confirms you're about to fly the leg you think you're flying — the right direction, the right distance, the alternate on the sensible side.
Pick your aircraft (or follow Take & Fly)
The Aircraft dropdown lists every aircraft in your fleet that is idle and not currently being tracked. An aircraft mid-flight in another session is filtered out, so you can't accidentally re-launch over an active tracker.
In freelance mode there's usually exactly one entry — the aircraft loaned by your contract.
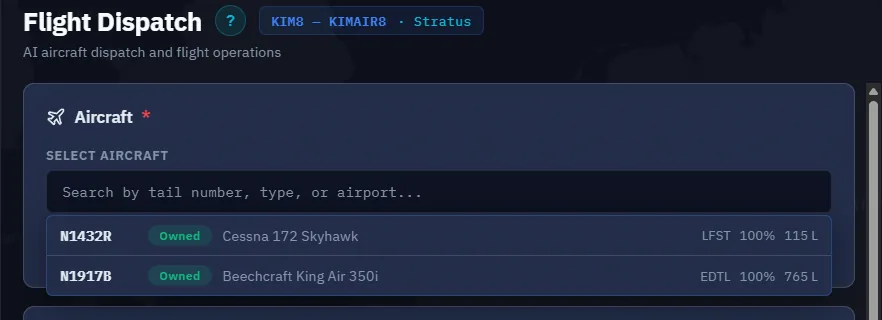
Aircraft selector in an Advanced company. Owned-aircraft entries differ from a supplied Freelance aircraft.
Route — Dep / Dest / Alternate
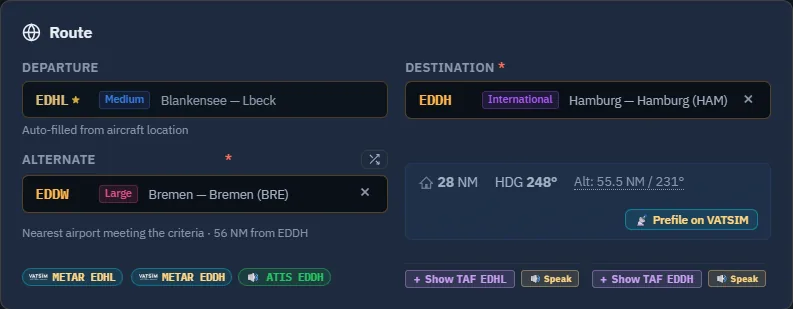
The route block has three ICAO fields:
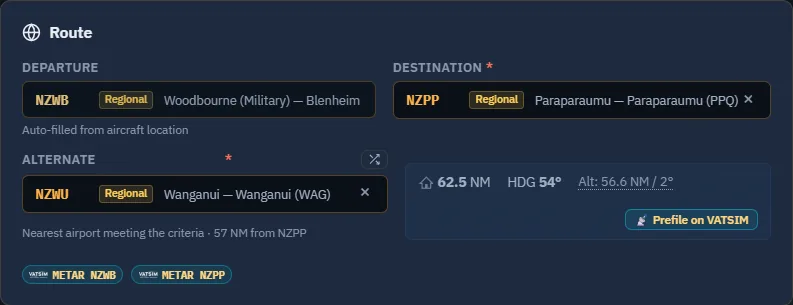
Departure — pre-filled from the aircraft's current parking position.
Destination — pre-filled from the job. For multi-leg charters, Dispatch shows the next leg; override the Destination if you need to divert (fuel stop, weather).
Alternate — required. It's auto-suggested when you set the destination, and a small randomize button picks another sensible field nearby if you don't like the suggestion. It must differ from the destination — the flight won't be created without a valid alternate.
How the suggestion is now chosen. The auto-suggested alternate is no longer simply the nearest qualifying field. In preference order it takes a
civilian airport at least 50 NM away — what a dispatcher would actually file — and only falls back to a closer civilian one, then to a military field, when nothing better exists within 500 NM. A military field is never offered while a civilian one is available, and an alternate closer than 50 NM is flagged rather than silently accepted. The screen tells you which rule it applied, so a surprising suggestion explains itself.
Flying a Regular Route? Dispatch now files the alternate the route declares, instead of picking a nearby field of its own. The server already used that alternate for the AI version of the same flight — and sized the fuel against it — so the two flights of one route no longer diverge.
Each field validates against the airport database as you type.
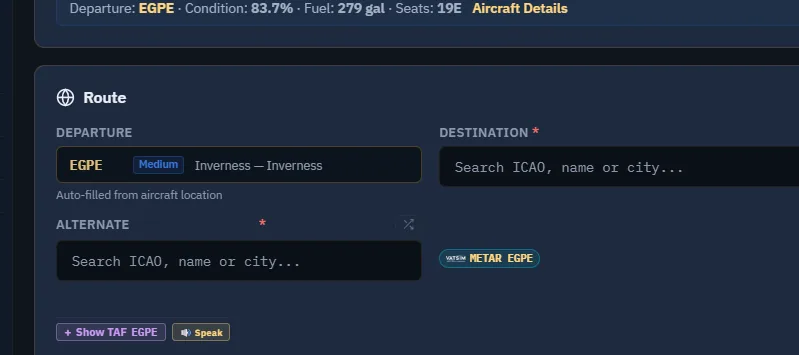
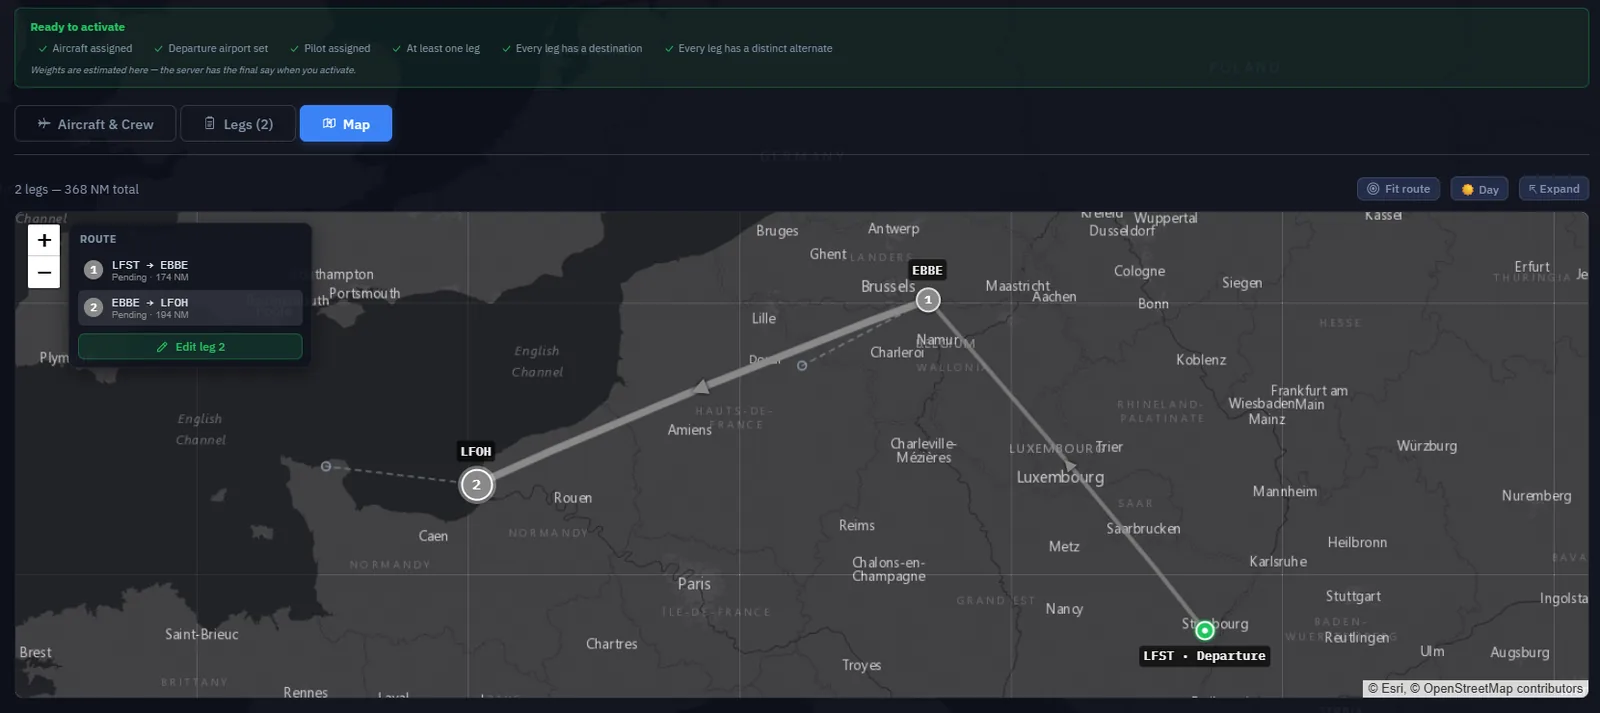
The Route block: departure auto-filled, destination and alternate to fill, and the METAR / TAF chips for the field you are leaving.Route map from the LFST–EDTL example.
Fuel & Weight-and-Balance
The Fuel & W&B panel computes everything you need:
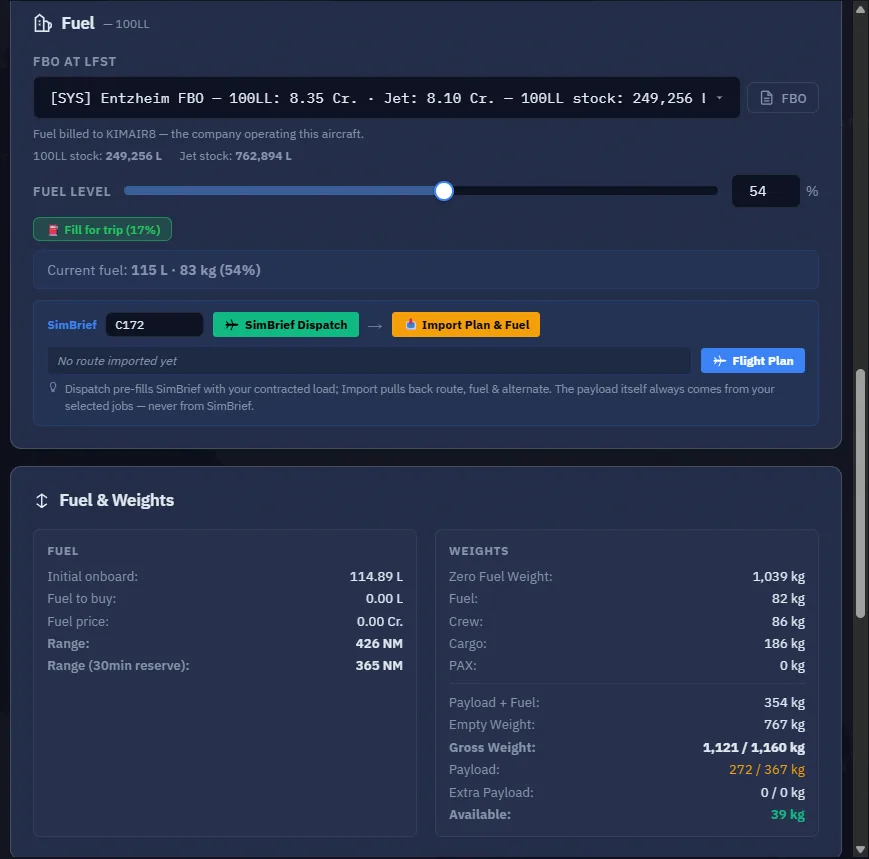
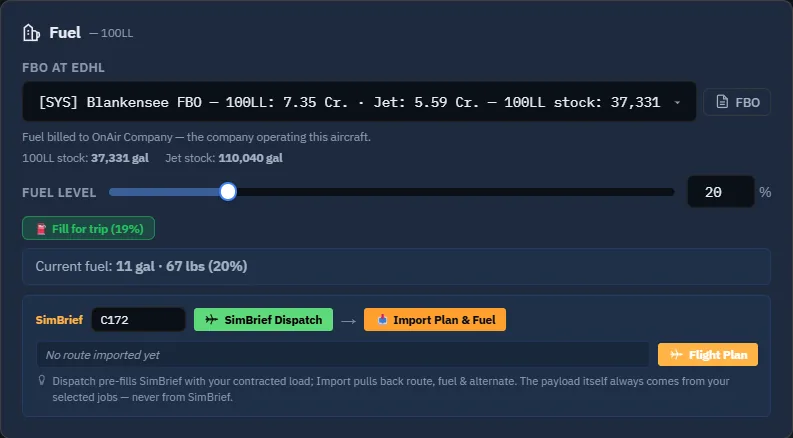
Fuel needed — from the route distance, the aircraft's burn rate, plus reserves. A ⛽ Fill for trip button sets the slider to exactly that; the percentage it will load is written on the button itself (Fill for trip (20%)). You can still slide manually to carry extra (long alternate, holding, ferry).
Which FBO serves the fuel. The picker no longer offers you the cheapest FBO regardless of what it holds. It now selects one that can actually serve the quantity you are ordering, and the dropdown shows each FBO's stock next to its price — so the number that decides the choice is visible before you choose, not after. If Order Refuel & Loading is greyed out, the reason is written underneath it: nothing to order, not enough fuel at that FBO (with the shortfall in figures), or an order already under way.
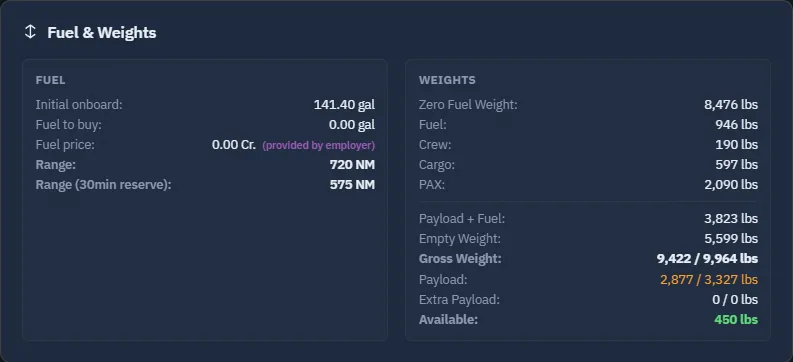
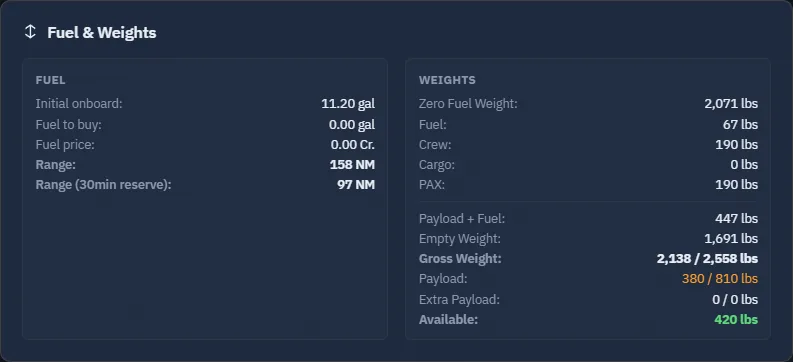
Weight breakdown — empty weight, payload, fuel, gross weight vs MTOW, updated live as you move the slider. Over the limit = red; fix it before launch.
Fuel and weight panels; check units, capacity and the current billing context.
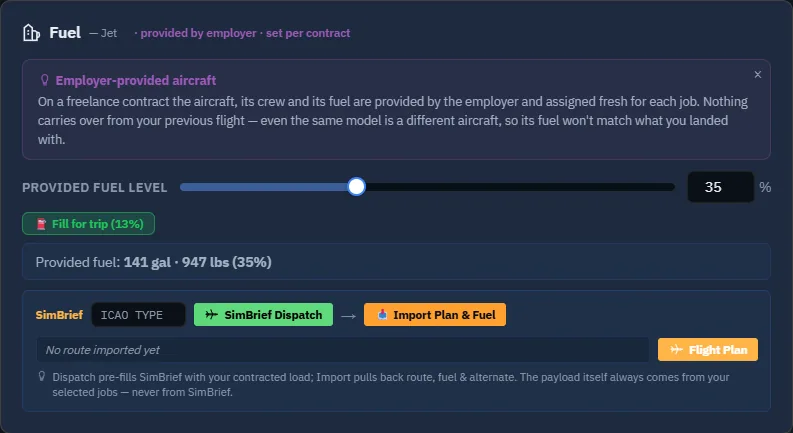
Freelance fuel — provided by the employer — In freelance mode fuel is paid by the client, and each new contract re-rolls the aircraft's fuel state (typically 20–40 % on handover — it does not carry over between missions). The panel shows a reconciliation line comparing the sim's current fuel % to the contract's, so you always know what the auto-set will change. Likewise the crew section collapses to a simple "crew provided by employer" banner — nothing to pick.
Some complex addons block auto-set — Aircraft like PMDG, Fenix, or INI Builds expose a DisableAutoSet flag. The Companion detects it and shows an amber "set fuel & payload manually" banner: use the addon's own EFB/tablet to load fuel and weights, and the Manual Fuel & Weight Balance helper to align the numbers. The Auto-set checkboxes in the conditions panel below are greyed out for those aircraft.
SimBrief & the flight plan file
If you plan with SimBrief, the fuel row carries a SimBrief block with an aircraft-type field and two buttons:
Dispatch — opens SimBrief's dispatch page pre-filled with your route, so you can build the OFP there.
📥 Import Plan & Fuel — pulls your latest OFP and applies its planned fuel to the slider, back-fills the route and alternate, and feeds the navlog to the dispatch map. Drain-protection is smart: it keeps your current sim fuel unless that would make you overweight, in which case it trims to just under MTOW.
The payload never comes from SimBrief — the row says so itself. Dispatch sends SimBrief your contracted load so the OFP is planned around it, and Import brings back route, fuel and alternate. What you actually carry is always what your selected jobs contain; SimBrief cannot change it.
To use it you need either a SimBrief username in Settings or a linked Navigraph account (then no username is needed — the OFP comes through your Navigraph login).
Want the plan inside your aircraft's FMS/GPS? Open the Flight Plan modal (next to the SimBrief buttons) and click Save to sim — it writes the flight-plan file where your simulator picks it up (e.g. MSFS's fms_downloads). The same modal is reachable later from the tracking header, and the full OFP text is available as a tab during the flight (the Fly & register section).
Know your load — briefings
Two briefing layers tell you what you're actually carrying:
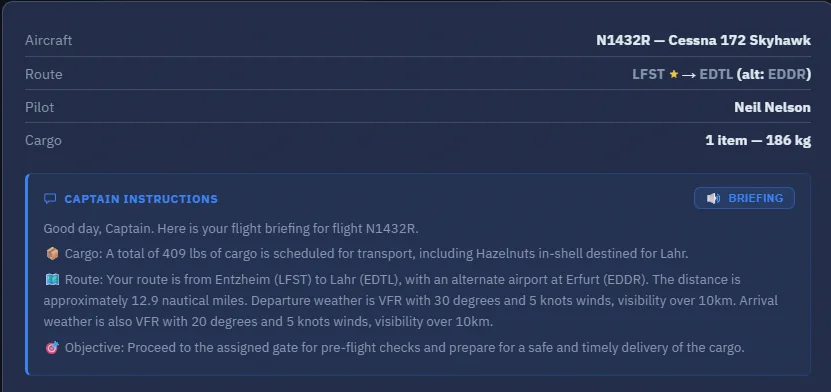
Captain Instructions — an aggregate briefing block on the dispatch form: a per-destination recap of the passengers and cargo on board, with a 🔊 Play button that reads it to you in the radio voice. It never auto-plays — click when you want it.
Mission Briefing — each cargo/charter row carries a briefing button opening the mission's narrative: who's flying, what the cargo is, why it matters. Pure flavour, zero mechanics — but it's what turns "350 lb, KSEA→KBOI" into a story.
In Advanced dispatch, Find Similar Jobs can help fill spare capacity. It is not available in the Freelance charter workflow; see the Find your first job section for this distinction.
Captain Instructions for an example Cessna flight.
Launch — the tracking conditions
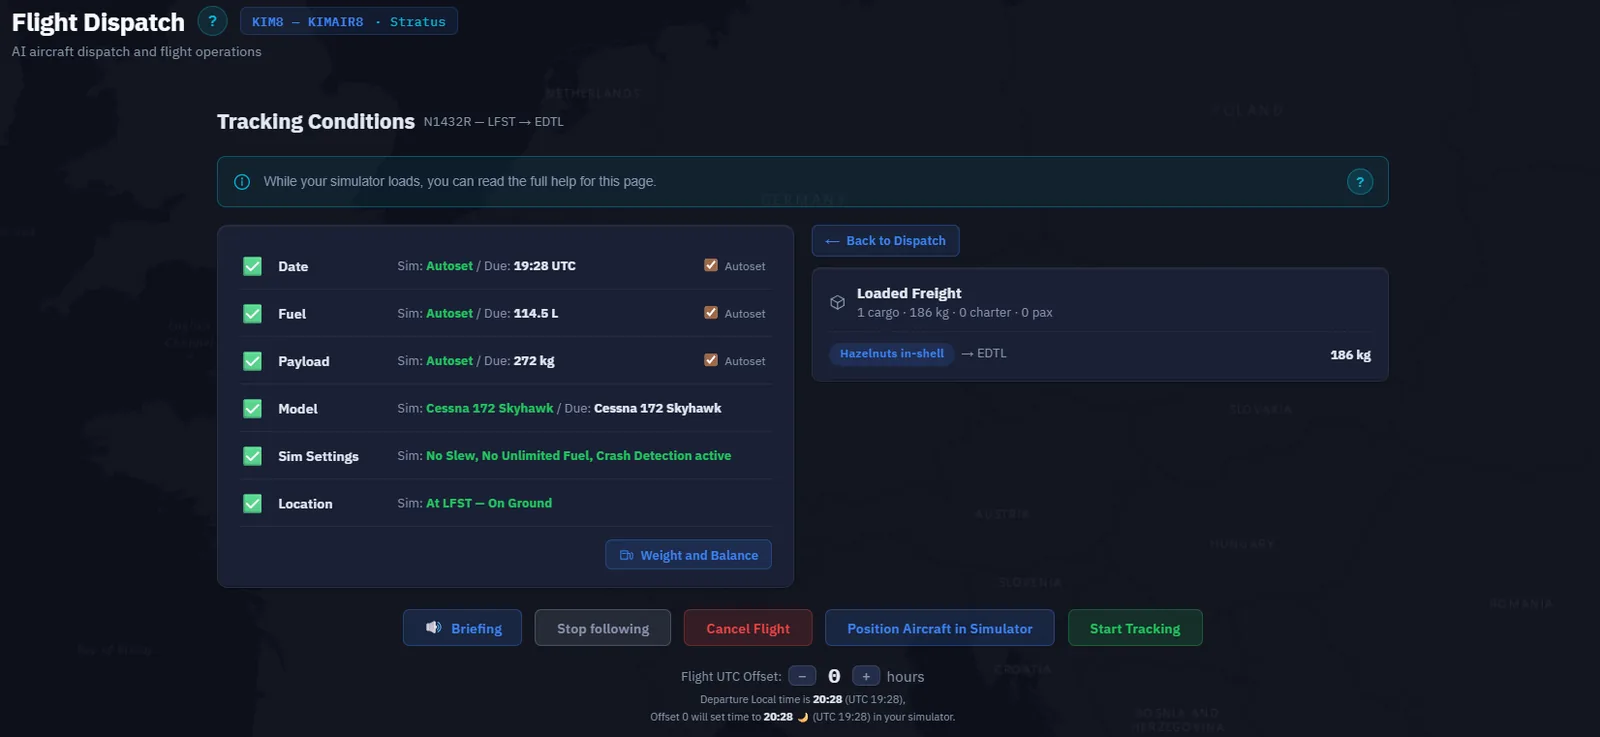
Click Fly in Simulator at the bottom of the form. The Companion creates the flight server-side and the page switches to the tracking conditions panel — six rows, re-checked every second, whose applicable checks must pass before the tracker arms:
#
Condition
What's checked
Auto-set
1
Date
When enforced, the sim date/time must match the expected clock within tolerance.
✅ checkbox
2
Fuel
Sim fuel within tolerance of the planned quantity.
✅ checkbox
3
Payload
Sim payload covers the due payload (small margin).
✅ checkbox
4
Model
The aircraft loaded in the sim matches the dispatched aircraft.
❌ load the right aircraft
5
Sim Settings
No slew, no unlimited fuel (and crash detection on, on survival worlds).
❌ fix in the sim options
6
Location
Sim within ~4 NM of the departure airport, on the ground.
❌ be at the field, on the ground
Date-check exceptions — Outside a Resume flow, the date check is disabled for gliders and when the company does not force simulator time. A disabled check does not require you to change the sim clock. Resume has its own time and position requirements.
You never have to start on a runway. The Location row asks for one thing: on the ground, within ~4 NM of the departure airport. Every gate, stand and apron of that airport is inside those 4 NM, so wherever you parked is the right place. As soon as the row is green, you are done — do not move the aircraft.
How the panel works:
Auto-set checkboxes sit on the Date / Fuel / Payload rows — tick them and the Companion writes the right values into the sim when you click Start Tracking (greyed out on DisableAutoSet addons, see above).
The Model row shows the detected aircraft name and a Diagnostic button if the match fails — load the right aircraft in the sim and the row re-greens within seconds.
A Loaded Freight side panel recaps what will be on board, and warns in amber if freight from a previous flight is still loaded.
Position in simulator — optional, and only for when you are somewhere else: parked at the wrong airport, or rejoining an interrupted flight. It never needs to be pressed when you are already at the departure field. The picker offers the real parking stands read out of your own scenery, the runway ends (with the into-wind one marked), where your aircraft actually is, and the airport reference point — pick one and the aircraft is placed there, Location row green a second later. Resuming an interrupted flight, it targets the last known position instead.
Leaving slew afterwards — on MSFS / Prepar3D / FSX the positioning goes through slew mode, which keeps the airframe from being damaged while the scenery loads. Until you leave it, the Sim Settings row stays red. The slew toggle is Shift+Z on MSFS 2024, and Y on MSFS 2020, Prepar3D and FSX; the dialog tells you which one applies. X-Plane is repositioned directly, with no slew involved.
Sim paused / in a menu — If MSFS is paused or in a menu, an orange badge appears top-right and Start Tracking stays blocked even with all six rows green. Unpause first.
Once everything is green and the sim isn't paused, Start Tracking enables. Click it: the Companion runs the ticked auto-sets, waits a couple of seconds for the sim to settle, and switches to the Tracking view — the flight is officially in progress.
Changed your mind? Cancel Flight aborts without penalty — the mission stays pending and you can come back later.
Tracking conditions satisfied and Start Tracking available.
You now know how to…
Reach Dispatch from a job card or an aircraft's Fly button (it's not a sidebar page).
Read the dispatch map — legs, alternate, and SimBrief navlog at a glance.
Set the Departure / Destination / Alternate route (alternate required, randomizable).
Size the fuel with the slider or Fill for trip + reserve, and read the W&B breakdown.
Pull an OFP with Adjust Fuel, build one via Dispatch, and Save the flight plan to the sim.
Brief yourself with Captain Instructions and the per-job Mission Briefings.
Run the 6 tracking conditions (Date, Fuel, Payload, Model, Sim Settings, Location), use the Auto-set checkboxes, and — only if you are at the wrong airport — reposition the aircraft.
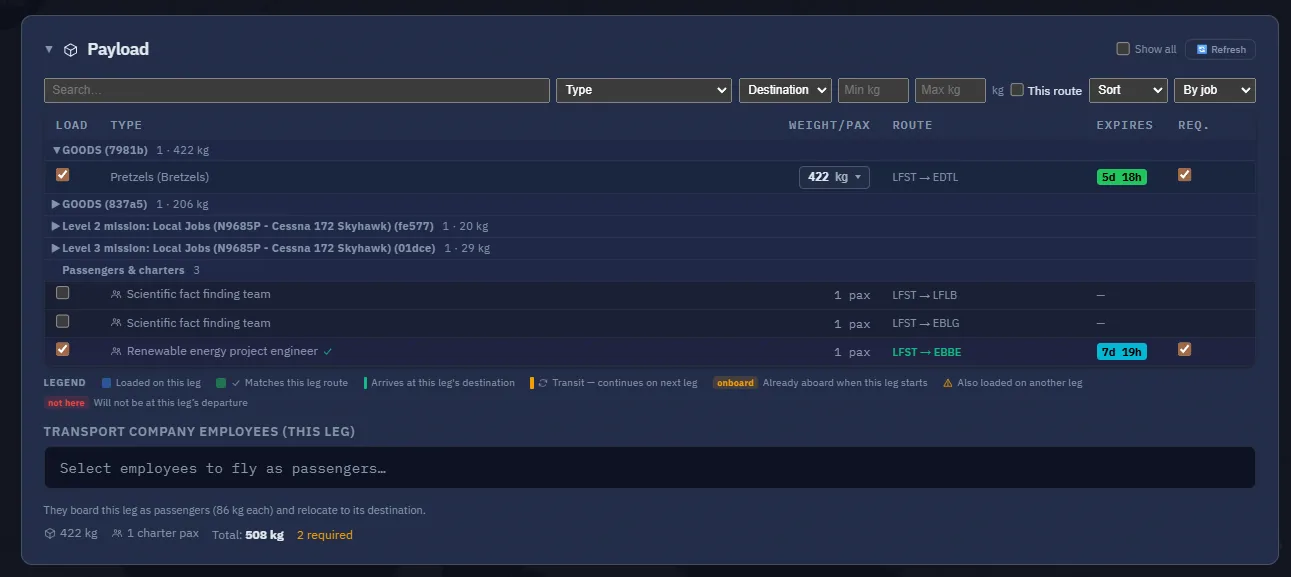
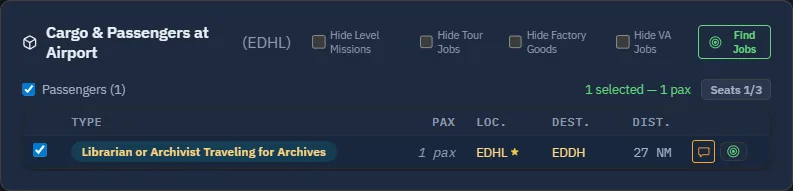
Payload example — Cargo and passengers in an Advanced company. This image illustrates loading, not the tracker tabs.
3.3 Fly & register the flight
Tracking has started — off you go. This section covers what happens during the flight (including a few things that may happen to you mid-air), the possible interruptions, and the key moment at the end: registering the flight server-side so your pay, XP, and reputation are credited.
Welcome banner — Step 3 This section completes Step 3 of the welcome banner on your Dashboard. Once you've finished it, the step turns green automatically.
The Tracking view — the tabs
Once tracking is started, the Companion shows the Tracking view on the Flight Management page. The tabs across the top:
Tab
Purpose
Overview
The current flight phase in large type + live metrics (altitude, IAS, GS, fuel, heading) + elapsed time.
Map
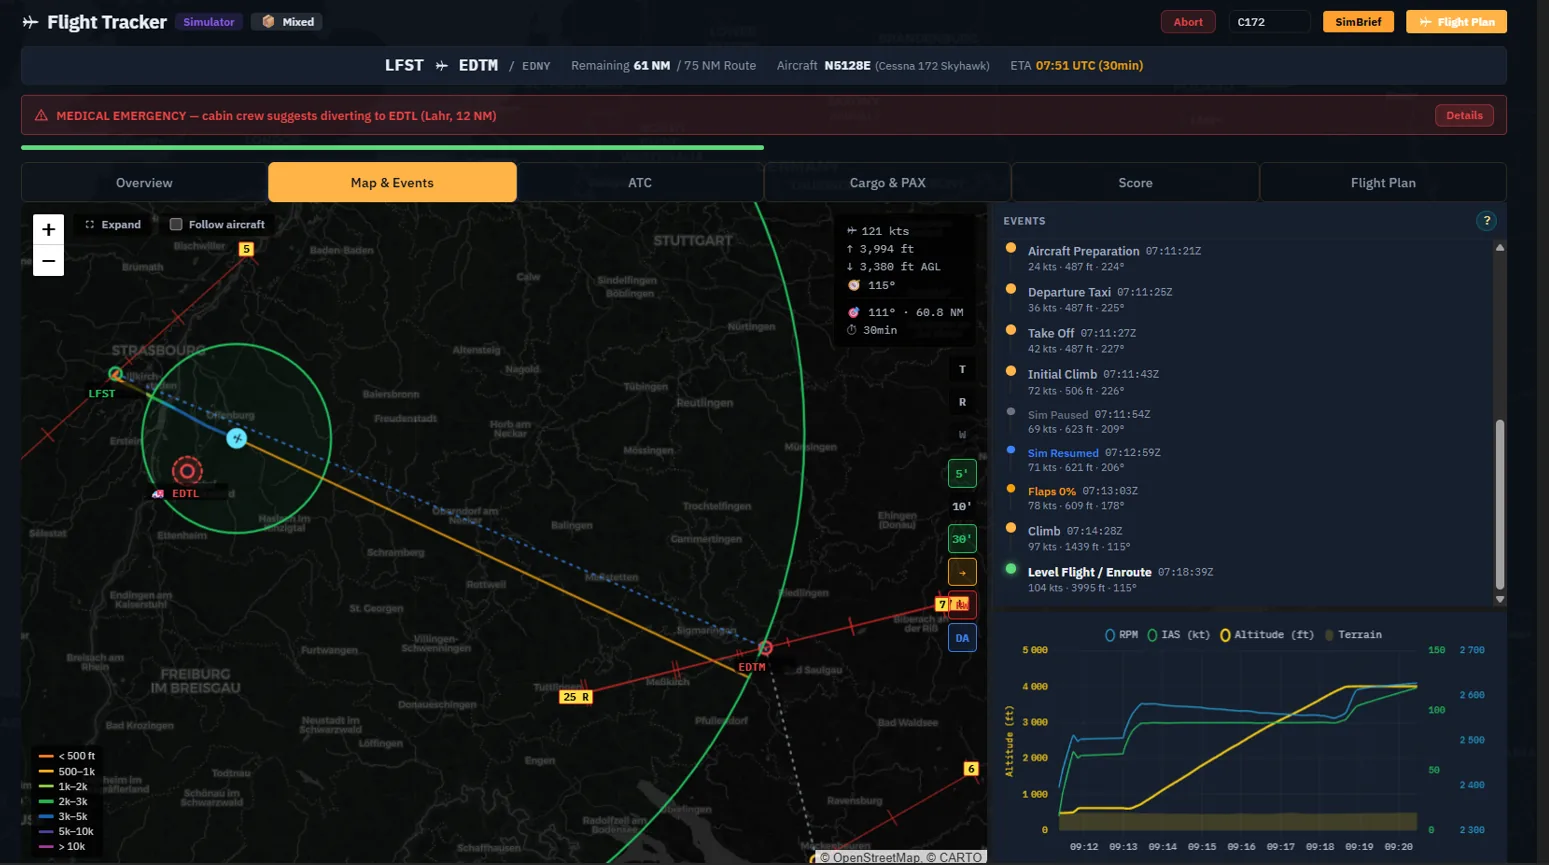
Trajectory drawn live, your aircraft dot, mission airports — with the event timeline in a side pane (takeoff, gear, lights, exceedances…).
Score
Your live flight score — the phase-by-phase marks that will feed the debrief (smoothness, procedures, landing).
OFP
The full SimBrief OFP text, if you pulled one at dispatch — your paper briefing, readable in flight.
Cargo & PAX
What's on board, when the flight carries a payload.
The tracker tabs are visible in the Overview example below.
A. The Overview tab
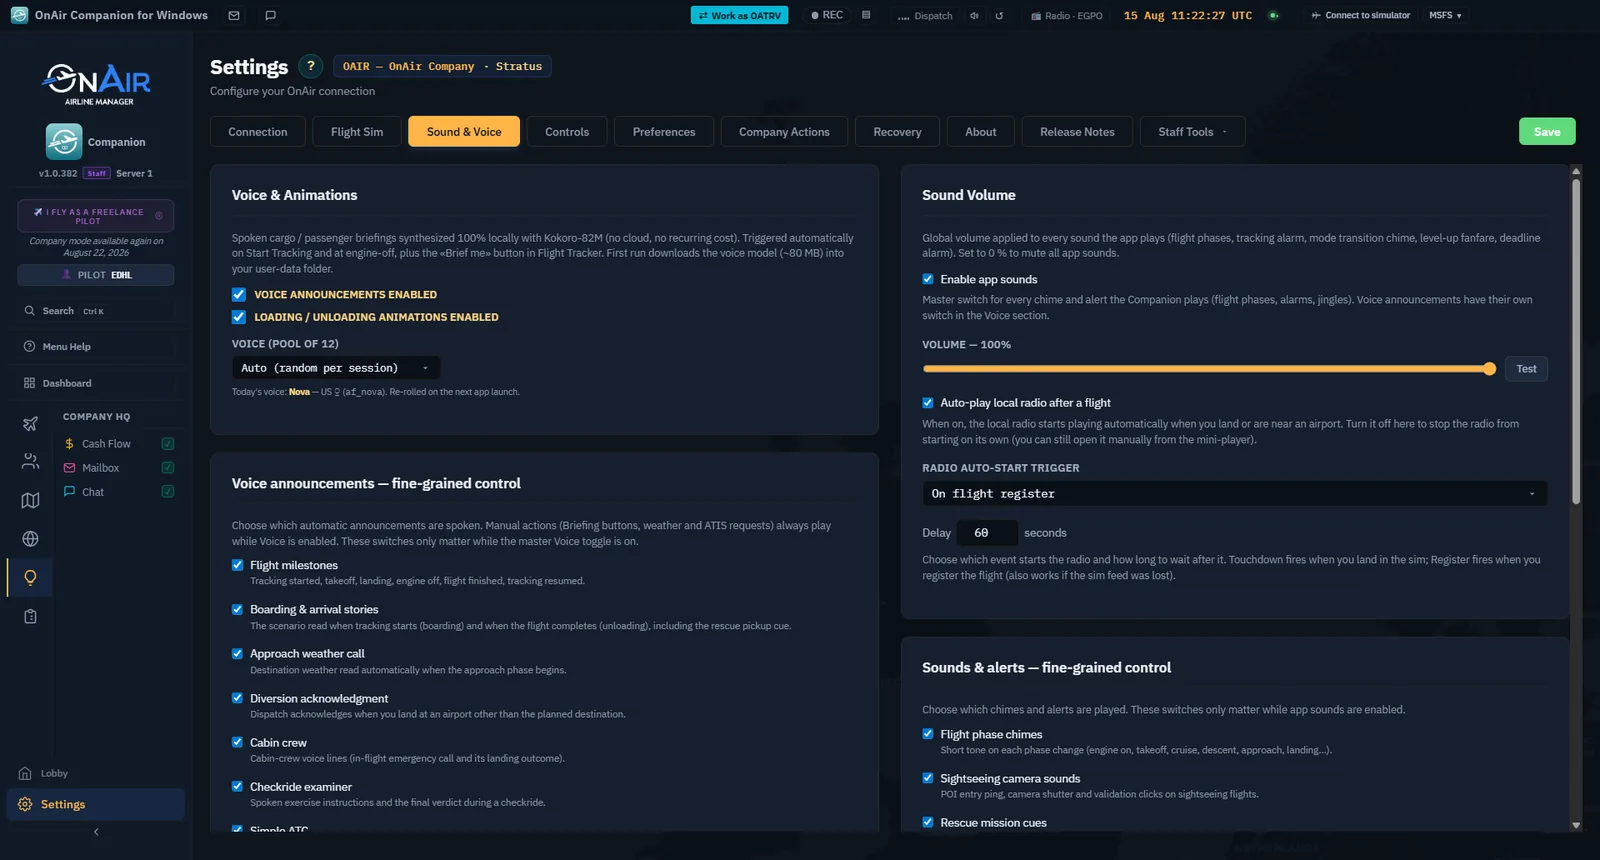
The current phase (Taxi, Climb, Cruise, Descent, Approach…) in large type, with the live numbers under it. Each phase transition plays a short discreet sound — you can disable them in Settings → Sound & Voice.
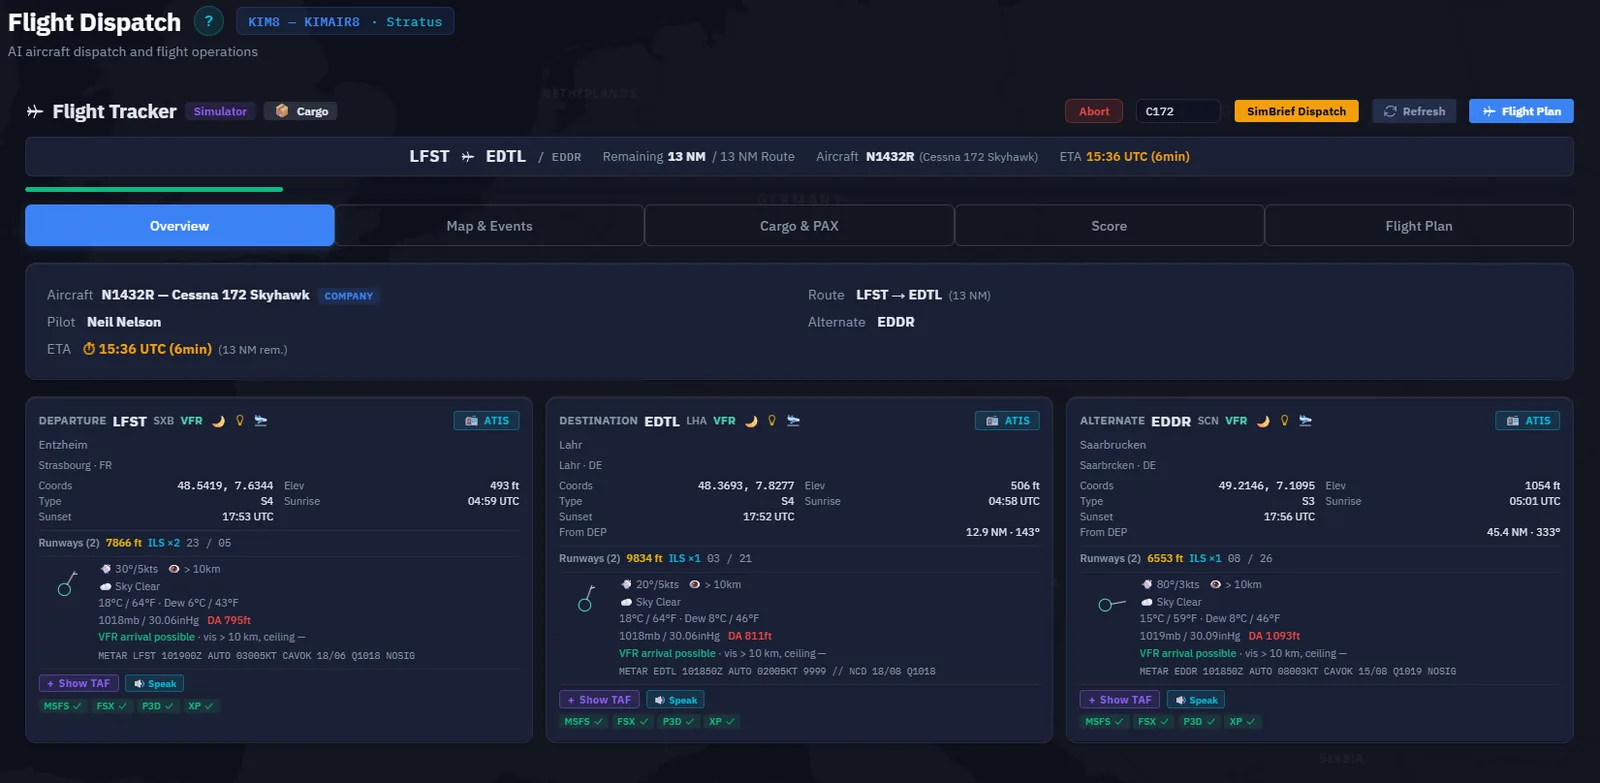
Tracker Overview for the LFST–EDTL Cessna example.
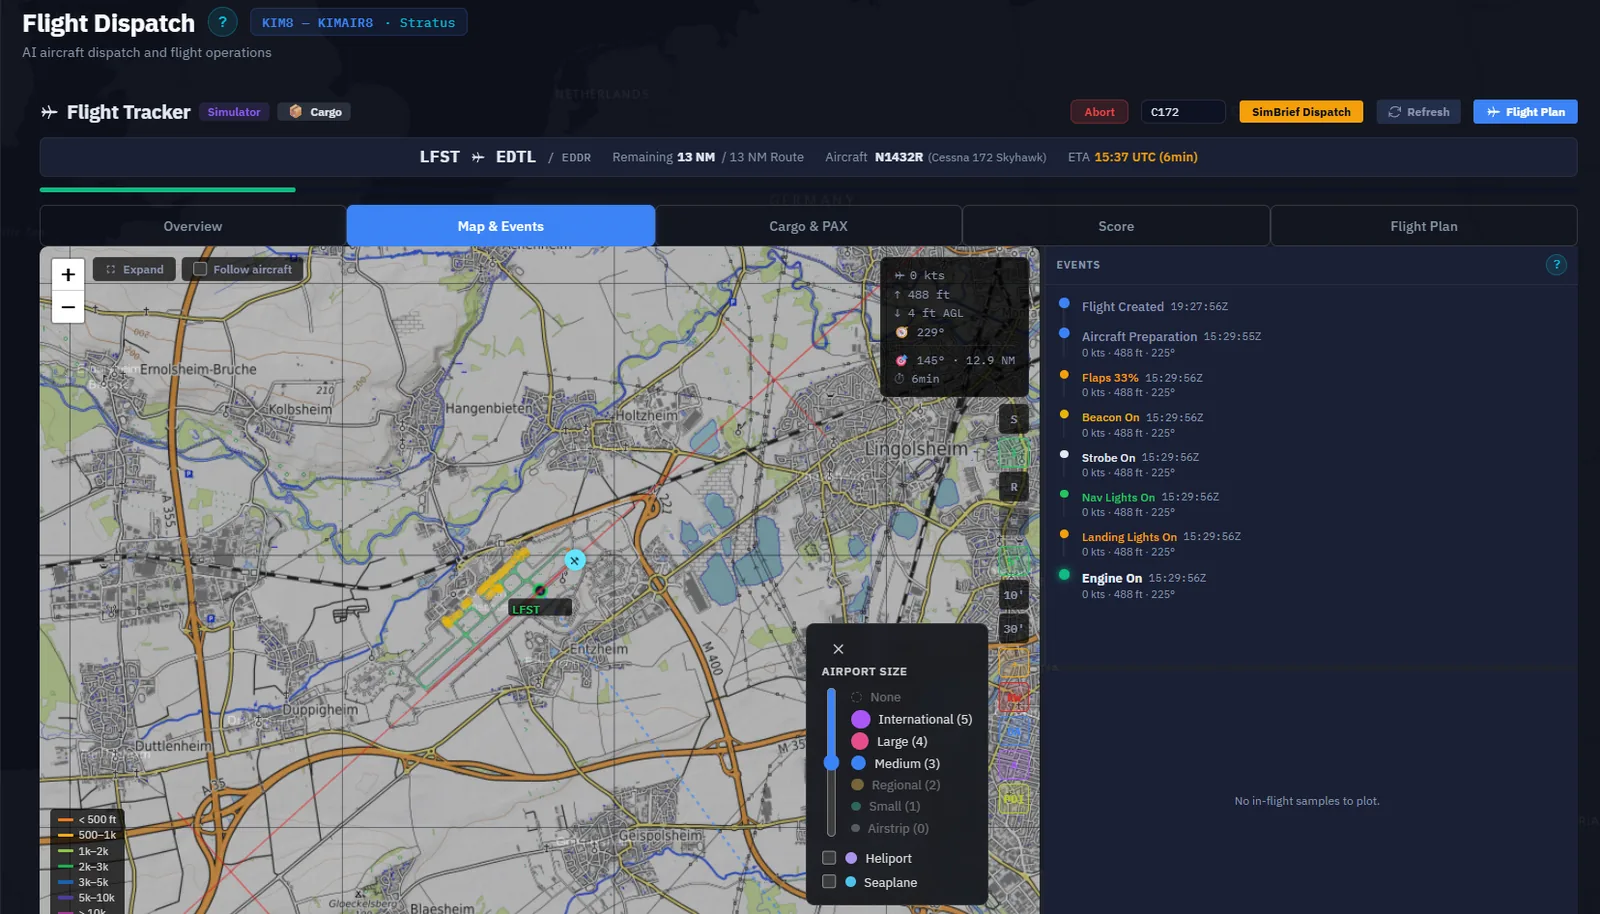
B. The Map tab
The trajectory drawn live on the world map: a dot for your aircraft (correctly oriented), a polyline trail behind, the mission airports marked — and the event timeline alongside, logging every detected event with its UTC timestamp: engine on/off, gear up/down, flaps, lights, takeoff, landing, exceedances (overspeed, stall, excessive G). That timeline is exactly what gets sent to the server at registration.
Map & Events with the recorded trajectory and event list.
The trail survives quit / relaunch — Events are persisted to disk every second. If you close the Companion mid-flight and relaunch it, the trail is rebuilt from the events file. You don't lose your trace.
C. The Score and OFP tabs
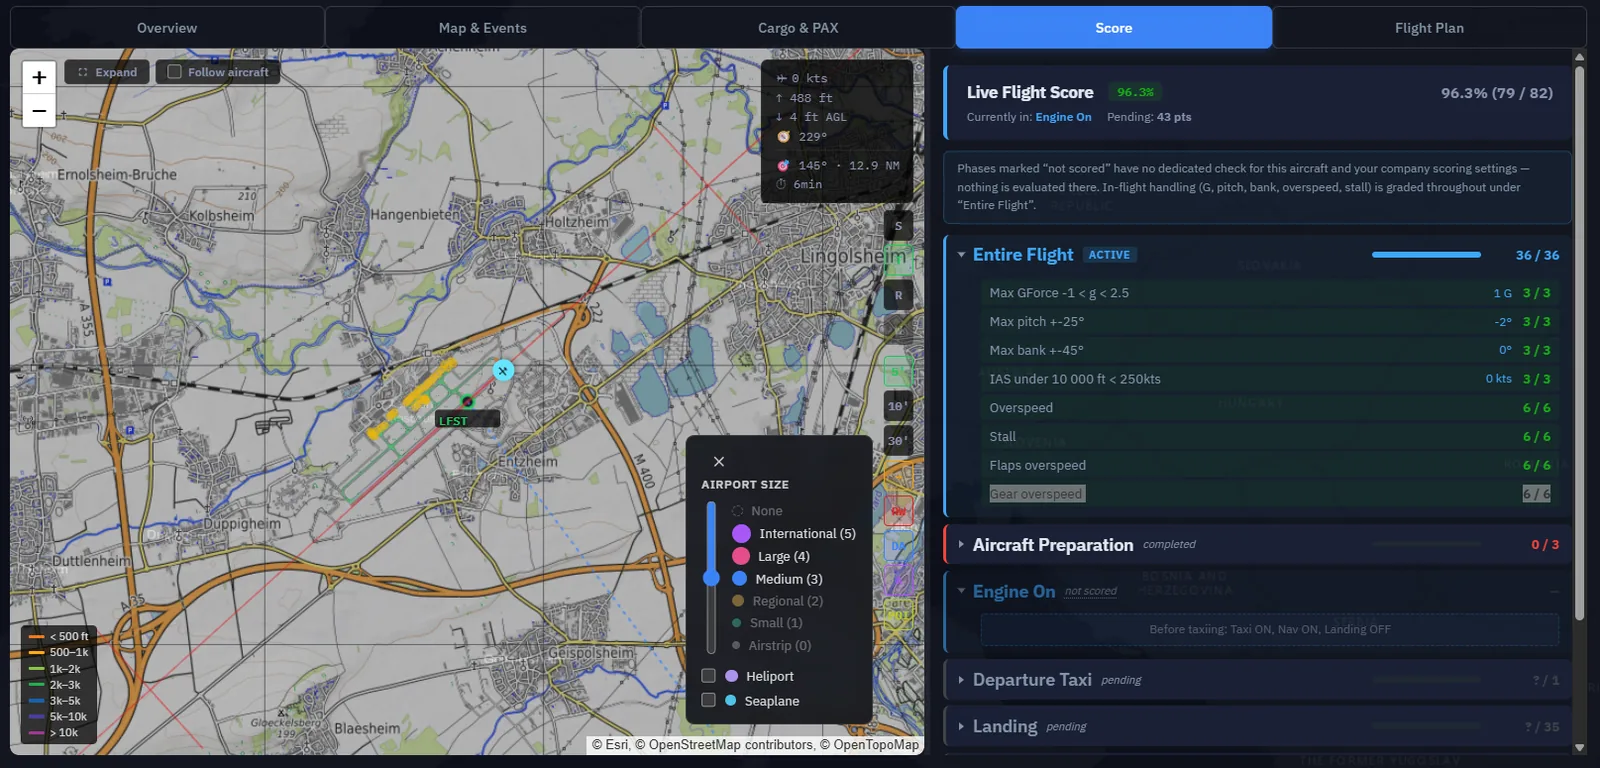
Score — the live scoring of your flight, phase by phase. Watch it if you're chasing a clean score; ignore it if you're just hauling boxes. The final score lands in the debrief below and in Flight Logs.
OFP — the SimBrief operational flight plan you pulled at dispatch, as text. Handy for cruise-level checks without alt-tabbing.
Live flight score alongside the map.
D. Reaching the tracker from any page — the Tracking pill
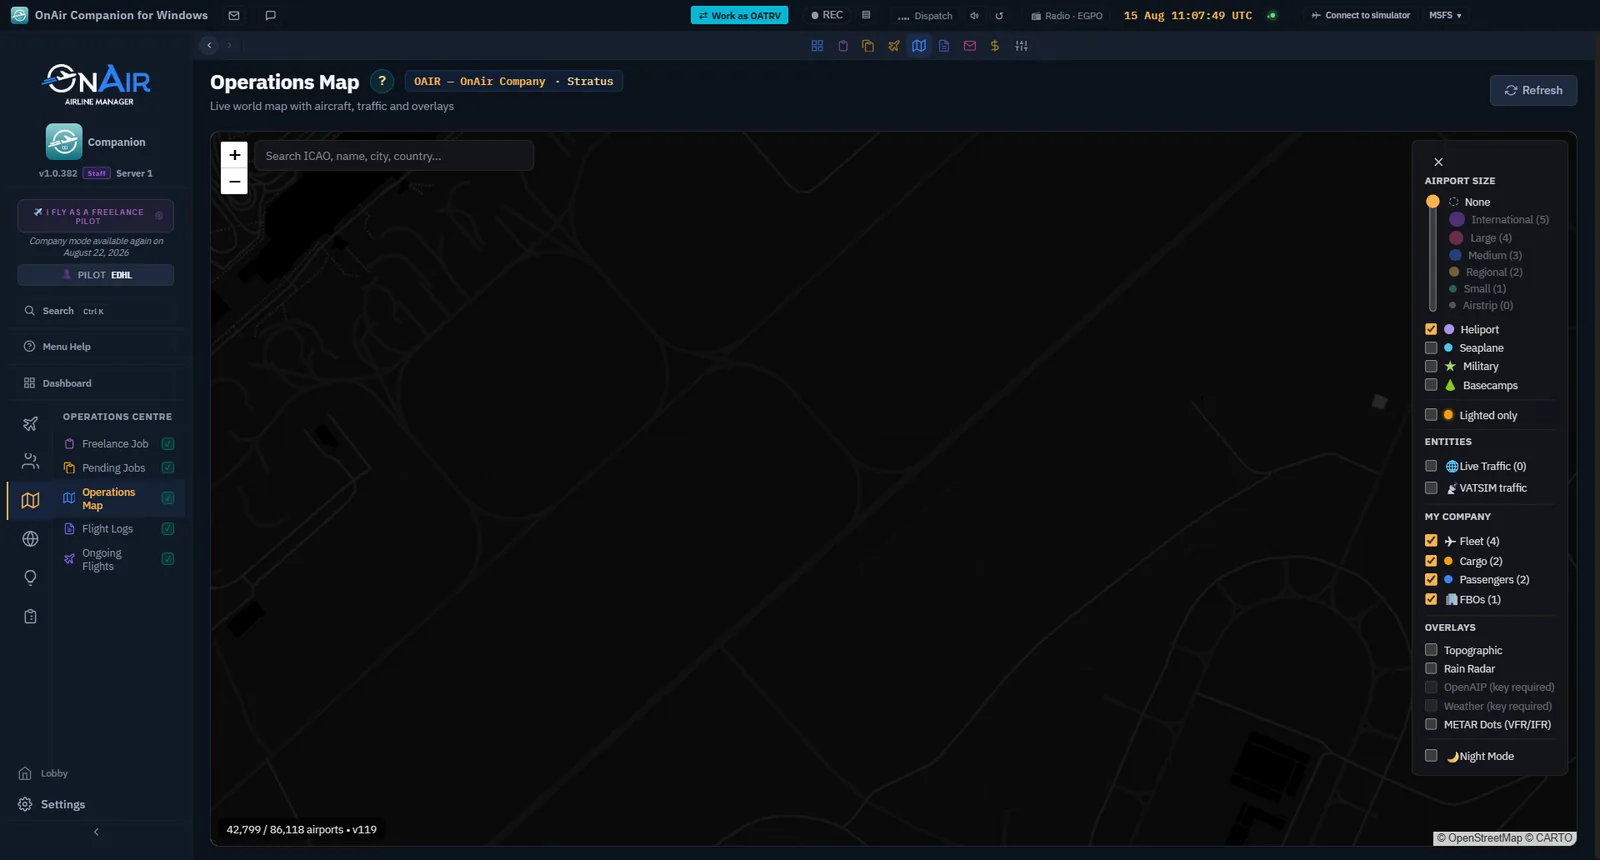
You don't have to stay on this page. As soon as tracking starts, an orange pulsing Tracking pill appears in the top bar. It is visible on every page — Pending Jobs, Freelance Job, Operations Map, Settings, even the lobby if you relaunch mid-flight.
The pill's label reads "TRACKING IN PROGRESS · <PHASE>" with the color matching the current flight phase.
One click takes you back to the Flight Management page in tracking view — the dispatch form is left untouched in the background.
The pill is disabled while you're already on the tracking view, and disappears when the flight ends (Register, Cancel, Abort).
Title-bar Tracking in Progress indicator.
The Companion talks to you — watches & warp
Three in-flight assists run quietly in the background:
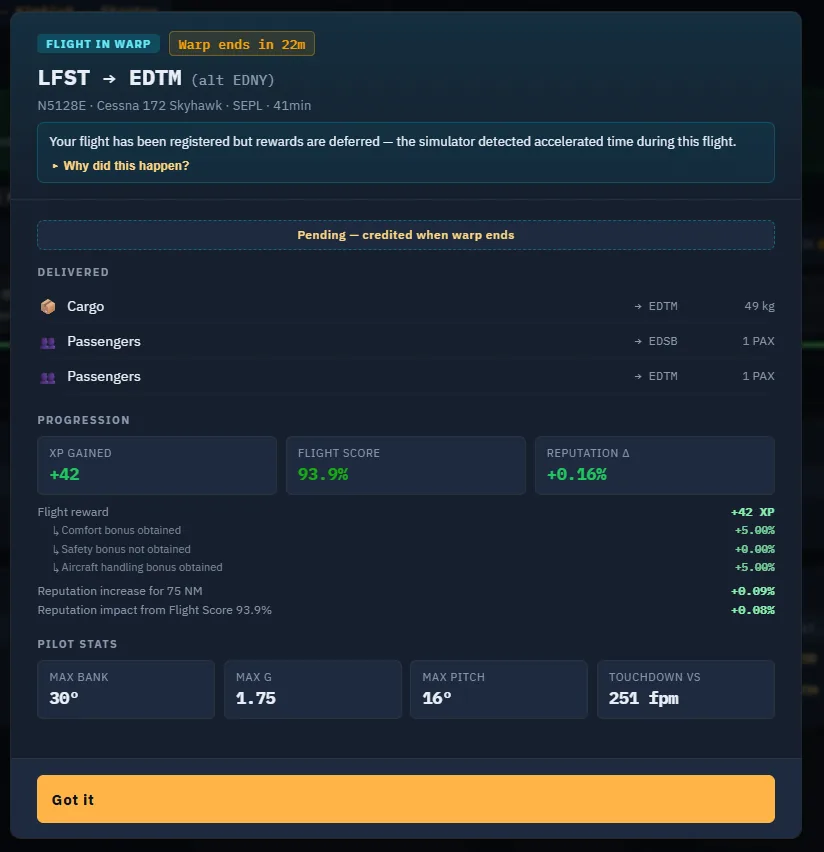
Warp banner — MSFS, FSX, and X-Plane let you accelerate sim time. When simRate > 1, a yellow warp banner shows the current rate and the real-clock time left to destination. Freelance-category flights are exempt from the server's delayed-credit warp rule. For eligible non-Freelance flights with simulator time enforced, acceleration beyond the tolerance can hold the aircraft in Warp and delay pay and XP until the real-time gap is closed. The banner clears at 1×.
Weather watch — if the destination METAR degrades while you're in cruise (VFR → MVFR → IFR…), the radio voice announces it, once per downgrade. No more discovering the fog on final.
Deadline watch — if the soonest cargo/charter deadline on board approaches, you get spoken T-30 and T-10 minute reminders. Time-constrained loads stop being a surprise.
Time-warp warning above the tracker.
Sim paused / menu — your tracker is frozen, not interrupted
When the sim reports a pause, an active pause, or a menu / loading screen, the Companion freezes the tracker rather than interrupting it. Phase detection, max-value trackers, and elapsed time hold in place until you unpause. A short low chime plays when the pause starts, a high chime when it ends (mutable in Settings → Sound & Voice). On unpause the tracker resumes exactly where it was — no phase reset, no event re-fire.
Pause detection is most reliable on MSFS; on FSX it falls back to detecting a frozen sim rate, and X-Plane has no pause badge for now.
In-Flight Emergencies — when the cabin calls
Every so often — and only when the conditions are right (airborne for a while, passengers on board, still far from destination) — the cabin may call the cockpit: a passenger is unwell, a medical situation is developing. It plays out like this:
A cabin chime rings, and the cabin crew speaks the situation over the radio voice.
A banner + a modal describe the emergency and suggest a diversion airport nearby.
You decide: divert to the suggested (or any) airport, or press on to destination.
The outcome appears in the debrief. There is no direct XP or money penalty simply for pressing on. A qualifying medical diversion on a Standard or Freelance flight can instead earn a separate flat XP bonus: the server requires an actual arrival different from the intended destination, at least 30 NM from the declaration point, and a reaction time of 3 to 180 minutes. Its reward calculation is bounded between 25 and 75 XP; not every diversion qualifies. Cargo delivery and deadlines still follow their own mission rules.
Emergencies are off by default and require an explicit opt-in. The toggle and a frequency slider live in Settings → Flight Sim → In-Flight Emergencies (the Daily Tools reference).
Tracker during an emergency, showing the warning, map and event history.
When tracking gets interrupted
The Companion continuously re-checks (about once per second) that your flight stays "clean". These checks can trigger an automatic interruption:
Detection
What the Companion does
Slew enabled
Immediate interruption with a "Slew detected" message.
Unlimited fuel enabled
Immediate interruption — turn it off in the sim's realism options.
Aircraft model changed
Immediate interruption (a different aircraft was loaded mid-flight).
Fuel jumped (beyond tolerance)
Immediate interruption — protects against mid-flight refuels.
Payload jumped
Immediate interruption — protects against mid-flight payload edits.
Sim time jumped (> 30 min forward or > 1 min backward)
3 auto-resync attempts, then interruption if the sim keeps drifting.
When an interruption fires:
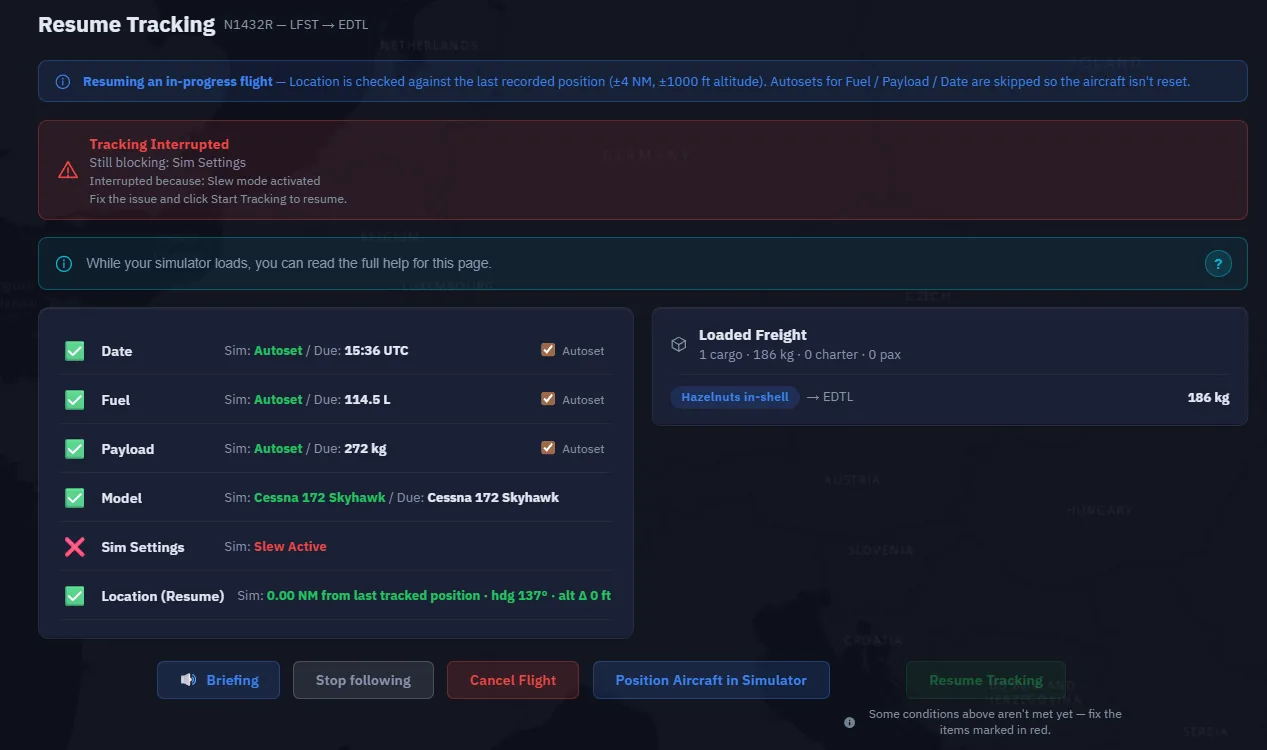
A red banner displays the reason above the tracking view.
The view switches back to the conditions panel so you can see which check broke and fix it sim-side.
Your last known position is memorized so a Resume can put you back where you were.
Interrupted tracking with a red simulator-settings check.
A crash ends the flight — On worlds with crash detection, crashing the aircraft doesn't "interrupt": it cancels the flight automatically. There's nothing to resume — the mission goes back to pending and you'll dispatch again.
Resume tracking after an interruption
Fix the issue on the sim side (disable slew, reload the right aircraft, undo the refuel…).
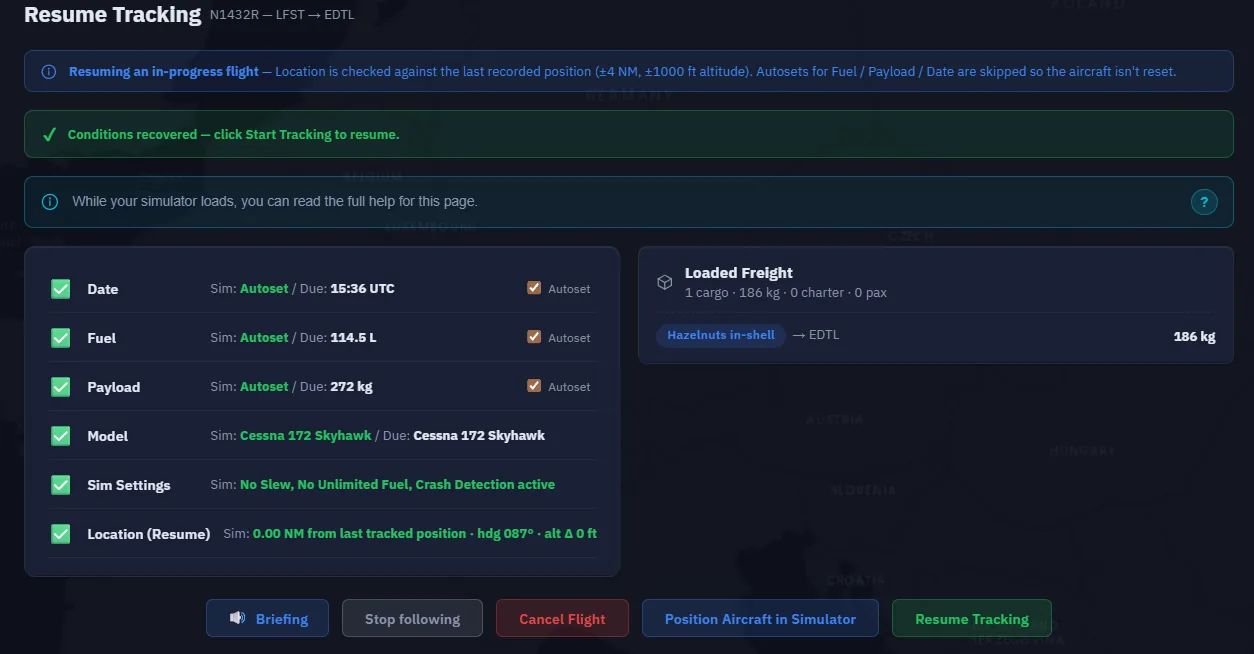
The conditions panel turns green again.
Click Resume Tracking — the flight continues from the phase it was in. No phase reset.
If you were airborne, Position in simulator uses the last known position (not the departure airport) to put you exactly where you were.
Resume after a crash or restart
The Resume above handles a running interruption. Different case: the sim crashed, or you closed and relaunched the Companion mid-flight. The in-memory tracker is gone — but your events were persisted to disk every second.
On the next launch, the Companion detects the orphaned flight and shows a Resume Tracking banner on the Dashboard:
Resume — rebuilds the in-flight state from the events file (phase, max values, fuel snapshot, last known position) and takes you straight back to the Tracking view. The trail on the Map tab is reconstructed too.
Discard — drops the orphaned flight and frees your dispatch slot.
Resume Tracking screen with conditions satisfied.
Tip — Relaunch the sim first if it crashed, then the Companion. The Resume flow expects a live sim connection so it can reseat you at the last known position.
The flight is complete — Register
Land, taxi off, shut down — when the tracker reaches EngineOff, a full-width green pulsing Register banner replaces the tracking actions. One click sends everything to the server.
In a hurry on arrival taxi? The End & Register Flight button appears once you're taxiing on the ground at low speed: it injects the engine-off event and chains the registration automatically — one click total, no second step.
End & Register Flight action.The submitted flight's debrief. Read the actual warnings and results; this example is not a claim that the separate EDHL–EDDH tutorial was completed.
What happens under the hood: the Companion snapshots the aircraft (remaining fuel, condition, position), assembles the flight's performance metrics (max bank, max G, landing rate, exceedances) and your flight score, zips the event log, and sends it all to the server, which credits pay and XP, unloads the cargo/pax, and completes the missions whose full load you delivered.
The debrief then recaps:
Pay credited — plus the on-time rank bonus on a Regular Route leg.
XP gained — with itemized bonus lines when you earned them: soft landing, IMC conditions, short runway, flight-score bonus, airport boost…
Reputation impact — on-time and complete deliveries push it up; lateness and incidents pull it down.
Flight score — the final mark from the Score tab.
Missions completed — and, for multi-leg missions, how many legs remain.
The freelance aircraft disappears — Once the mission is completed, the loaned freelance aircraft is deleted server-side; it leaves your fleet at the next refresh. For multi-leg Regular Routes, the aircraft is kept between legs and only deleted at the end of the schedule.
Tricky cases — what to do if…
Situation
Action
The sim crashes mid-flight
Relaunch the sim, then the Companion. The Resume Tracking banner in Resume after a crash or restart restores the flight from the on-disk events.
You close the Companion but not the sim
Same — relaunch the Companion. The tracker reconnects and rebuilds the trail from the events file.
You crash the aircraft
On crash-detection worlds the flight auto-cancels — the mission returns to pending. Dispatch again when ready.
You want to divert
Land at a suitable airport and register. Review the debrief and the remaining delivery legs: a diversion does not by itself complete loads bound elsewhere. Continue their delivery and check their deadlines. The medical-emergency bonus has its own qualifying conditions described above.
You landed at the wrong airport by mistake
Register the actual flight, review the result and plan onward delivery for loads still pending. Do not assume every diversion carries the same penalty.
You picked the wrong aircraft or mission at dispatch
Cancel Flight from the conditions panel as long as you haven't pushed the throttle. Once airborne, land and register (or divert).
You toggled slew by accident
Disable slew, then Resume Tracking from the conditions panel.
You now know how to…
Follow your flight via the Overview, Map, Score and OFP tabs.
Reach the tracker from any page through the top-bar Tracking pill.
Read the warp banner, and let the weather and deadline watches talk to you.
Handle an In-Flight Emergency — divert or press on, and tune the feature in Settings.
Use the sim's pause safely — the tracker freezes and resumes without losing state.
React to an interruption (slew, unlimited fuel, fuel/payload jump, model swap, time jump) and recover after a crash or relaunch.
Register with one click — including the End & Register taxi shortcut — and read the full debrief (pay, XP bonuses, reputation, score).
A Freelance schedule gives you a sequence of airline flights to fly yourself. You select an airline and a suitable simulator aircraft, inspect a proposal, accept the programme and prepare its current leg. You do not create or manage that airline's company regular routes.
Before you start
Complete your first charter first. You should know how to connect your simulator, prepare dispatch and register a flight. Have the aircraft add-on you intend to fly available in the simulator. A matching aircraft in a selector is not proof that the add-on is installed or connected.
For this exercise we use Sounds Air and a Pilatus PC-12, with two proposed flights around NZWB and NZPP. This is a short learning programme, not a promise that today's catalogue will always contain the same flights. Choose a currently available equivalent if necessary. The Cessna used later for creating company regular routes serves a different exercise.
Step 1. Open the Freelance route browser
1. Open Freelance Job and find its Regular Routes card.
2. If you already have an active programme, inspect it first with Show legs. Only one Freelance route schedule can be active at a time.
3. Otherwise open the route browser. Its title is Apply for a route as a Freelance.
4. Check the company badge before accepting anything.
A charter and a route schedule are separate activities. In the captured company, a pending Cessna charter remained present while the PC-12 route programme was accepted. Do not abandon unrelated work to follow this tutorial.
Step 2. Find an airline and choose your aircraft
1. Type an airline name in Text Filter, for example Sounds Air.
2. Select the matching airline in the list.
3. Under Aircraft Type, select the aircraft you intend to use in your simulator. We selected Pilatus PC-12.
4. Inspect the map and the available Starting Airport choices.
The selected airline's network appears alongside aircraft and programme settings. Filters narrow the catalogue; they do not accept a contract.
The airline's catalogue count and the number of routes loaded for the current view can differ. Work from the routes and airports actually offered by the current selection. From Sim can assist with aircraft detection when the simulator is connected; otherwise choose deliberately and verify the match before tracking.
Step 3. Request a small proposal
1. Start with 2 flights.
2. Choose a short distance interval suited to your available flying time. Our proposal used 30–100 NM.
3. Review Only routes that fit your aircraft and Only speed compatible. A short geographical distance does not automatically mean the timetable is easy for your aircraft.
4. Choose a starting airport, or leave Any (auto) if you want the generator to choose from the available network.
5. Click Schedule Proposal.
The proposed programme contains an outbound and a return flight. Read the airports, UTC times and aircraft choice before accepting.
A proposal is not yet your accepted programme. If no suitable proposal appears, reconsider the airline, airport, flight count or distance filters. Do not loosen a restriction without checking why the original combination failed.
Checkpoint: you can identify the first departure airport, the aircraft and the time needed to complete at least the first flight.
Step 4. Accept and inspect the actual programme
1. Click Accept Schedule when satisfied with the proposal.
2. Wait for the Freelance hub to show the programme under Regular Routes.
3. Open Show legs.
4. Read each leg's status, UTC times, payment and the Weekly Bonus Limit shown above the list.
Our accepted programme uses N6316R, a Pilatus PC-12. The weekly bonus limit displayed on this run was 17 September 2026 at 09:35 UTC. Use the date in your own programme.
Re-read the accepted result rather than treating the preview as the final contract. In this capture, the proposal and accepted schedule showed different distance figures; dispatch subsequently showed the geographical sector as about 62 NM. The tutorial therefore does not treat any one preview distance as a fuel calculation. Use the actual dispatch route and an appropriate operational flight plan.
The current leg can be labelled In progress in the schedule while the aircraft is still awaiting dispatch. That label alone does not prove a flight is being tracked in the simulator.
Step 5. Open dispatch for the current leg
1. Use Fly on the current schedule leg, or Fly Now on its hub card.
2. Verify the supplied aircraft and its departure location.
3. Verify the destination and a suitable alternate.
This Freelance aircraft is supplied for the contract. Selecting it does not buy it for your managed company fleet.The captured flight is NZWB to NZPP, with NZWU as alternate. Reassess airport suitability and conditions before your actual flight.
4. Inspect the selected passengers and cargo. They define the contracted load.
5. Read the crew and fuel information supplied by the employer.
The fuel panel explains the employer-provided aircraft. Do not assume its fuel equals what you left in a previous Freelance aircraft.
6. Review weights and fuel together, including the alternate and reserve appropriate to your flight. Importing a plan must not be mistaken for changing the contracted passenger or cargo load.
The example fits the displayed limits. The figures belong to this aircraft and contract; they are not PC-12 operating instructions.
Checkpoint: aircraft, departure, destination, alternate, selected jobs, fuel and weight agree with the flight you intend to fly.
Step 6. Fly the leg in your simulator
Freelance jobs require a human-flown simulator flight. Dispatch explicitly disables AI launch for this load. Read the Use official Route Schedule option and the displayed simulator-time explanation before proceeding; do not assume local computer time and published UTC departure are interchangeable.
Follow the previously learned dispatch and tracking sequence with the simulator loaded at the correct airport in the correct aircraft. Resolve the actual connection and tracking conditions, then use Fly in Simulator when ready.
CAPTURE TO COMPLETE — simulator required, FR-08. Load the accepted aircraft at the first departure airport, finish dispatch and start a real tracked flight. Capture the tracking Overview with the route and connection state visible, then a representative en-route view. Include the simulator-time choice in a separate capture before starting. Do not substitute a schedule status badge for evidence of tracking. This flight was not performed during manuscript preparation.
Step 7. Register and verify the result
Complete the flight, follow the landing and registration procedure, then return to the programme. Check the flight result, payment and progression shown by the server. A completed flight and a schedule bonus are different results: read any timing or eligibility explanation before attributing a bonus to the landing alone.
CAPTURE TO COMPLETE — completed flight required, FR-09. After a genuine landing and registration, capture the debrief and the updated Current Freelance Schedule. Show the completed first leg and the next available leg. If a bonus is lost or a timing warning appears, capture its actual explanation and document that observed outcome rather than inventing a successful result.
Step 8. Continue or review a blocked leg
Return to Show legs to identify the next action. Resume is for an already active flight; Fly prepares an available leg. Read disabled-button tooltips when the aircraft is busy, in warp or unavailable. Refresh the programme if its state has not yet caught up with the operation you just completed.
Skip discards a leg; Abandon schedule discards the remaining programme. They are not refresh buttons and are not required to inspect the schedule. For this writing exercise the accepted programme was retained, ready for the real flight captures.
You now know how to continue
Generate and inspect a short Freelance programme.
Distinguish a proposal, an accepted schedule and a tracked flight.
Prepare the supplied aircraft and contracted load.
Identify the real-flight evidence still needed to finish the exercise.
Continue with the Freelance daily routine, then choose whether to remain a Freelance pilot or begin company management.
Chapter 05
Build Your Freelance Routine
Your first paid flight proves that the connection, dispatch and registration workflow works. The next goal is to repeat it comfortably and choose activities that fit your time. This chapter is also a stopping point: you can remain a Freelance pilot without taking on company management.
Step 1. Start each session from your current commitments
Open Freelance Job before searching for more work. Inspect the charter, regular-route, VA and tour cards. Identify the next leg, its departure and the aircraft you will need. Resume a tracked flight where appropriate; do not accept new work as a way to recover an interrupted one.
Open Pending Jobs for the accepted-work list. Distinguish work already accepted from offers on a browsing page. Read the actual deadline or programme condition attached to each activity.
Step 2. Use the map to prepare the next sector
Open Operations Map. Locate the departure, destination and your current activity. Use airport details to check the intended location before returning to dispatch. Filters determine what is visible: an empty filtered map does not prove you have no jobs.
Use the map to orient yourself; use the actual job and dispatch screens to verify the load and flight readiness. This existing capture is retained from the earlier Freelance guide.
Step 3. Review the flight you just completed
Open Flight Logs, locate the correct date and route, and inspect its details. Compare the recorded result with what happened during the flight. Confirm registration before assuming a flight earned its reward.
Choose an actual flight record. The illustrated log belongs to an earlier session; it is not a claimed completion of the route exercise in the previous chapter.
CAPTURE TO COMPLETE — real flight required, RT-03. After completing the chapter 3 charter or chapter 4 route, capture its row in Flight Logs and its detailed result. Show the same route and date in both images. Record any warning or penalty actually received.
Step 4. Check messages and progression
Read Mailbox for operational notices and follow relevant links. A message is evidence about a particular event, not a substitute for checking the current aircraft or job state.
Inspect the rank display associated with your activity. Keep the distinctions between pilot qualifications, Freelance progression and company growth in mind: a Freelance reward does not automatically provide every aircraft-class certification needed in Advanced.
Checkpoint: you know where to find the result of the previous flight and what activity you can sensibly do next.
Step 5. Make the interface comfortable
In Settings, inspect Preferences for language, units and presentation. Pick units you can read consistently in your aircraft, then recheck fuel and weight labels in dispatch. Do not copy a number from a screenshot while ignoring its unit.
Inspect Sound & Voice for the audio you want to hear. Test it before a flight rather than discovering during an event that an important notification is inaudible. Controls can move between releases; use the current labels in your installed Companion.
For interrupted or unregistered flights, read the available Recovery information and choose the matching record. Deleting a recovery record is not the normal way to resume tracking.
Step 6. Try an optional activity
Choose one optional branch, not all of them at once:
Tours: open Browse Tours from the hub, read a tour's description and starting location, then inspect its legs before starting. Plan any necessary positioning and read the cost before spending a travel token.
Virtual airline: inspect an available VA and its membership conditions. Joining as a pilot is different from administering a shared company; the advanced collaboration chapter covers that later.
Training: use the available learning and qualification tools to understand an aircraft class or an unfamiliar procedure. Follow the actual prerequisites displayed for the selected exercise.
CAPTURE TO COMPLETE — flown activity required, RT-06. For one selected tour, capture its description and chosen leg before the flight, then fly and register that leg and capture the changed progress. For a VA example, use an authorised membership and assigned flight; show assignment, completion and result without exposing private member communications. These are optional learning branches, not prerequisites for switching mode.
Step 7. Choose your next path
Stay in Freelance if you want supplied aircraft and flight-by-flight commitments. Continue to Advanced when you want to acquire aircraft, hire people and organise company operations, and have time to manage the resulting commitments.
Before continuing, make a short list: aircraft you can already fly, a region you know, typical session duration and funds available. Those four facts become the starting plan in the next chapter.
Chapter 06
Move from Freelance to Career / Advanced
Advanced turns you from a pilot taking supplied flights into the operator of a company. Aircraft, people, recurring costs and positioning become part of your decisions. This chapter prepares a small first operation and walks through the mode controls before you spend on expansion.
Step 1. Decide what your first company will do
Write a simple starting plan:
One operating region with airports you understand.
One aircraft suited to a short mission you can fly.
Your own pilot for the first company flight.
Enough remaining cash for operating expenses after any acquisition.
One manageable mission before a fleet, FBO or factory expansion.
You can add employees and automation after proving this first operation. An industry network is a later optional branch; it is not a prerequisite for earning company revenue.
Step 2. Check world rules and pilot qualifications
Check the company and world at the top of the app. Read the available assistance and AI restrictions for that world. A tutorial using AI must be adapted to your own flying where AI pilots are unavailable.
Inspect your pilot's aircraft-class qualifications. The transition confirmation explicitly warns that Advanced aircraft classes require the applicable certification, and that Freelance flying does not automatically grant those certifications. Begin with a class you can already operate, or complete the required checkride before planning to fly the larger aircraft.
CAPTURE TO COMPLETE — checkride flight required, CA-02. If the chosen first aircraft requires another certification, capture the qualification requirement and the actual checkride briefing. Complete the exam flight, then capture the earned qualification. Do not illustrate success merely by selecting the aircraft in a market list.
Step 3. Inspect your finances before switching
Read the company's available cash. For a first unlock, inspect the actual quotation shown by the server; use the cash bonus and equity calculation explained in Chapter 2. A company that already unlocked Advanced can instead receive a resume confirmation.
Plan what remains after the switch and the aircraft acquisition. Include fuel, maintenance, rentals or loan commitments where applicable, and any employees you intend to hire. A low purchase price is not useful if the aircraft is far away, unavailable or leaves no operating reserve.
Step 4. Open the mode control
1. Open Settings.
2. Select Company Actions.
3. Find Management Mode and confirm that it currently reads Freelance.
4. Read any cooldown message before using Switch to Advanced.
This is the mode control for the current company. Close Company is a separate action and is not part of this tutorial.
Step 5. Read the confirmation that actually applies
Click Switch to Advanced and inspect the response before confirming. In our live example, OAIR had unlocked Advanced previously. The dialog therefore said Welcome back to the captain's seat and offered Resume my company.
This is a genuine return-to-Advanced confirmation, not a first-unlock quotation. It lists the operations and employee commitments that resume, and states the next date on which Freelance will be available.
For a first unlock, record and assess the quotation shown on your own company. For a return, review the fleet and workforce that will resume. The two cases should not be illustrated with interchangeable screenshots.
For a real first-unlock quotation and its resulting ledger, see Chapter 2: KAIR on Thunder was switched from Onboarding to Advanced with 10,000 Cr. starting equity. The OAIR screenshots here demonstrate the separate return-to-Advanced case.
The live return was confirmed on 10 September 2026. The app announced a return-to-Freelance availability date of 17 September 2026. Read your own date; the screenshot is not a permanent calendar instruction.
Step 6. Confirm the resulting mode
Confirm when your plan and the displayed conditions are acceptable. Allow the company to reload. Verify the management-mode badge and the expanded company tools.
OAIR after the real switch. A customised Dashboard can show different widgets; identify the departments and the management mode rather than trying to reproduce every tile.
Return to Settings → Company Actions to verify Advanced and the new cooldown information.
The enabled management mode and the next switching date are visible together. Repeatedly clicking a disabled switch does not remove the cooldown.
Checkpoint: the company is in Advanced and you understand which commitments are now running.
Recognise the Advanced interface
These earlier Companion captures show where to find the mode controls and how the navigation changes. They complement the transition recorded above; their companies and balances belong to different sessions.
Company Actions — the mode controls in an earlier session.Advanced Dashboard — full-page navigation example.Expanded Advanced sidebar.Advanced Departments and Quick Actions — a closer view. Despite its original filename, this is a Dashboard capture, not a rescue board.
Step 7. Make the first operating decisions in order
1. Inspect the fleet before buying. A returning company may already have a suitable aircraft.
2. Locate your pilot and the selected aircraft. Their positions must support the planned departure.
3. Check condition, configuration and the relevant pilot qualification.
4. Compare one suitable mission with the aircraft's capabilities.
5. Reserve enough cash to finish that operation before expanding.
On a returning company, also inspect active Work Orders, routes, FBOs and employees. Resuming full management is not the same as creating a blank company. Preserve useful existing assets and understand their obligations.
Step 8. Know how to take a break
Read Pause Company separately from the mode switch. Its purpose is to suspend company operations; the mode switch changes how you use the company and has its own cooldown. Before either action, inspect ongoing flights and the confirmation shown by the current app. Do not close the company to take a temporary break.
Continue to Acquire and Prepare Your First Company Aircraft. For an existing company, follow the same checks on a suitable aircraft you already have; buying another one is not mandatory.
Chapter 07
Acquire and Prepare Your First Company Aircraft
Choose an aircraft for an achievable first operation, not merely because you can afford its asking price. Your pilot's qualification, simulator add-on, departure airport, condition and operating reserve all matter. A returning company should inspect its existing fleet before acquiring anything else.
Step 1. Define the requirement
For this exercise we choose a Cessna 172 Skyhawk, single-engine piston land, for a short flight from EDHL. The player pilot is already there. Its small capacity makes the first load and weight checks manageable. It is intentionally a training example: larger services will need larger aircraft, different qualifications and more crew.
Check the aircraft class you may fly in Advanced. Select a type that matches an installed simulator aircraft if you will fly yourself. An AI pilot can only substitute when the world and mission allow it and the employee has the necessary qualifications.
Step 2. Compare aircraft types
Open Aircraft Market, enter Cessna 172 in Keyword, and compare the returned types. Use the class and simulator filters if needed. Do not confuse the landplane, amphibian and other variants simply because their names contain the same model number.
The type list shows payload, seats, range and speed alongside an average price. An average price is not a purchase quotation for a particular aircraft.
Inspect the compatible add-ons if needed. Use the action whose tooltip says Buy, rent or lease this aircraft to open offers for the chosen type. Aircraft Lookup and Economic Details serve other purposes; opening specifications does not acquire an aircraft.
Step 3. Search where you intend to operate
In the type detail, verify Search Airport and the search range. Use Search Aircraft Database after changing them. The returned aircraft may be near the search airport rather than at it: compare the actual Airport and Dist columns.
In this search, second-hand Cessnas were at other airports. A new aircraft was offered for delivery at EDHL. The available listings are live observations, not guaranteed future prices.
For each candidate, inspect airframe condition, engine condition, workshop/inspection information, price and location together. A cheaper aircraft can require collection and work before your intended first flight.
Step 4. Compare the acquisition methods
Method
What to assess before confirming
Buy
Immediate price, ownership, location and subsequent operating costs.
Rent
Hourly charge, immediate bond and the displayed return conditions, including base and fuel.
Lease
Weekly rate, duration and the maintenance responsibility shown by the lease terms.
Read the actual confirmation for the selected offer. A blank price or unavailable action means that method is not offered for that airframe. Do not treat a lease as a cost-free way to avoid an acquisition budget.
Our example purchases a new aircraft for 143,640 Cr. at EDHL. The company had 557,662.87 Cr. at the confirmation, leaving about 414,000 Cr. after the purchase. We chose immediate local availability over collecting a used aircraft from another airport. This is an explained teaching choice, not a universal recommendation to buy new.
Step 5. Confirm the exact purchase
Click Buy on the new-aircraft offer, then read the type, delivery airport, price and available cash in the confirmation. Confirm only when these match the plan.
The confirmation belongs to the new Cessna delivered at EDHL. It is separate from the selected second-hand offer visible behind the dialog.
Wait for the result. If the action reports an error, refresh and verify the fleet and balance before attempting another purchase. Do not assume a second click is needed because the first response is slow.
Step 6. Verify delivery in Fleet
Open Fleet and find the resulting registration. Check ownership, type, status and location. In this exercise the new aircraft is N5454S, Owned, Idle, at EDHL, with the displayed airframe and engine conditions at 100%.
The aircraft is now part of the company's fleet. The Freelance PC-12 from the earlier exercise remains a separate supplied aircraft.
Expand the aircraft and inspect its maintenance and capacity information.
Use the delivered aircraft's actual state when preparing its first job. A new aircraft still needs appropriate fuel and a ready pilot.
Step 7. Position the pilot and prepare the next action
If the aircraft is elsewhere, plan collection or positioning before accepting time-sensitive work. Read transport costs and timing before confirming a pilot transfer. Do not confuse moving a pilot with moving an aircraft.
In this example both pilot and aircraft are at EDHL, so no positioning flight is needed. The aircraft starts with fuel aboard, but that quantity must still be checked against the selected mission, alternate and reserve.
Use Find Jobs on the aircraft to prospect from its location. Verify the aircraft filter and the limits applied to the search: the next chapter turns one of those offers into the first company flight.
CAPTURE TO COMPLETE — only if using a remote aircraft, AC-07. If you choose a used aircraft away from the starting airport, capture its location and your positioning plan. Where a real collection flight is required, fly and register it, then capture the new fleet location. Do not replace a ferry flight with a fabricated arrival screenshot. The local-delivery exercise above needs no such flight.
Ready for the first job
You should be able to name the aircraft, ownership method, location, pilot qualification, seats, current fuel and remaining operating funds. Keep the acquired aircraft: selling it to reset the tutorial would remove the asset needed by the following chapters.
Chapter 08
Complete Your First Company Job
Your aircraft is ready at its starting airport. Now choose one mission you can complete with it. Unlike a Freelance charter, this job does not supply the whole operation: your company provides the aircraft, pilot and fuel and carries the operating costs.
Step 1. Search from the aircraft
Expand your aircraft in Fleet and choose Find Jobs. Check the resulting Company Jobs page: the departure airport, From direction, Job Market source and aircraft filter should match your intention.
Our example uses the newly purchased Cessna N5454S at EDHL. It is a small first exercise; do not buy another aircraft if a suitable one is already available.
The aircraft filter helps screen offers, but dispatch remains the place to verify the complete flight.
Read any applied filters. The range indication depends on the current aircraft/fuel assumptions, and a filter can hide otherwise relevant work. Inspect Apply limits, the visible range and weight bounds, passenger count and airport restrictions before interpreting an empty result.
Step 2. Select one uncomplicated mission
For a first flight, choose a short ordinary passenger or cargo mission with a comfortable deadline, suitable destination and manageable load. Avoid adding urgency, specialised handling and several destinations to the same first exercise.
We chose Librarian or Archivist Traveling for Archives, one passenger from EDHL to EDDH, about 27 NM, with a displayed 570 Cr. payment and more than two weeks remaining at acceptance.
This is the observed offer, not a guaranteed future mission. Choose a comparable current job when following the tutorial later.
Read the source marker, legs, passenger or cargo quantity, destination, deadline and eligibility indications. A locked action needs its actual explanation investigated; a high payment does not remove the qualification or aircraft requirement.
Checkpoint: you know what must arrive, where it must arrive and why the aircraft can carry it.
Step 3. Accept and open dispatch
Use Take job & fly to accept the chosen job and open dispatch. Add to pending jobs accepts work for later; it is not a preview button. For this exercise, take only the selected mission so the later loading check is easy to understand.
If acceptance fails or the offer has disappeared, inspect the message and refresh the available work. Do not assume an unaccepted job has been reserved merely because it remains visible on your screen.
Step 4. Verify route and alternate
Check that N5454S is selected and that dispatch starts at EDHL. Confirm EDDH as destination. Inspect the proposed alternate and choose a suitable one for the actual aircraft, weather and fuel plan. The captured default was EDDW.
Airport selection is part of flight preparation. The automatically proposed alternate must still be assessed for the real flight.
Step 5. Assign the pilot
Under Crew & Company Employees, select your own qualified pilot. Verify location and availability. In the exercise Antoine is at EDHL. The first dispatch opened with no pilot assigned; selecting the pilot changed the weight calculation.
The company supplies its own pilot. This differs from the employer-managed crew in the previous Freelance exercise.
Do not use Quick Hire merely to clear a field when your own pilot is the intended operator. Hiring creates an employee commitment and is taught in the next chapter. A larger aircraft may also require a copilot and cabin crew.
Step 6. Verify the selected load
Inspect Cargo & Passengers at Airport. Confirm that the correct passenger job is selected and that its destination agrees with the flight. The captured load is 1 passenger, using one of the aircraft's three passenger seats.
Accepted work is not necessarily loaded aboard merely because it appears in the list. Dispatch selection, preparation and the eventual flight determine what is carried. If several jobs are visible, read their destinations rather than selecting all of them automatically.
Optional later exercise: Find Similar Jobs
For the first flight, keep the single selected mission. Once you are comfortable with dispatch in Advanced Career, you can search for additional loads heading to the same destination.
In the charter cargo section of flight preparation, hover the small target icon beside an undelivered load to identify Find Similar Jobs. The action appears only when the load has a known destination different from the departure airport. It is not available in Freelance mode or as a button on the Search Charters and All Pending Jobs rows.
Click the icon to open a window over dispatch. The search uses the dispatch departure airport and the selected row's destination, so the offers follow the same route. The existing load need not already be aboard. Review remaining capacity, restrictions and deadlines, then use Add to flight on the chosen offer. After successful acceptance, the airport Cargo / Passengers list refreshes without leaving dispatch. Accepting extra work commits the company to delivery but does not itself load it aboard: recheck selection, loading and complete weights before departure.
Coming from the older client? Its target icon opens the jobs page filtered by departure and destination. In the Companion, the search stays in a window over dispatch and the accepted job becomes available in the refreshed cargo/passenger list.
Step 7. Review company fuel and complete weights
Inspect the fuel supplier and the billing explanation. Here the system FBO at EDHL offered 100LL; fuel is billed to OnAir Company, the company operating this aircraft.
Unlike a supplied Freelance contract, company fuel has an operating cost. Existing fuel aboard and fuel to buy are separate quantities.
Choose fuel for the sector, alternate and appropriate reserve. Fill for trip is a preparation aid; it does not replace your aircraft's operational planning or a check of current conditions.
With the pilot selected, the example shows 190 lbs of crew, 190 lbs of passengers, 67 lbs of fuel and 420 lbs Available. These are the current configuration's figures, not values to force into a different aircraft.
Checkpoint: there is a pilot, the intended passenger is selected, and fuel and weight have been checked together.
Step 8. Fly and register
For this first company mission, fly it yourself using the simulator procedure already learned. Read the briefing, resolve all launch conditions, and use Fly in Simulator when ready. Order Refuel & Loading prepares the aircraft without itself completing the flight; the launch actions explain their automatic preparation behaviour in dispatch.
CAPTURE TO COMPLETE — simulator required, CJ-08. Load the matching Cessna at EDHL, finish the operational fuel/weather review and start a genuine tracked EDHL–EDDH flight with the selected mission. Capture the successful tracking state and a representative flight view. The manuscript preparation stopped at dispatch; no flight was launched.
CAPTURE TO COMPLETE — delivery required, CJ-09. Land and register the flight, then capture its debrief, the mission's delivered/completed state and the resulting income entry. Show matching route and date. If the passenger is not delivered, investigate the actual destination, selected load and registration result before writing a successful outcome.
Step 9. Review the operation before expanding
The quoted 570 Cr. is revenue, not profit. Compare the completed result with fuel, aircraft and other applicable costs. Decide how the aircraft and pilot will return or find useful onward work. A short first mission teaches the controls; it is not a promise of an optimal business model.
The captured mission remains accepted for the future real-flight exercise. Do not discard it simply to reproduce the original empty queue. Continue to crew management after understanding this manually flown company operation.
Additional views: browsing and comparing Company Jobs
The earlier prospecting examples below use other airports and companies. They illustrate the same browsing controls without replacing the EDHL–EDDH exercise. Read the current filters and units before using any result.
Company Jobs in the Advanced sidebar.Opening Company Jobs: departure, direction and search criteria.List view for comparing the returned offers.Map view for locating the returned offers.Job Market results with the available offer indicators.The colour legend explains the job indicators.Pending Jobs: accepted work, separate from offers still on the market.
Chapter 09
Hire and Organise Your First Crew
Your first company job can use your own pilot. Hiring becomes useful when you want another pilot available, or when an aircraft needs additional crew. Check your world's rules before building a plan around AI flights: availability of an employee does not by itself authorise every kind of operation.
Step 1. Decide what the next flight needs
Start with the aircraft and departure airport, not the longest list of certificates. Our tutorial Cessna N5454S is at EDHL and needs a pilot qualified for SEPL. We do not add a copilot or cabin crew to this small exercise. Larger aircraft may need both; check their requirements in dispatch before hiring.
Read your existing roster first. A qualified employee already at the right airport may avoid a new recurring commitment. Your own pilot also remains an option for a simulator flight.
Step 2. Evaluate a candidate
Open Employee Management, choose Hire, then use Crew Market. This market recruits people; it is different from the Job Market source on the Company Jobs page.
Use Evaluate on a suitable candidate. Read the role, certificates, flight experience, punctuality, stress resistance and contract terms. Compare the guaranteed weekly amount and the flight-hour rate. A cheap hourly rate alone is not enough to choose a contract.
Our candidate, Hina Hatano, has the SEPL qualification needed for this aircraft. The illustration records a real offer; your current market will differ.
The evaluated permanent contract showed 115.50 Cr. per flight hour and 1,695 Cr. weekly guaranteed. Keep the two labels distinct when budgeting; do not describe the guarantee as a one-time hiring price. Review the alternative Freelance terms separately if considering temporary employment.
Step 3. Set the home airport and sign
For this exercise, select EDHL as the home airport and verify the airport suggestion before signing. Sign Contract commits the company to the displayed employment terms.
We actually hired Hina on 10 September 2026. After returning to Employee Management, select the new employee in the left-hand list; the previous employee can remain selected after hiring.
The employee is Idle at EDHL, with EDHL as home base. This hire has been retained in the tutorial company.
Checkpoint: the roster contains the intended person, contract, certificates and airport. A successful confirmation alone is not the full check.
Step 4. Resolve location and availability
Compare the employee's actual location with the aircraft's departure airport. Our example needs no transport because both are at EDHL. If yours differs, use Transport, select the destination, and read the quotation and arrival time before confirming. Wait for arrival before planning the person as available there.
Inspect status as well as location. A person who is resting, travelling, training or already busy is not interchangeable with an idle person at the aircraft. Change Base changes the home airport; do not assume it instantly transports the employee to the next flight.
Use certificate training when a required class is missing. Read its terms and duration and allow for the absence. Skills training serves a different purpose from aircraft-class certification. Neither should be started merely to dismiss a dispatch warning whose cause has not been identified.
Step 5. Save a reusable crew group
Open Crew Groups, enter a recognisable name and choose Create. We created Academy C172, chose Hina as Pilot, and selected N5454S as Preferred Aircraft. Copilot and cabin-crew fields remain empty because they are not needed for this example.
A group is a saved selection local to this device. It is not a permanent server assignment, a transport order or a flight launch.
Load the group when preparing an appropriate dispatch, then recheck every person. A saved group cannot make an absent employee present, restore duty availability, or supply a missing certificate. On another device, do not assume the preset exists automatically.
Step 6. Validate the actual flight
In dispatch, verify the selected aircraft, crew names, locations, qualifications and available duty/rest information. Recheck weight after changing crew: people contribute to the aircraft's load. Keep the player pilot selected for the simulator exercise in Chapter 8 unless deliberately preparing a separate AI operation supported by your world.
Screenshot placeholder CR04 — first operation with the hired pilot. When an appropriate real operation is ready, capture dispatch with Hina selected, the complete crew validation and the actual start action available in that world. Then capture the flight's resulting status. Do not label a saved group as a completed assignment or substitute a player flight as proof of AI operation.
Step 7. Review after the operation
Return to Employee Management after the flight. Check location, status and flight hours. Before scheduling the next leg, account for rest and repositioning. Do not repeatedly force rest or transport as a substitute for reading a blocking message.
Screenshot placeholder CR05 — post-flight availability. Capture the same employee after the operation, including changed location and duty/rest state. Add the flight reference so readers can follow the transition from CR04.
You are ready to continue when you can identify a qualified, available crew at the aircraft and explain the recurring cost of retaining them. The next chapter applies the same readiness check to the aircraft itself.
Chapter 10
Keep the Fleet Ready to Fly
A purchased aircraft is not a promise of uninterrupted service. Before committing it to another mission, check its location, status, inspections, condition and configuration. This chapter uses N5454S, the Cessna purchased in Chapter 7, to read the workshop and obtain a real quotation.
Step 1. Inspect before scheduling
Open Fleet, expand the aircraft and read its readiness information. Compare inspection time remaining with the operation you intend to fly. Check active failures and aircraft status as well as the condition percentages. An aircraft already in maintenance cannot be treated as available just because its location matches the departure.
Choose Workshop for the detailed maintenance and cabin screen. Our new aircraft shows 365 days before its annual check, 100 hours before its 100h inspection, and airframe/engine condition of 100/100%. It does not currently need the demonstration inspection.
Read the remaining inspection allowance separately from total airframe hours. The two counters describe different things.
Step 2. Find a compatible workshop
Select Workshop FBO at the aircraft's airport. The example offers Blankensee FBO at EDHL. Use its information button to examine the available services before choosing the work.
If no compatible workshop exists at the field, use the displayed nearby alternatives or Find FBO. Check that the workshop covers the aircraft class and the intended operation. An annual inspection needs the appropriate annual capability. Plan a ferry only if the aircraft is allowed to fly, and include crew, fuel and time in that decision.
Screenshot placeholder MR03 — workshop repositioning. On an aircraft that genuinely needs another airport, capture the no-compatible-workshop panel, chosen suitable FBO, ferry dispatch and arrival. Explain the actual aircraft's ability to fly; do not imply a grounded aircraft can always be ferried normally.
Step 3. Select only the work required
For an inspection, choose 100h Inspection or Annual Checkup as appropriate. Annual includes the 100h inspection; do not budget them as two independent mandatory jobs. Failures Repair applies to actual failures and is disabled when there are none.
For condition work, distinguish a repair target from a replacement. Repair Airframe to requests a resulting condition, not a percentage to add. The reachable ceiling can be below 100% on an ageing aircraft. Engines have their own repair/replacement choices. Replacing a sound component just to raise an already adequate number spends money without resolving an operational need.
Step 4. Read the quotation and downtime
Choose Get Quotation. Our demonstration selects a 100h inspection and receives 1,519.54 Cr. with 10h 10m downtime. The detail includes 500 Cr. paperwork and handling, 388.62 Cr. inspection and 630.92 Cr. markup.
This is a quotation, not completed maintenance. We did not start an unnecessary inspection on the new tutorial aircraft.
Review the selected FBO, total, individual operations and time before Start Maintenance. Recalculate the impact on accepted deadlines, work orders and regular routes. A small invoice can still cause a costly missed mission if the aircraft is unavailable at the wrong time.
Step 5. Confirm when maintenance is actually due
When your aircraft needs the selected work and the schedule allows it, use Start Maintenance. Return to Fleet and verify its maintenance status and expected availability. Record the expense in your operating review.
Screenshot placeholder MR05 — maintenance in progress and completion. Use an aircraft with a real maintenance need. Capture the accepted quotation, Fleet maintenance status and ETA, then the aircraft after completion with updated inspection/condition values. Record the elapsed interval; do not use the quote as evidence that the work occurred.
Step 6. Treat cabin changes as operational changes
The same screen controls economic, business and first seats. Read Total Seats, Occupied Surface and Extra Cargo Capacity together. Larger seats use more cabin space; the number of available seats alone is not enough. Configuration also does not remove maximum weight limits.
Keep the tutorial Cessna's three economic seats unchanged for the accepted passenger mission. If adapting another aircraft, quote the change before committing, then reopen dispatch and recheck the mission's passenger classes, cargo and total weight against the completed configuration.
Step 7. Build a small readiness habit
Before each new assignment, check location and status, inspection allowance, failures, crew availability, fuel and payload. Before expanding the fleet, identify where each aircraft class can be serviced. Owning an FBO without the appropriate workshop agreement does not solve that coverage gap.
The next chapter combines maintenance, wages, fuel and acquisition costs into a cash review before expansion.
Chapter 11
Understand Cash, Costs and Borrowing
Before adding an FBO or another aircraft, establish what the company can afford to operate. A job's advertised payment is revenue, not the profit left after flying it. This exercise follows the actual Cessna purchase and crew contract from the previous chapters.
Step 1. Find the acquisition in Cash Flow
Open Cash Flow Statement, refresh, and read Current Cash and the report date. Locate the aircraft purchase in the transaction list. Our example records 143,640 Cr. for N5454S and a current cash balance of 414,022.87 Cr. at capture time.
The ledger belongs to an existing test company with older activities. Those historical transactions are not outcomes of this tutorial.
Use the description filter to isolate an aircraft, fuel purchase or fee. Filtering hides rows; it does not redefine the full-company balance. Read the timestamp in UTC and the income/expense column before interpreting an entry. A returned bond, for example, is not a payment for completing a flight.
Step 2. Separate cash movements from operating performance
The legend distinguishes Revenue, Expense, Financial and Investment. The aircraft purchase is an investment: cash has become an aircraft the company still owns. Fuel, wages and maintenance explain a different part of the operation.
Open Income Statement, choose the date interval and use Display. Compare revenues and expenses for that period, then read net income. Do not look for the entire aircraft purchase price as an operating expense on this page. Use the same dates when comparing periods and check report availability if activity appears missing.
Use Balance Sheet for assets, liabilities and company value at the last financial report. Its report date matters: refreshing that page does not turn an old report into a live cash ledger. Use Current Cash for the immediate spending check.
Step 3. Build a budget for the next flight
Start with the accepted job's expected payment. List the fuel still to buy, applicable aircraft rental or lease charges, crew cost, airport charges and a maintenance allowance. Include repositioning if the return leg has no paying work. Use current quotes and the actual contracts rather than copying another aircraft's hourly cost.
The Chapter 8 job pays 570 Cr. for one passenger. That figure alone does not establish profit. Its short distance is useful for a first flying exercise, but the company still needs to cover its wider commitments.
The hired pilot's contract shows 115.50 Cr. per flight hour and 1,695 Cr. weekly guaranteed. Read the game's actual wage entries when reconciling the guarantee and flight activity; do not mechanically assume every displayed contract number is an additional immediate debit.
Step 4. Look for recurring drains
Switch Cash Flow to Chart to see the trend, then return to the list to identify the transactions behind a movement.
This historical trend includes activity before the tutorial. It is a review example, not a forecast of the new Cessna's profitability.
Check recurring wages, rentals, leases, loans and FBO ownership. An idle rental can still incur contract charges. Aircraft, fuel stocks and buildings may have value while the company lacks enough cash for the next payment. Leave a reserve for those commitments before spending the displayed balance on expansion.
Step 5. Read a loan before accepting one
Open Loans. Compare current commitments with any proposals. Read principal, first payment, duration, remaining weeks, weekly payment, rate and amount due. A skill gate, a loading error and an empty proposal list are different states and call for different responses.
This company already has a historical loan and no current proposals. We did not take a tutorial loan.
The existing loan displays a 11,063.31 Cr. weekly payment. Include it in the company-wide review even though it was not created for N5454S. If considering early repayment, read the actual quotation and penalty before confirming. If considering new borrowing, estimate how the intended activity will cover the weekly commitment, including a period of poor utilisation.
Step 6. Reconcile after a completed flight
After the simulator flight is registered, return to the ledger and locate the mission payment and associated charges. Separate earlier company transactions by time, description and aircraft. Compare the result with the pre-flight estimate and record why it differs.
Screenshot placeholder CF06 — realised first-job result. After completing and registering Chapter 8's actual flight, capture the job payment and relevant fuel, airport and aircraft/crew charges. Add a short reconciliation with the flight reference and date. Do not use an older company's payment as proof that this mission was delivered.
Step 7. Make the expansion decision
Continue only when you know the available cash, recurring commitments, cost of the next operation and reserve left after the proposed investment. If the plan depends on every flight earning the maximum immediately, reduce its scale first. The next chapter uses this check before configuring the first FBO.
Chapter 12
Establish Your First FBO
An FBO is a facility at a particular airport. It can support fuel storage, parking, crew accommodation, workshops and recurring job queries, according to the assets and skills you acquire. Build it where you have a practical operating reason to return.
Step 1. Choose the airport and purpose
Our tutorial aircraft and hired pilot are at EDHL, so this exercise creates a small FBO there. We are not claiming EDHL is the most profitable base. Check airport suitability, nearby work, fuel and workshop availability, then compare those benefits with the recurring cost.
The Cessna keeps the first exercise modest. A larger-aircraft network can use the same approach with different airports, facilities and capacities. Airport size affects the cost and time of development; do not copy the small example's budget into a hub plan.
Step 2. Open a new configuration
In My FBOs, use Build a new FBO at, select the exact airport suggestion and choose Build an FBO. Read the airport confirmation before Proceed. If the FBO agreement skill is missing, resolve the skill requirement first. Workshop and selling rights are separate capabilities.
You can have only one of your company's FBOs at a given airport. If one already exists, configure it instead of trying to create another.
Step 3. Specify useful capacities
In Assets & Selling, read the current, changes and updated columns. We requested 500 lbs cargo capacity, a 100-gallon 100LL tank, two crew rooms and one tiedown. We left Jet fuel capacity, aircraft hangars and workshops at zero.
Capacity is not stock. A 100-gallon tank does not include 100 gallons of fuel, and cargo storage does not create merchandise.
Match the fuel type to the aircraft. Do not pay for every asset category by default. Read skill requirements before planning to sell workshop services; this company's Workshops skill is not unlocked in the example.
Step 4. Quote both the investment and weekly cost
Choose Get a Quotation and review each line. Our real quote totals 41,700 Cr., with an estimated two days and 2,452.94 Cr. weekly ownership. This includes the licence, capacity additions and paperwork; the recurring cost continues beyond the initial construction.
Recheck Chapter 11's cash reserve with the FBO added. Only use Accept when the complete proposal is suitable. After acceptance, wait for the server response rather than clicking again while the button says Applying.
Step 5. Read the construction breakdown
We accepted the quotation and retained OAIR Blankensee FBO. The resulting configuration shows BUILDING and a separate ETA for each asset.
The licence and crew rooms are scheduled around 12 September 2026 at 10:34 UTC. The tank, cargo capacity and tiedown have earlier individual completion times.
An asset with a shorter build time does not mean the whole facility is ready. Read the specific gate shown for the operation you want. In particular, job generation is unavailable while the required licence or workshop construction blocks it.
Step 6. Order fuel after the tank exists
Open Fuel Order. Our 100LL tank is still being built, so ordering is disabled. The Jet row correctly shows no tank.
After completion, enter the quantity you need, account for any pending delivery, and review the total before ordering. The order spends cash and has a delivery delay; a pending order is not usable stock. When it arrives, verify the actual tank level before depending on it for dispatch.
Screenshot placeholder FB06 — first fuel delivery. After the EDHL tank is complete, capture a modest 100LL order, its cost and pending ETA, then the delivered stock. Show the actual quantity chosen; do not imply that constructing capacity filled it automatically.
Step 7. Review the operating facility
Return to My FBOs and check the base, stock, capacity and workshop coverage. A facility without a workshop still requires outside maintenance. If adding a workshop later, verify the relevant class agreement, annual capability and staff/capacity information as well as the new quote.
Screenshot placeholder FB07 — completed base. After the licence finishes, capture the same EDHL FBO without its construction gate and the resulting capacities. Keep the before/after captions dated.
For the next lesson we use the company's already established EGPO base to demonstrate Logistic Queries while EDHL is under construction. This is a change of example location, not an instant completion of this build.
Plan fuel supply before relying on an airport
Your own FBO is supplied by its owner; it does not receive the system's scheduled restocks. System FBOs are checked on Monday and Friday at about 04:45 UTC, using the same rule on both days: stock below half capacity is refilled to a random level between 50 % and 100 %. At or above half capacity, nothing is added. The next pass is whichever day comes first, and a busy FBO can run dry between passes.
Check actual stock before scheduling flights. For a base you rely on, plan your own FBO deliveries or carry a fuel container. When an automatic purchase is needed, one FBO must hold the whole required amount; several small stocks are not combined.
Chapter 13
Generate Recurring Jobs from Your FBO
Once an FBO is operational, its Logistic Queries can bring back work suited to a chosen area and load profile. A query produces offers; you still inspect, accept and dispatch them. This exercise uses the existing OnAir Company Base at EGPO, while the new EDHL facility from Chapter 12 remains under construction.
Step 1. Open the operational base
In My FBOs, choose the base's Configure FBO action, then Logistic Queries. Confirm the airport in the page heading. Read any construction or skill gate before changing a query.
Our example has one slot, Q1. The current screen identifies FBOs Agreement as the skill that increases slot availability, with levels providing 1, 3, 5, 8 and 10 slots. Read the actual skill description in your company before spending points. Additional query output depends on separate capabilities shown by the preview.
Step 2. Define a modest operating area
Choose direction and range before the load. We set SE, 50–200 NM, airport sizes 2–5, cargo 0–0 lbs, passengers 1–2, and preferred seats Eco.
These are preferences for generated work, not a guarantee that every resulting mission fits the tutorial Cessna.
Other directions target selected FBOs or owned FBOs within range. Use those when a deliberate network exists. Check return-leg and military-airport settings individually. A company setting can also exclude small airports even if the query's size fields appear broad enough.
At least one cargo or passenger bound must request work. With all four values at zero, the screen warns that the server will not generate jobs. Avoid combining an extremely narrow sector, distance and size range before checking whether any airports match.
Step 3. Read the preview and save
The example preview finds approximately seven airports, including EGPD, EGPE and EGPF, with an estimate of one to two jobs per generation at the current Enhanced Queries skill level.
Use Validate to save the edited slot. Check that the unsaved-changes indication disappears. The preview helps identify impossible or narrow criteria; it is not an accepted mission or a guaranteed result count.
Step 4. Generate once and read the cooldown
Choose Generate Jobs for Q1 when available. Our actual generation returns one mission and places Q1 on cooldown, displayed as about 4 days 21 hours at capture time.
The screen permits editing the criteria during cooldown. Saving an edit does not reset the timer; it changes the next generation's request.
Read the current per-slot timer instead of assuming every slot refreshes on the same schedule. Avoid repeated clicks while a generation is processing. For an empty result, inspect the preview, bounds, airport exclusions and server message before concluding the feature is unavailable.
Step 5. Inspect the generated offer in Company Jobs
Use Open in Company Jobs. Confirm the FBO Jobs source and the intended base. Generated work waits here for acceptance; accepted work moves to Pending Jobs.
This example returned a three-leg offer labelled “Tourists, Press delegations, Musicians”, with four economic passengers, 760 lbs and 1,953 Cr. total payment. It is not a completed flight.
This is a useful result to inspect precisely because it differs from the simple query preference. The list shows three legs, a 229 NM distance and four passengers in aggregate. Expand the legs and inspect their individual loads, airports and deadlines before deciding whether any aircraft can operate the complete mission.
The retained N5454S filter also shows its current fuel/range assumptions. A mission remaining visible is not proof it fits those limits: review which exclusions are enabled, then validate the actual dispatch. We did not accept this generated offer, because the purpose here was to demonstrate generation and screening rather than add a multi-leg commitment to the first-flight exercise.
Step 6. Accept only work you can operate
For a suitable offer, use Add to pending jobs or Take job & fly, as in Chapter 8. Inspect the whole mission, not just the first leg's payment. Account for the aircraft's position, crew, passenger classes, fuel and deadline on subsequent legs.
Screenshot placeholder FQ06 — suitable generated job accepted and dispatched. Choose a genuinely compatible offer after inspecting every leg. Capture the expanded offer, its acceptance in Pending Jobs and the resulting dispatch. If a different aircraft is used, identify it explicitly and explain the change from the Cessna example.
Step 7. Keep regeneration under control
The Query Assistant can notify or regenerate while Companion is open. Regeneration replaces leftover offers from the query except those marked to keep with the star in Company Jobs. Understand that behaviour before enabling automatic regeneration or using Generate all ready.
Assign a clear purpose to each additional slot instead of duplicating every criterion. After actual operations, compare the generated work with your fleet's practical capacity and adjust the next request.
Screenshot placeholder FQ07 — completed recurring operation. After real flights, capture delivery and payment for the same accepted FBO mission, then document any change made to its query for the next cycle. Keep generation, acceptance and completion as three separate milestones.
The next chapter uses work orders to organise multiple legs and loading actions. A work order cannot make an unsuitable generated mission fit an aircraft; perform that screening first.
Additional views: FBO jobs and facilities
These earlier views complement the FBO exercise. A filtered or empty result is an observed state, not proof that a query has generated jobs.
Company Jobs with the FBO Jobs source and its criteria.Expanded FBO facilities in an earlier company example.
Chapter 14
Create Your First Work Order
A Work Order is a flight schedule for one aircraft. You describe a sequence of legs, crew, destinations and loads. The server prepares each leg in order; it flies eligible AI legs automatically and waits for your simulator flight on hand-flown legs.
14.1 What a Work Order is
Think of it as the difference between flying one taxi run by hand and handing a driver a full day's route sheet.
Where this fits — Work Orders are a Career-mode tool. Open them from Fleet & Hangar → Work Orders. They need a suitable company aircraft and crew, subject to your world's operating rules. If you're still in Freelance mode, see the Freelance guide first — this chapter assumes you've grown into a full company (chapter 6, Growing into Career mode).
What it does for you
A Work Order ties together:
one aircraft (one of yours — not a freelance loaner);
a crew (a pilot, plus a copilot and cabin crew when required);
a starting airport;
an ordered list of legs (the "actions"), each with its own destination, alternate, fuel and cargo.
Once you activate it, the server executes the legs in order. Each leg loads its cargo, flies, lands, and hands over to the next leg — until every leg is done.
The Work Orders page: the status filter, the In Progress and Completed tiles, and one row per work order.
AI pilot vs. you at the controls
Each leg can be flown two ways:
By an AI pilot — the assigned crew flies it automatically, in the background, on the server. You don't touch the simulator. This is the whole point of work orders: passive, hands-off operation.
By you, in the simulator — the leg pauses and waits for you to fly it yourself (the same tracking flow as a normal flight). Useful when you want to hand-fly the interesting legs and let the AI grind the boring ones.
In a company using a simulator, an employee pilot flies AI legs where the world permits them; your avatar waits for you to fly. Thunder is human-only. A company set to operate without a simulator (NoSimulator) executes work-order flights through the server even with an avatar, subject to the world rules. See the crew setup and activation sections below.
One aircraft at a time
An aircraft can only execute one work order at a time. If you create and activate a second work order for the same aircraft, it doesn't run in parallel — it queues behind the first one and shows a Waiting status until the first finishes (§14.8).
A newly created order remains Idle until activated. Only activated orders participate in this queue.
Work Order vs. a single dispatch — Flight Dispatch (chapter 3, Dispatch) prepares one flight that you fly right now. A Work Order schedules many legs in sequence, with automatic execution or a wait for your simulator flight according to the company and world settings. Use dispatch for the flight you want to fly; use a work order for routine runs you'd rather automate.
Before you start — what you need
Plan both the activation checks and the conditions needed when each leg actually starts:
Before activation: Career mode, a non-Freelance aircraft, departure, pilot, required copilot and cabin crew, and defined legs with distinct destination/alternate airports. Check seats, weights and sufficient fuel. Don't load fuel skips refueling, not the need for fuel already on board.
Before departure: aircraft and crew must be in the right place. An activated order can wait for aircraft maintenance, crew rest or Required cargo to become available. An aircraft in the wrong place can instead cause a failed leg.
For unattended flying: use an eligible AI pilot in a world allowing AI flights, or the company's without-simulator setting where permitted. Thunder requires a human flight.
Read the status reason after activation. A waiting order is not necessarily invalid; distinguish an activation refusal, a temporary wait and a Failed leg that needs correction.
You now know how to…
Describe what a Work Order is — an automated, multi-leg flight schedule for one of your aircraft.
Tell the two execution modes apart (AI pilot vs. hand-flown).
Understand why work orders queue one-per-aircraft.
Check the prerequisites before building one (owned aircraft + crew at the departure airport, defined legs, fuel, weight, cargo present).
Rail: Fleet & Hangar → Work Orders. The page has two views — a list (your work orders) and a detail (one work order open for editing). This section tours the list; the detail view is §14.4–§14.6.
The filter bar
Across the top:
A status dropdown — All statuses / Idle / In Progress / Completed / Waiting. Filters the list to one state.
An aircraft chip and a pilot chip — appear when you've filtered by a specific aircraft or pilot (e.g. by arriving here from the Fleet page). Click the ✕ on a chip to clear that filter.
A green Create button (right) — starts a new work order (§14.4).
A red Delete completed button — appears only when you have finished work orders; it clears them all in one go (§14.8).
The filter bar: the status dropdown on the left, Create Work Order on the right.
The stat tiles
Two gauges summarize the operation against the same total:
Tile
Reads
Active
Started orders that are in progress, waiting for cargo, or waiting for the player to fly.
Completed
Orders whose legs have finished.
The denominator is the number of owned work orders, excluding deleted orders. Thus 1 / 2 Active and 0 / 2 Completed describe two orders, one started and neither finished. Active does not necessarily mean an aircraft is airborne. The In Progress status filter is narrower than the Active gauge.
Historical two-gauge view with one started order out of two. Older captures label the first gauge In Progress; current Companion uses Active with the broader definition above.
Two ways to view the list
A Strips / Cards toggle switches the layout:
Strips — a dense one-line-per-order list. Each strip shows the order name + leg count, the aircraft, the route (departure + next leg), the FBO, ETE, total distance, the pilot, and inline action buttons (Pause ⏸ / Activate ▶ / Edit).
Cards — a roomier grid, one card per order, with a progress bar of finished-vs-total legs, the status badge, the crew, and the same actions.
Both show the same data; pick whichever density you prefer. Clicking a strip or card opens the detail view (§14.4).
Strips view: one dense row per work order, with aircraft, status, route, ETE, distance and pilot.
The inline action buttons
On each row/card, depending on status:
▶ Activate — appears on an Idle order that has an aircraft and a pilot. Starts it.
⏸ Pause — appears on an In Progress order. Sends it back to Idle.
Edit — always available; opens the detail view.
These are shortcuts; the same actions live inside the detail view too.
At-a-glance signals on each row
Beyond name, status badge, aircraft and route, every row carries three signals that answer the questions players ask most often — without opening the order:
AI / YOU badge — identifies an employee pilot or your avatar. For simulator-enabled companies, YOU means you fly the prepared leg. A company without a simulator can execute an avatar's legs automatically where AI is allowed; Thunder requires human flying.
Status reason — for a running or waiting order, the server's plain-language reason is shown right on the row (e.g. "Waiting for resting crew to start the leg", "Aircraft is busy"). So when an order looks stalled, the row usually already tells you why — no need to open it (§14.9).
Auto-delete date — completed orders show their removal date. Server cleanup applies to all statuses once StartDate is more than 30 days old; unfinished orders are not exempt. Keep that in mind when retaining an order to reuse its crew.
Two rows, everything readable without opening either: the AI badge, the aircraft, the status pill, the next leg, the FBO, the ETE, the distance and the pilot.
You now know how to…
Filter the list by status, aircraft, or pilot.
Read the Active and Completed gauges against their shared total.
Switch between Strips and Cards.
Recognize the inline Activate / Pause / Edit buttons.
Read a row's at-a-glance signals — AI/YOU, status reason, auto-delete date.
A work order moves through a small set of states. Knowing them makes the whole page readable at a glance — the status colour tells you what's happening without opening anything.
The statuses
Status
Colour
What it means
Idle — the row badge reads Inactive
grey
Created or paused. Not running. This is the only state you can edit in. The status filter calls it Idle, the badge on the row calls it Inactive; same state.
In Progress
blue
Currently executing (or scheduled to). Legs are being flown.
Completed — the row badge reads Finished
green
Every leg is done. The filter and the gauge above the list say Completed, the badge on the row says Finished; same state. A completed order also shows its auto-delete date.
Waiting
yellow
Queued behind another work order on the same aircraft. Starts automatically when the one ahead finishes.
Two states show up at the leg level rather than the whole order:
Leg state
Colour
What it means
Failed
red
A leg hit a problem (bad position, weight, missing cargo…). The order pauses so you can fix it.
Diverted
purple
A leg landed at its alternate instead of its destination (e.g. weather). Needs your attention.
Two work orders, two statuses: one In Progress with its Pause button, one Inactive with its Play button. The tile above counts 1 of 2 running.Completed work order — Finished badge, completed leg and automatic deletion date.
The lifecycle
            create
              |
              v
  +---------- Idle <----------- pause
  |             |
  |           activate (validation passes)
  |             |
  |             v
  |        In Progress ---- all legs finished ----> Completed
  |             |
  |          (a leg fails)
  |             |
  |             v
  +------ pause to fix, then activate again
The key rules:
You can only edit an Idle order. Activating locks it; to change a leg, pause it back to Idle first (§14.8).
Activate runs a validation pass — if anything's missing (no pilot, no alternate, overweight…), it won't start and tells you why (§14.7).
A failed leg pauses the order, not deletes it. Fix the cause, then activate again — it resumes from where it stopped, resetting the failed leg.
When an In Progress order finishes, any order Waiting behind it on the same aircraft is promoted and starts on its own.
Why "Waiting" exists — Because one aircraft runs one order at a time (§14.1). If you activate three runs for the same plane, the first goes In Progress and the other two sit Waiting until their turn.
The colour tells you the state; the row tells you the reason — For a Waiting or In Progress order, the list also shows the server's plain-language reason on the row (e.g. "Waiting for resting crew to start the leg"). So a blue order that isn't moving usually explains itself right there — see §14.2 and §14.9.
You now know how to…
Read the four order statuses by colour (Idle / In Progress / Completed / Waiting).
Recognize a Failed or Diverted leg.
Follow the lifecycle — and remember you can only edit in Idle.
Click Create on the Work Orders page. A new, empty work order opens in the detail view — in Idle status, so it's fully editable. The detail view has three tabs: Aircraft & Crew (this section), Legs (§14.5–§14.6), and Map — a live chart of the whole rotation (§14.5).
Before filling the form, review the activation checks and departure conditions in the introduction. Maintenance, rest and missing Required freight can cause waits after activation; they are not all structural activation blockers.
Name, departure and start date
At the top of the Aircraft & Crew tab:
Name — a label for this work order (e.g. "Monday cargo loop"). Optional, but worth it once you run several.
Departure airport — type the ICAO; autocomplete suggests matches. This is where the first leg starts and where the aircraft and crew must be when the first leg starts.
Start date — when the schedule should begin executing. Quick-adjust buttons (−1h / −30m / +30m / +1h / Now) save you the date-picker dance for small shifts.
Departure = where everything must be — The aircraft and the assigned crew need to be at the departure airport when the first leg starts. The pilot picker highlights crew already at that field in green with a ✓, so you can pick someone who won't need ferrying first.
Assign the aircraft
The Aircraft selector lists your available fleet entries, excluding Freelance loaners. Search by registration, type, or current ICAO, and pick one.
Aircraft required — A work order can't run without an aircraft. The field is marked with a red asterisk and activation is blocked until it's set.
Assign the crew — and decide who flies
Pilot(required) — search your employees; those already at the departure airport show a green ✓, and each entry carries an availability chip — green Available, purple 😴 Resting · until HH:MMz, orange when otherwise busy. Pilots not certified for the aircraft's class are greyed out and can't be picked.
Copilot — required only if the aircraft type needs two pilots (the field shows a red asterisk when it does). Otherwise optional.
Cabin crew / attendants — multi-select, required above 15 charter passengers: one attendant per started block of 50 passengers beyond the first 15. A leg with 40 passengers needs one attendant. The order must cover its busiest leg; deadheading staff are a separate passenger selection.
Who flies depends on both the selected pilot and company/world settings.
With a simulator-enabled company, an employee pilot flies eligible AI legs automatically; your avatar waits for a simulator flight.
Thunder is human-only. Use your avatar and fly the prepared leg yourself; hiring a pilot does not unlock AI flying there.
In a company configured without a simulator (NoSimulator), the server executes the order automatically even with an avatar, where the world permits AI flights.
The AI / YOU badge identifies the selected pilot in the current interface. Interpret it together with these company and world settings. When a manual leg is ready, use Fly this leg to open its flight preparation.
The Aircraft & Crew tab of a new work order: aircraft, departure airport, pilot and crew, then the schedule.
If an order waits for you — Check its status reason and the company/world settings. In a simulator-enabled company, either fly the prepared leg yourself or assign an eligible employee where AI flights are allowed. Thunder requires the manual path.
Copy crew from another order
If you already run similar orders, two helpers save you the re-picking: the Crew Groups quick-bar (the same saved crew presets you use at Flight Dispatch — one click applies a full roster) and a copy the crew helper that clones the crew of another crewed work order. Both appear only while editing (Idle).
Just hired someone? — If a pilot you hired moments ago isn't in the dropdown yet, click Refresh crew in the Crew section header to reload your roster, then pick them.
The pre-activation checklist
Above the tabs, an editable order shows a compact checklist of the structural prerequisites OnAir verifies on Activate: aircraft assigned, departure set, pilot assigned, copilot (when the type needs one), at least one leg, every leg with a destination, and every leg with a distinct alternate.
All green → a "Ready to activate" line.
Anything missing → an amber "Fix before activating" line that highlights exactly what's outstanding.
It's there so you fix everything up front instead of clicking Activate and getting a server error.
Weight is estimated before activation. The Overloaded legs banner names any leg estimated above the limit and its excess, for example 271 lbs. It is an informational warning, not an activation lock: some inputs can differ from the server.
A green structural checklist and an overload warning can appear together. Review the loads and fuel; the server makes the final weight validation. The Companion separately blocks confirmed cabin-crew, seating, route and fuel shortfalls.
The pre-activation checklist. Every red item blocks Activate; the green one is already satisfied.
The Aircraft & Crew summary also shows a computed ETA / ETE for the whole rotation (turnaround time per leg, plus 8 h per forced crew rest) — the same estimate you'll see in the list's ETE column.
You now know how to…
Open a fresh work order with Create.
Set its name, departure airport and start date.
Assign the aircraft, and choose a pilot consistent with the world and company simulation settings — and recognize the AI / YOU distinction.
Add a copilot and cabin crew, copy a roster from another order, and refresh the crew list after a new hire.
Read the pre-activation checklist and distinguish an informational weight warning from a blocking validation.
The order now needs somewhere to go — let's build the leg list.
The Legs tab is where a work order becomes a real route (and the Map tab, right next to it, is where you check it visually). A leg (the code calls it an "action") is one flight: from one airport to the next. You chain legs together, and the work order flies them in order.
Layout
The tab splits in two:
Left — the ordered list of legs. Click one to select it.
Right — the properties form for the selected leg.
Each entry in the leg list is a quick summary: its number, the dep → dest route, the distance, the leg status, and — at a glance — what it carries:
a cargo count and a passenger count (so you can see which legs are loaded);
an amber "empty" marker on any leg carrying no cargo and no passengers — your cue that a leg would fly empty (often not what you intended on a transit run);
a 😴 icon when the leg ends with a forced crew rest.
The Legs tab: the leg list on the left, then the route, the fuel slider and the payload picker for the selected leg.A loaded leg: the card on the left counts 11 items and flags them overweight, while the route, fuel and payload sit on the right.
5.1b How long each leg takes — and the duty day
Since v1.0.398 the leg list also answers the question that used to force you to count on your fingers: how long is this chain, and will the crew still be legal at the end of it?
Every leg with a destination now shows:
⏱ Flight time — cruise time at the aircraft's book speed, plus the **30
minutes of ground turnaround** the server adds to every leg. It is an estimate: no wind, no climb or descent profile.
Since the start — the same flight time added up across the chain, so you
can read the total without adding legs yourself. It turns amber past the 14-hour mark.
ETD → ETA — the estimated off-block and arrival times in UTC, chained
from the order's activation date. A leg that has actually departed re-anchors every leg after it, and a +1 suffix means the next day.
The running total restarts after a crew rest. When it does, the label changes from Since the start to Since the crew rest — the number drops on purpose, because the crew's 14-hour duty window begins again once they wake up. That is also why the header's duty summary counts the longest duty period, not the whole order.
Why 14 hours matters. When employee flight-duty and sleep management is enabled, an AI crew member's duty day runs 14 hours from their first flight of the day. A leg that lands past it is not refused — it is billed:
2 000 Cr per AI crew member, and the server puts the crew to sleep before the next leg, which stalls the order until they wake. The player avatar is exempt from this automatic duty penalty and rest rule. The header tells you whether the order fits (Within the 14 h window) or which leg breaks it (Over the 14 h window — leg #4 crosses it), and names each crew member whose window is already closing.
Add, reorder, remove
Add leg — appends a new empty leg to the list.
Reorder — move a leg up or down; the sequence numbers update automatically.
Remove — deletes the selected leg.
The legs run top to bottom. The first leg departs from the work order's departure airport (§14.4); every following leg departs from where the previous one landed. You only ever set each leg's destination — the departure is implied by the chain.
The chain is automatic — If leg 1 is LFPG → EGLL, leg 2 automatically starts at EGLL. You don't re-enter it. This is why reordering legs matters: it rewrites every downstream departure.
Per-leg properties
For the selected leg:
Destination(required) — the ICAO this leg flies to.
Alternate(required) — a fallback airport, different from the destination. If the destination is unreachable (weather, etc.), the leg diverts here.
Fuel — how much fuel to load, in the selected volume unit. Or tick Don't load fuel to skip fuel loading on this leg (e.g. the aircraft is already fuelled, or you manage it yourself).
Force crew rest at end — after this leg, hold the crew for a mandatory rest before the next leg. Use it to model duty-time limits on long chains.
Note — a short free-text label shown in the leg list ("fuel stop", "return leg"…, max 120 characters).
Search job — saves the order and jumps to Company Jobs, pre-filtered on this leg's departure and the work order's aircraft; pick a job there and it comes back attached to the leg (destination + loads auto-filled). The same flow is described from the Company Jobs side in chapter 8 of this volume.
Alternate must differ from destination — Validation blocks activation if a leg's alternate equals its destination, or if either is missing.
Fuel & weights on the leg form
The leg form runs the same weight-and-balance engine as Flight Dispatch, per leg:
Fuel sufficiency — a green/red note tells you whether the fuel you've set covers departure → destination → alternate + a 30-minute reserve, and, if it's short, the minimum gallons needed. (Hidden when Don't load fuel is ticked.)
Weights breakdown — Zero-Fuel Weight, Gross Weight, Payload and remaining Available capacity, computed from the leg's loads, passengers, crew and fuel — plus the achievable range with reserve in NM and a seat-shortfall check when you've booked more people than the cabin holds.
Overload banner + Find fuel stop — if the leg is overweight, or simply too long for the aircraft's range, a banner says so and offers Find fuel stop: pick an airfield from the picker and the leg is split in two (current leg → the stop, a new inserted leg → the original destination, loads and passengers moved to the final leg). A hint also tells you how many hops the distance actually needs.
The overload warning names the leg and the exact excess — 271 lbs over the 19,000 lbs maximum take-off weight.
5.4b The Map tab — see the rotation
The detail view's third tab, Map, charts the whole rotation: numbered markers on every airport, great-circle arcs per leg, alternates marked. Click a leg's arc or marker to select it, and an "Edit this leg" shortcut jumps you back to the Legs tab on that leg. Two minutes on the Map tab catches the classic "leg 4 goes the wrong way across the continent" mistake before activation does.
Cargo and passengers
Each leg also carries loads (cargo / charters) and passengers. That's a topic of its own — §14.6.
You now know how to…
Read the Legs tab — list on the left (with per-leg cargo/pax counts and the empty-leg marker), properties on the right.
Add, reorder and remove legs.
Understand the automatic departure chain (each leg starts where the last one landed).
Set a leg's destination, alternate, fuel (or Don't load fuel) and crew-rest flag.
Read the leg form's fuel-sufficiency note and full W&B breakdown, and split an over-long leg with Find fuel stop.
A leg that carries nothing still flies — but the point of a work order is usually to move freight and people. On the Legs tab, each leg has a payload picker that pulls from what's actually available at that leg's departure airport.
What's offered
When you select a leg, the picker offers the cargo and charters at that leg's departure airport (remember: the departure is the previous leg's destination — §14.5) plus your company-wide pool — pending missions you've already accepted and merchandise you own — deduplicated into one list. Location still matters at execution time: only what's actually at the departure airport when the leg flies will board.
Filtering the cargo list
Cargo lists get long. The filter row narrows them:
Search — free text over description, type, departure and destination ICAO.
Type — filter by cargo type (the dropdown lists the types present at this airport).
Destination — filter by where the cargo wants to go.
Min / Max weight — keep only cargo in a weight band.
This route — show only cargo whose origin→destination matches this leg's route.
Sort — by weight, type or destination.
Show all (in the section header) — lifts the filters entirely, and Refresh re-reads what is available at the airport right now.
Loaded items are never hidden — Filters only hide unloaded cargo. Anything you've already ticked stays visible so you can always un-tick it, no matter the active filters. A small "N hidden" hint tells you how many the filters are suppressing.
Required vs. optional loads
Tick a cargo or charter to load it on the leg. Each load has a Required flag:
Required on — the leg won't depart until this item is loaded. Use it for freight that must go.
Required off — load it if it's there at execution time, otherwise fly without it.
Multi-leg cargo (transit)
A piece of cargo whose destination is a later leg is transit freight: you load it now, it rides along, and it's delivered when a future leg reaches its destination. The picker hints at this — cargo arriving here vs cargo passing through are distinguishable, so you can plan a hub-and-spoke run where freight changes legs.
"Show all loads" — By default the picker filters the pool to the leg's departure field. Toggle Show all to see the whole pool, including loads currently elsewhere — useful when planning ahead (a previous leg may deliver them there in time), but remember only cargo actually present at execution time will board.
Check every transit leg — Attach the load to every leg that must carry it. At each departure, it must be at the airport and past its availability time. A missing Required load makes the leg wait; a missing Optional load may be skipped. An empty-leg marker is a useful warning when you expected freight.
Passengers & deadheaders
Below cargo, the passengers selector adds people to the leg:
Charter passengers come with charter loads (paying pax).
Deadheaders — your own crew riding along to be repositioned for a later leg or another duty.
Weight & balance
As you load, keep an eye on the leg's weight. The work order won't activate if a leg is over the aircraft's limits — same W&B rules as a normal dispatch. The leg form's weights breakdown (§14.5) shows Zero-Fuel / Gross / Payload / Available live, and the overload banner offers Find fuel stop to split the leg when weight or range is the problem. If you've overloaded, drop a non-required item, split the cargo — or take the fuel stop.
Tight margins on no-fuel legs — Carrying return fuel on a Don't load fuel leg eats into your payload allowance. If the caution turns amber, trim either the cargo or the planned fuel so you're not riding the very edge of the limit.
You now know how to…
Load cargo and charters from what's available at each leg's departure airport.
Filter and sort a long cargo list (and know loaded items never get hidden).
Use the Required flag to gate departure on must-carry freight.
Plan transit cargo across multiple legs — and spot a leg that would fly empty.
Add charter passengers and deadheaders.
Keep each leg within weight & balance, watching the margin caution.
When browsing jobs from a work order, read the handoff banner before selecting freight: it identifies the work-order context and provides the return action.
Job-picking banner for a work-order leg.Company Jobs opened in the work-order picking context.
14.7 Activate & monitor
The order is built: aircraft, crew, legs, cargo. Now you activate it and watch it run.
Activate
Click Activate (the ▶ button, on the list row or inside the detail view). Before it starts, OnAir runs a validation pass. It will refuse to activate and tell you what's missing if any of these aren't satisfied:
a pilot is assigned;
an aircraft is assigned;
a departure airport is set;
a copilot is present if the aircraft requires one;
required cabin crew and the booked passenger seat classes are available;
every leg has a destination and a distinct alternate;
every leg has enough fuel, including estimated carried-over fuel when Don't load fuel is set;
every leg is within weight & balance;
no crew or passenger conflicts.
Fix whatever it flags, then activate again. Once it passes, the order enters execution or waits behind another activated order on the same aircraft, and locks for editing. Maintenance, crew rest and missing Required freight can then cause waits shown in the status reason.
An activated work order: the In Progress badge, the leg count, the Pause button, and the execution history of the leg being flown.
What runs, and where
Execution happens server-side, on a recurring tick — you don't need the Companion open or the simulator running for AI legs to progress. Each leg goes through the same internal steps:
Start — checks the aircraft is at the leg's departure airport.
Loading — loads the leg's cargo / charters / fuel and checks weight.
Flight — creates the flight and either flies it (AI) or waits for you.
Complete — leg finished; the order advances to the next leg.
When the last leg completes, the whole order turns Completed (green).
AI legs vs. hand-flown legs
AI pilot — the leg flies itself in the background. You'll see the leg advance to Finished on its own, and your crew/aircraft move across the world.
Hand-flown — the prepared leg waits for your simulator flight. Use Fly this leg to open flight preparation, check the aircraft, route and crew, then track and register the flight (chapter 3, Dispatch and Fly & register). Thunder uses this path; a NoSimulator company instead executes through the server where AI flights are allowed.
Reading progress
The leg count ("3 / 5") and the progress bar on each card show how far along the order is.
The next leg is surfaced on the strip (departure → destination, distance).
The status reason is shown on the row when relevant (e.g. "Waiting for resting crew to start the leg"), so you can see why an order is where it is without opening it (§14.2).
Per-leg status colours (§14.3) tell you which leg is active, finished, failed or diverted.
An Execution history panel on the order's detail lists each leg with what happened and when — "#1 LFST → ETHS · In Progress · Flying… · Started 09:29z". It is the quickest answer to "what is it doing right now?".
One tick at a time — The server processes an aircraft's order on a timer and guards against overlap, so a leg won't start twice. If an order looks "stuck" for a few minutes it's usually just between ticks — give it a moment before assuming a problem (§14.9).
You now know how to…
Activate an order and read the validation errors if it won't start.
Understand that AI legs run server-side without the sim open.
Tell AI legs from hand-flown legs (which wait for you in the simulator).
Read leg count, progress bar and next-leg on a running order.
Work orders aren't fire-and-forget — you'll pause them to make changes, line several up on the same aircraft, and clear out the finished ones.
Pause (back to Idle)
Click Pause (the ⏸ button) on an In Progress order to send it back to Idle. Pausing is how you unlock it for editing — you can't change an order's legs, crew or aircraft while it's running.
Pause does not undo finished legs. When you activate again, the order resumes from the first unfinished leg (and resets any failed one — §14.9).
The queue — one aircraft, several orders
Because an aircraft runs one order at a time (§14.1), creating and activating a second order for the same aircraft doesn't double its workload. Instead:
The first order runs In Progress.
The others sit Waiting (yellow badge) behind it.
When the running order finishes, the next Waiting order is promoted automatically and starts.
This lets you schedule a whole day — or week — of runs on one plane and let them roll through in order.
One work order In Progress and another Queued on the same aircraft.
Queue order — Waiting orders are promoted by their start date — the earliest scheduled one goes next. Set start dates deliberately if the sequence matters.
Delete one order
Every row and card carries a trash button, whatever the status; the detail view has one too. A confirmation naming the order is asked before anything happens. Deletion is a soft removal — the order leaves your list.
Delete all completed
When you have finished orders cluttering the list, the red Delete completed button (top of the list, only visible when at least one is done) clears them all at once. It's the quickest way to keep the page tidy after a productive run.
Delete completed is bulk — It removes every Completed order in one click, not just the selected one. Anything still Idle, In Progress or Waiting is left untouched.
Automatic cleanup after 30 days — The server removes orders whose StartDate is more than 30 days old, regardless of status. Idle, Waiting and In Progress orders are not exempt. This is separate from the Delete completed button. Copy the crew or details you need before that deadline; do not treat an old order as permanent storage.
You now know how to…
Pause an order to edit it, and resume it later from where it stopped.
Queue several orders on one aircraft and let them promote automatically.
Delete a single order (with confirmation) or bulk-clear all completed ones.
Work orders run on their own, so when one stalls the cause isn't always obvious. The cases below are the ones players hit most often — drawn from real support history and verified against the Companion.
"It's In Progress but my aircraft hasn't moved for days"
Start with the status reason. Two possible causes are a manual leg waiting for you and a crew-rest hold:
The leg is waiting for a human flight. In a simulator-enabled company, your avatar waits for you to fly: use Fly this leg. Where AI flights are allowed, you can instead pause and assign an eligible employee. Thunder remains human-only. In a company configured without a simulator (NoSimulator), the server can execute an avatar's legs automatically; check the actual reason before changing crew.
It's waiting for crew rest. A departed order that's holding between legs is usually waiting for the crew to finish a mandatory rest (especially if a leg had Force crew rest at end set). It's resting, not stuck — give it time, or plan crews so rest doesn't block the schedule.
Read the world and company settings as well as the badge. AI / YOU identifies the pilot; it does not override Thunder's human-only rule or the company's without-simulator setting.
The common cases
Symptom
Likely cause
Fix
Won't activate (red toast with a message)
Validation failed
Read the toast — missing pilot, missing/duplicate alternate, overweight leg, no fuel. Fix and activate again (§14.7).
"Aircraft is busy" / "already at the destination"
A finished leg left the aircraft ahead of where the next leg expects it
Pause, check the leg chain against the aircraft's real position (Fleet page), fix the offending leg's departure/destination, activate again.
A leg goes Failed (red)
Aircraft not at the leg's departure, invalid flight setup or weight exceeded
Pause, fix the cause (reposition, drop a load, adjust fuel), activate again — it retries the failed leg.
A leg Diverted (purple)
Destination unreachable → landed at the alternate
The aircraft is now at the alternate. Decide whether to re-route the rest of the chain, then resume.
Required cargo never loads
The cargo is elsewhere or not yet available
The leg waits. Check its location and availability time; clear Required only if it is acceptable to fly without the load.
Order looks frozen for a few minutes
Just between server ticks
Wait a moment — execution is timer-based. Only worry if it stays put much longer (then see the "hasn't moved for days" case below).
Copilot required error
The aircraft type needs two pilots
Assign a copilot in the Aircraft & Crew tab.
Cargo left behind on later legs
Transit freight must be attached to every leg that should carry it. At each stop, the server checks its location and availability time again. An absent Optional load can be skipped; an absent Required load makes the leg wait. A leg with no attached load can leave empty even if you intended to carry transit freight.
When a load must travel the whole chain, after building the legs re-open each leg and confirm the load actually appears on it before activating. If a later leg shows 0 cargo where you expected freight, fix it before launch rather than discovering it mid-run.
Re-check loads after any change — editing the aircraft (e.g. seating), running maintenance, or rebuilding the route can detach loads from a leg. Pause, reopen each leg, confirm the cargo/PAX are still attached, then activate.
Editing means pausing — including a crew swap
You can't change a running order. To fix legs, crew or cargo, Pause it back to Idle first (§14.8), make the change, then activate again. Finished legs are preserved.
This is also how you swap who flies: to take the AI out of the pilot seat so you can hand-fly a leg (or vice-versa), Edit → Pause → change the Pilot / Copilot → Activate. You can do this even when the current crew is resting.
Crew and aircraft must be in the right place
A common stall is position: the work order expects the aircraft (and crew) at a leg's departure airport, but they're somewhere else — often left at the end of a previous order. Check the Fleet page for the aircraft's current ICAO, and use deadheaders (§14.6) to reposition crew as part of the chain.
Automatic purchase cannot find enough fuel
At leg departure, automatic refueling needs one FBO with enough stock for the entire purchase. It chooses your own eligible FBO first, then your VA's, otherwise the cheapest eligible supplier. An empty or short FBO is skipped; stocks are not combined.
If none can supply the amount, the leg does not start and reports No FBO with enough fuel available at .... Check the departure airport's stocks and arrange supply. The leg's Don't load fuel option (the server's No fuel operation at leg departure) skips the purchase; use it only when you have already planned enough onboard fuel. It does not provide free fuel or remove the need to plan range and weight.
Fuel margins on "don't load fuel at departure" runs
When you tick Don't load fuel on a leg (e.g. a remote field with no fuel) and carry return fuel instead, leave a comfortable weight margin. If you plan right up to the limit, a leg can read as overloaded once the numbers settle, and the order stalls. The leg form's W&B breakdown (§14.5) shows the problem live — trim load or fuel, or use Find fuel stop to split the leg instead of riding the limit.
A newly hired pilot isn't in the dropdown
The Companion loads your employee roster when you open Work Orders, so a pilot you hired earlier appears normally. If you just hired one and they're not yet in the Pilot dropdown, hit the Refresh button in the top bar (or leave and re-open the page) to reload the roster.
Flying for a Virtual Airline — If you operate inside a VA with dispatcher rights, you can execute the VA owner's work orders too. The mechanics are identical; only the ownership differs.
You now know how to…
Recognize a manual leg waiting for you and choose the correct path for your world and company settings.
Tell "waiting for crew rest" apart from a real stall.
Diagnose activation errors, Failed and Diverted legs.
Stop cargo being left behind on later legs.
Pause to edit (including swapping who flies), keep crew/aircraft positioned, and leave fuel-weight margins.
Reload the roster when a freshly hired pilot is missing.
That's the full Work Orders workflow — schedule it, crew it, load it, run it, and keep it tidy.
A regular route turns a flight you want to repeat into a weekly service. You choose the airports, operating days, aircraft, crew and capacity; OnAir creates the scheduled flights for that service. This chapter takes you from an empty route to its first scheduled occurrence, then shows how to monitor it.
15.1 Creating Your First Company Regular Route
We deliberately use a Cessna 172 for the exercise. It is an accessible way to learn the controls with a small load, one pilot and a short flight. Its range, speed and carrying capacity limit the services it can operate. Regular routes are also well suited to larger aircraft, including regional aircraft and airliners: the same workflow supports more passengers, multiple cabin classes, more freight and larger crews. The A380 example at the end shows that change of scale.
You do not have to buy a Cessna to follow along. Use a suitable aircraft already in your company and adapt the airports, capacity and timings to it.
Before you start
You should already know how to prepare and register a normal OnAir flight. For a refresher, read Dispatch — prepare the flight (Chapter 3) and Fly & register the flight (Chapter 3).
Have these ready:
A company in Advanced / company-management mode.
An aircraft in your company fleet, with a configuration suitable for the service. A temporary Freelance aircraft cannot be selected here.
A qualified pilot and any required copilot or cabin crew.
A departure airport, a different destination, and a suitable alternate.
Funds for the aircraft's operation, fuel, maintenance, crew and applicable airport slots.
For AI operation, your world must permit AI pilots. For a flight you will fly yourself, use an aircraft available in your simulator and select your own pilot.
The tutorial service
Setting
Our example
Route number
9001 — use an unused number in your company
Tag
Academy - First Route
Aircraft
Cessna 172 Skyhawk, N14599 in the screenshots
Departure
TFFF, Le Lamentin
Destination
TFFR, Le Raizet
Alternate
TFFM, Marie Galante
Operating day
Thursday
Departure
08:00 UTC
Arrival
09:21 UTC in this example, using the reference-duration adjustment
Departure slot
Starts 08:00 UTC, duration 01:00
Arrival slot
Starts 09:00 UTC, duration 01:00
Offered capacity
2 economy seats, no business or first-class seats, 0 lbs cargo
Pilot
Your own avatar
Operations
Fly in Simulator: Yes, Auto Pricing: Yes
These are training inputs, not a promise of profit or a universal flight plan. Check the selected aircraft, airport suitability, weather and fuel requirements for your own flight. The forecast and reference duration can differ from the values pictured here.
Step 1. Open Routes and understand what you are creating
1. Open Operations Centre → Routes.
2. Check the company name at the top of the page.
3. Locate New Route. Use this for the first exercise; Generate Set is intended for creating a group of services.
4. Click New Route to open Regular Route Settings in edit mode.
New Route is above the list. The screenshot was taken after the tutorial route had been saved, so route 9001 is already visible.
Three objects are easy to confuse:
Object
What it means
Company regular route
The repeating service you configure in this chapter.
Scheduled flight / occurrence
One dated execution of that service, with its own status and journal.
Freelance route
A schedule you take as a freelance pilot; it is a separate workflow.
A company regular route generates its own passenger and freight demand. It does not collect your existing factory goods or accepted Company Jobs. Use dispatch or Work Orders to move those loads.
Checkpoint: you are editing a company route, not accepting a Freelance schedule. Creating the entry does not activate the service. If you abandon a new entry, check the Routes list: the initial inactive entry can remain there.
Step 2. Choose one day, one aircraft and a clear identity
1. Under Activation days, select Thursday for this exercise. Leave the other days unselected.
2. Select your company aircraft under Aircraft.
3. Enter an unused Route #, such as 9001.
4. Enter Academy - First Route in Tag. A tag helps you find related routes later.
5. Optionally choose a colour to recognise the service in the list and planning grid.
Thursday is selected and N14599 is assigned. Start with one weekly occurrence before adding more operating days.
A route describes one direction. TFFF → TFFR does not include the return to TFFF. Before repeating the service, plan how the aircraft and crew will return to the departure airport. A separate return route, a Work Order or a manually flown positioning leg can serve that purpose.
Checkpoint: the selected aircraft is the one you intend to operate, and the tag clearly identifies your exercise.
Step 3. Set the departure airport and its slot
1. In Departure, enter TFFF in ICAO.
2. Wait for the airport name and size to resolve. Check that the result is Le Lamentin.
3. Set Time (UTC) to 08:00.
4. Check Slot Start (UTC) and Duration. For the exercise, use 08:00 and 01:00.
5. Leave the time field to commit what you typed, then check its displayed value.
The departure time and its slot are separate settings. Both are shown in UTC.
Think of Time as the planned departure and Slot Start + Duration as the permitted time window. A slot also belongs to the operating day: a Thursday window is not permission to fly at that hour on any day of the week.
Use the Companion's UTC clock as your reference when comparing the schedule with the current time. A local clock can show a different date near midnight, so check the weekday as well as the hour.
The Companion adjusts slot starts when you change scheduled times. Always re-read them after changing the timetable. Airports of size 0 or 1 have no slot fee or timing penalty; the two larger airports in this exercise use slots.
Checkpoint: the airport is resolved, the time is correct, and the departure falls inside its intended window.
Step 4. Set the destination and a realistic arrival
1. In Arrival, enter TFFR and wait for Le Raizet to resolve.
2. Enter a reasonable arrival time for your aircraft and route.
3. If a duration discrepancy appears, read it. Adjust applies the application's reference arrival time.
4. Recheck the saved time and the arrival slot after adjustment.
In the tutorial, Adjust produced 09:21 UTC; the arrival slot starts at 09:00 and lasts one hour.
The reference duration is a scheduling aid. Your actual flight still needs suitable fuel, weather and operational planning. Do not copy the Cessna timing to a different aircraft without checking it.
Checkpoint: the departure and arrival times differ, and the timetable is plausible for the selected aircraft.
Step 5. Choose an alternate and inspect the map
1. In Alternate, enter TFFM.
2. Wait for Marie Galante to resolve.
3. Check that your aircraft can use it. For your actual flight, also check weather, runway and fuel requirements.
4. Inspect the route map to confirm you have selected the intended airports.
An alternate is required to activate the route. The small alternate in this Cessna exercise is not an airliner recommendation.Use the map to catch a wrong ICAO before continuing.
The alternate also affects the weight estimate because the calculation includes fuel for the leg and alternate. Select it before judging whether the aircraft has enough capacity.
Checkpoint: all three airports are resolved and appropriate to the aircraft you selected.
Step 6. Decide who will fly
1. Under Operations, set Fly in Simulator to Yes for this exercise.
2. Leave Force Crew Rest off for the example using your own avatar.
3. Under Default Crew, select your own pilot.
4. On a different aircraft, also provide the qualified copilot and cabin crew required by its configuration and the seats you offer.
Fly in Simulator is a route setting. Activation alone does not start a simulator flight.The tutorial uses the player's own pilot at TFFF.
For an AI-operated route, choose a suitable AI pilot and switch Fly in Simulator off, provided your world supports AI flying. Check where the aircraft and crew are and whether they are available. A green activation checklist is not a guarantee that an employee will be ready at every future departure.
Employee duty and rest matter when you grow into repeated or long flights. Read Crew duty and rest (section 15.3) before building a full day of AI operations.
Checkpoint: you know whether this service will wait for you in the simulator or be operated by AI.
Step 7. Offer a load the aircraft can carry
1. In Capacity & Pricing, enter 2 Eco Seats.
2. Set Bus Seats and First Seats to 0.
3. Set Cargo (lbs) to 0 for the first exercise. If your settings display another unit, follow the unit shown by the field.
4. Read Weight check after the aircraft and airports have resolved.
5. Leave a useful margin for your actual flight preparation.
Two passengers, one pilot and the estimated fuel fit the tutorial aircraft. These figures describe this configuration, not every Cessna 172 add-on.
The offered seats and cargo are the service's capacity. They are not guaranteed sales. The forecast estimates demand; the weight check estimates whether your offered load fits the aircraft. You need to read both.
In this example, Available was 182 lbs. Adding cargo uses that margin. A negative value is a reason to revise the plan before activation, even when the route can still be saved.
Read Capacity, fuel and weight (section 15.2) for the worked calculation and an illustrated overload example.
Checkpoint: the load fits and you understand how much margin remains.
Step 8. Read demand and pricing before committing
1. Leave Auto Pricing on for the first exercise.
2. Inspect Departure PAX heatmap. Switch to Departure Cargos heatmap if you are considering freight.
3. Read Forecast Computation after it refreshes.
4. Check the effects of reliability, scheduled duration, company reputation, aircraft condition and pricing where displayed.
The heatmap helps you compare departure times. It does not replace aircraft and crew scheduling.
With automatic pricing enabled, price fields follow reference prices rather than values you type yourself. In our saved training route, Route Fill Rate was 55.0%. That is a forecast, not a guaranteed occupancy or profit margin. In particular, ticket revenue is not the same as profit after fuel, maintenance, crew and other costs.
If the forecast reports an error or cannot be calculated, resolve that message before relying on the number. Do not treat an incomplete or outdated figure as a confirmed result.
Checkpoint: you can explain what the forecast predicts and what costs remain outside that percentage.
Step 9. Save and read the result
1. Scroll to the top of the page.
2. Click Save Route.
3. Wait for the route to return to view mode.
4. Re-read the aircraft, operating day, airports, times, capacity and crew.
Save Route persists the configuration. Cancel discards unsaved edits.A saved, inactive route can be ready to activate without operating yet.
If Save reports an error, read it and correct the relevant field. Departure and destination must be different, and at least one operating day must be selected. Do not move on merely because the form still contains what you typed.
Checkpoint: the route is saved, and its displayed values match your intended service.
Step 10. Check readiness, then activate
1. Read every item in the pre-activation checklist.
2. Fix missing aircraft, pilot, capacity, airport or slot information.
3. Check Weight check and crew availability separately.
4. Click Activate Route when you are ready to operate the service.
5. Verify that the action changes to Deactivate Route and that Operations → Status reads Active.
Ready to activate means the listed configuration checks pass. The server checks the activation request too.Active describes the repeating service; Pending describes its execution state.
Activation is not take-off. A saved aircraft assignment, a resting employee and a future departure can coexist with an active route. The individual flight must still satisfy its own operating conditions.
Checkpoint: activation succeeded and you can distinguish the route's state from a flight's state.
Step 11. Find the first scheduled flight
1. Scroll to Scheduled Flights.
2. Locate the new dated occurrence.
3. Check its departure date, status and comment.
4. Read the timing explanation beside a Pending flight before interpreting it as a failure.
Activation created the Thursday occurrence. The comment distinguishes simulator flexibility from the route's Thursday slot.
For a simulator-operated occurrence, the available Fly Now action prepares the route mission and normally opens Flight Dispatch with the aircraft, destination, alternate and load. Continue with the dispatch and tracking procedure you already learned. Do not assume that accepting the occurrence means your simulator is ready to start tracking.
A simulator occurrence can be flown before the end of the current schedule week, as its comment explains. That flexibility does not erase the slot's day and time conditions: flying on another day can incur timing penalties at both ends. For AI flights, a future scheduled departure is a normal reason to remain Pending.
The dates in the screenshot belong to the capture week. Follow the current-week dates shown in your own app.
Checkpoint: you can find the occurrence and explain its status. A completed simulator flight and registration are the next operational exercise; they are not demonstrated by an activation screenshot.
Step 12. Monitor a service over time
After flights have run:
1. Reopen the route and compare its scheduled flights.
2. Read the status and latest comment on any occurrence needing attention.
3. Open its journal for the full explanation rather than guessing from the status colour.
4. Return to Routes and use the week selectors to review the current or previous weeks.
This established Cessna service is a separate read-only example. Completed flights and a future Pending occurrence appear together.The tutorial journal records activation's simulator instruction, then the cancellation caused by deactivating the practice route. Each line explains an event at its own UTC time.The weekly list brings status, aircraft, airports, fill-rate indicators and reliability together. It is a larger network than the one-route tutorial.
For an AI-flown company regular route, fuel is bought automatically at departure and charged to the company operating the aircraft. One FBO must hold the whole purchase: your own eligible FBO is preferred, then your VA's, otherwise the cheapest eligible supplier. If none has enough, nothing is bought. The flight needs onboard fuel for the destination, alternate and 30 minutes of cruise; otherwise it remains Not started, and the journal explains the fuel shortage. Check stock and arrange supply before retrying. For Fly in Simulator, prepare fuel yourself through dispatch. Company regular routes are separate from Freelance Routes and do incur operating costs.
If a flight fails repeatedly, investigate load, fuel, aircraft position, maintenance, crew availability and scheduling conflicts. Repeated activation clicks do not repair those conditions. Use the actual journal message to choose the next check.
Checkpoint: you know where to find the reason for an occurrence's outcome.
Step 13. Look at the week before expanding
1. On Routes, click Planning.
2. Find the aircraft's row and its operating days.
3. Find the crew rows and check that assignments fit together.
4. Inspect any conflict or rest indication before adding another service.
An established network shows how several services share aircraft and crew. Blocks are grouped within a day; their horizontal position is not a precise time scale.
A sensible next exercise is a return service. Plan its departure after the outbound flight, arrival processing and necessary preparation. Make sure both services use an achievable sequence of airports. Do not add every weekday until you can explain how the aircraft returns and how the crew remains available.
If you are only practising setup, use Deactivate Route after inspecting the result. The route remains available for later editing and reactivation. Deactivation also unlocks schedule fields that are locked while active; it is not the same action as deleting the route.
The pending tutorial occurrence became Canceled when the route was deactivated. The journal explains why; the saved route and its aircraft remain available.
Checkpoint: you have an operational plan for the next departure, or you have left the practice service inactive.
Step 14. The same workflow with an A380
The Cessna exercise teaches the controls at a small scale. It does not define the intended maximum size of a regular-route operation.
A real example found through Routes Leaderboard is SH83 — Shaker, on Cumulus. Its route 627, Frankfurt (EDDF) → Dubai (OMDB), uses an Airbus A380 FBW. The following views were captured in read-only inspection.
Aircraft type changes; the route number, tag and operating-day controls remain familiar.A larger aircraft supports a very different service from the short Cessna exercise.
What to compare
Tutorial Cessna service
Observed A380 service
Sector
TFFF → TFFR
EDDF → OMDB
Offered economy seats
2
430
Offered business seats
0
121
Offered first-class seats
0
60
Total offered seats
2
611
Offered cargo
0 lbs
81,476 lbs
Assigned crew
Player pilot
Pilot, copilot and 12 attendants
Flight mode
Simulator
AI
Multiple cabin classes and a substantial freight offer use the same capacity controls. These are observed settings, not recommended starting values.The crew requirement grows with the operation. Employee duty and availability become central to a repeatable schedule.
Read the margin as carefully as the seat count: this particular A380 example showed only 20 lbs Available in the estimate. That is a useful illustration of why a large aircraft still needs a weight check, not a margin to copy into your first service.
For your own airliner, reassess airport suitability, range, fuel, cabin configuration, crew, turnaround time and operating costs. Keep the same sequence: define a service, check that it fits, save, activate and monitor its occurrences.
You now know how to…
Distinguish company regular routes from Freelance schedules and individual occurrences.
Create a one-day service with an aircraft, pilot and three airports.
Read UTC times and slots as both day and time commitments.
Separate offered capacity, estimated weight, forecast demand and operating profit.
Save, activate and inspect the first dated flight.
Use journals and weekly planning before expanding.
Apply the same workflow to larger aircraft without copying unsuitable Cessna settings.
Continue with Capacity, fuel and weight (section 15.2), then Crew duty and rest (section 15.3).
Additional example: saved route identity and slots
These retained close-ups belong to an earlier Cessna service from Calgary (CYYC) to Great Falls (KGTF). They show how identity and UTC slots are displayed; do not copy their airports or times into the separate tutorial route.
Saved Cessna route identity and operating days.Calgary departure time and its slot start and duration.Great Falls arrival time and its slot start and duration.
15.2 Capacity, Fuel and Weight on a Regular Route
This section supports Creating Your First Company Regular Route (section 15.1). Use it while choosing the seats and cargo for your service, and when a route saves successfully but its flights do not start.
Read an offer as a capacity limit
Eco Seats, Bus Seats, First Seats and Cargo define what you offer on each occurrence. They are not an instruction to move the cargo already in your company's inventory, and they are not a prediction that every seat will sell.
For the first tutorial service, enter two economy seats and no cargo. Leave the other cabin classes at zero. Inspect the weight estimate before increasing anything.
A deliberately small load makes the relationship between passengers, crew, fuel and available weight easier to understand.
Each passenger counts as 190 lbs, including luggage, in this calculation. A useful way to read the load is:
The route estimate accounts for the pilot, any required copilot, and the attendants required for the offered seats. Picking a larger aircraft therefore does not simply turn its maximum payload into saleable cargo: crew and fuel still matter.
The aircraft's cabin configuration matters too. Removing seats can provide extra weight capacity; the calculation accounts for that allowance and the corresponding reduction in empty weight. On a reconfigured aircraft, the displayed Payload can therefore differ from the raw passenger, cargo and crew sum. Read the calculated block rather than comparing that raw sum with an unadjusted aircraft specification.
Resolve the airports before judging the estimate
Select the aircraft, departure, destination and alternate before relying on Weight check. The calculation needs aircraft data and route distance. The alternate matters because the estimate includes fuel for the leg and alternate.
If the aircraft or route information is incomplete, an absent estimate is not a clean bill of health. Finish the inputs and let the page update.
The three main lines answer different questions:
Line
What to check
Gross weight
Estimated take-off weight against the aircraft limit.
Payload
The calculated load against the aircraft's payload limit.
Available
The remaining margin; a negative number means the offer does not fit the estimate.
In our tutorial configuration, the screen showed 2,376 / 2,558 lbs gross weight, 570 / 810 lbs payload, and 182 lbs Available. It also showed the ingredients: two passengers, no cargo, one crew member and 115 lbs of estimated fuel.
These are figures from the pictured aircraft and route. They are not fixed values for all Cessna 172 models, and the estimated fuel is not a substitute for your actual dispatch planning.
Learn the overload warning without saving it
To understand the controls, you can try this on your own inactive practice route:
1. Click Edit.
2. Temporarily increase the cargo offer.
3. Observe the change in Weight check.
4. Click Cancel to discard the experiment, then verify the saved cargo offer is unchanged.
Entering 1,000 lbs of cargo on the tutorial route produced an 818 lbs excess. This draft was cancelled, not saved or activated.
The block turns red and identifies the excess. Start by reducing the offered seats or cargo, or choose a more suitable aircraft. Do not remove necessary flight fuel or select an unsuitable alternate merely to make the displayed number turn green.
For this exercise, return to 2 economy seats and 0 cargo. Check both the input values and the resulting margin.
Keep the forecast and the weight check separate
A high fill-rate forecast cannot make an overloaded aircraft legal. Equally, plenty of weight margin does not mean there is enough demand to fill the service profitably.
This separate Cessna example shows a 100% forecast but only 5 lbs of available estimated weight. The percentage and the weight margin answer different questions.
Read the forecast for expected demand and its modifiers. Read the weight block for carrying capacity. Then plan actual fuel and operating costs. Avoid copying a nearly full aircraft just because its forecast looks attractive.
Understand when the final check happens
The route's weight block is an estimate. The server performs the final weight check when each flight is created, using the actual flight state. Saving and activating a route do not prove that every future occurrence can be launched.
This explains an otherwise confusing sequence: a route can be saved, become active, and later have an occurrence refused on weight. An aircraft with different fuel on board, a changed configuration or a different assigned aircraft can change the result.
When an occurrence fails:
1. Open the route's Scheduled Flights.
2. Read the latest comment and open the occurrence journal.
3. If it reports weight limits, compare the listed fuel, crew, passengers, cargo and empty weight with the limits.
4. Correct the service or aircraft configuration before expecting the next occurrence to work.
Repeated failed occurrences can damage reliability and therefore the service's future demand. Investigate the first repeated error instead of waiting for a busy-looking route to recover by itself.
This example records a deliberate route deactivation, not a weight refusal. For an actual weight refusal, read the weight explanation in that occurrence's own journal.
Apply the same reasoning to a larger aircraft
The observed A380 service offers 611 seats and 81,476 lbs of cargo, yet its estimate has only 20 lbs Available. A large aircraft still has limits.
The scale changes; the questions remain the same. Do the passengers, freight, crew and fuel fit? Can the departure, destination and alternate accept the aircraft? Is the remaining margin useful for the actual operation?
The Cessna is an accessible tutorial aircraft with limited range and carrying capacity. Regular routes also support larger regional and airline operations. Recalculate the offer for the aircraft and service you actually intend to fly.
You now know how to…
Separate offered capacity from forecast demand.
Read the passenger, crew and fuel contributions to the estimate.
Recognise an overload and undo a practice edit without changing the saved route.
Understand why activation is not the final flight weight check.
Use an occurrence journal to investigate a refusal.
Return to the route walkthrough (section 15.1) · Continue to crew duty and rest (section 15.3)
15.3 Crew Duty and Rest on a Regular Route
This section supports Creating Your First Company Regular Route (section 15.1). Read it before replacing the tutorial's player pilot with AI crew, or scheduling several flights with the same employees.
Start with the right distinction: you and your employees
Our Cessna exercise uses the company's player pilot. Your own avatar is exempt from automatic employee rest and the duty penalty. That is why the tutorial can teach route creation without first setting up an employee roster.
The player entry is labelled “you”. Do not expect an employee duty timer for this avatar.
AI employees are different. With the company's employee duty-and-sleep system enabled, their duty windows and rest can affect a route even if you are flying the aircraft yourself. An AI copilot or attendant is still an employee; selecting your avatar as captain does not exempt the other crew members.
Understand the two durations
The documented duty system uses a 14-hour duty window and 8 hours of rest.
The duty window starts with the employee's first flight after rest. It is not a fixed roster such as “works 08:00–16:00”. Time between flights still advances an already-open window, so a long wait on the ground can matter even when the pilot has flown very little.
For example, if an employee starts a fresh duty period at 06:00 UTC, the 14-hour window ends at 20:00 UTC. A new flight late in that window must be considered alongside its expected completion time, not merely its departure time.
Read what the crew card tells you
Before operating the route:
1. Open Regular Route Settings.
2. Read the Default Crew card.
3. If an employee is resting, note the displayed rest-end time.
4. Compare that availability with the flights you expect the employee to operate.
The rest-end time is a live observation from another service, not a recurring roster time to copy.
The card can display either a rest-end time or a duty-end time with time remaining. A missing timer does not always mean unlimited availability: the employee may have no open duty window, the roster data may not be available, or the duty system may be disabled. Read their status as well.
A route may be activated while an employee is resting. Activation validates the service configuration; the later flight still needs an available crew. Read any rest information shown near activation rather than treating a successful activation as proof that the employee can depart now.
Separate real time from simulator time
Employee duty and rest advance with real elapsed time. Changing the simulator's clock to match a published schedule does not reset the employee's duty window.
For simulator-operated route flights, a schedule-time option can align the simulator with the scheduled departure. This does not make the two clocks interchangeable, and it does not remove the slot's weekday requirement.
For AI-operated flights, the scheduled departure controls when the service is due to operate. The instruction that a simulator occurrence can be flown within the schedule week must not be read as permission to make an AI route depart whenever you want.
A practical planning habit is to ask two separate questions: “Which occurrence and slot am I flying?” and “Are the assigned employees available now, for the expected duration?”
Know what happens at the end of a duty window
An employee is not sent to sleep in mid-flight. Automatic rest is applied when the employee is in an eligible ground status such as Idle or Ready.
A flight that ends beyond the duty window can incur a 2,000 Cr. penalty for each affected AI crew member. That penalty does not itself interrupt the flight. Resting, on the other hand, makes an employee unavailable for departure.
The automatic rest calculation can count from the end of the duty window rather than adding eight fresh hours after touchdown. Do not calculate a new wake-up time by simply adding eight hours to every landing; read the employee's actual rest-end indication.
The tutorial did not deliberately fly an exhausted crew to reproduce the penalty. These rules describe the documented duty mechanism; the screenshot demonstrates the rest indication itself.
Check the whole rotation
1. Return to Routes and select Planning.
2. Locate the aircraft and each crew member you are reusing.
3. Inspect the sequence of services and any conflict or rest indications.
4. Leave time for the aircraft to arrive, prepare for the next departure, and bring the crew to the correct airport.
The weekly grid makes shared resources visible. Block positions within a day are not a precise timeline; inspect the underlying service times.
Do not rely on the grid alone to prove availability. It is a planning aid based on the current fleet and roster; the server has the final say when a flight is created.
If two assignments cannot both be operated, revise the timetable or use another suitable crew. Repeatedly activating a route does not solve an overlap or a crew member being at the wrong airport.
After changing an assignment, inspect the affected routes again. Check the aircraft and every required employee across the whole rotation, including the positioning needed before the next departure.
Scale the crew with the aircraft
The observed A380 service assigns a pilot, a copilot and 12 attendants. This is the pictured service's roster, not a universal requirement for every A380 configuration.
Larger regular routes use the same controls, but introduce more people whose qualifications, location and availability need to fit the timetable. Determine cabin-crew needs from the offered seats and the application requirements, rather than copying the crew count from another company's screenshot.
The employee duty-and-sleep system is controlled by a company setting in Settings → Preferences, subject to the rules allowed by your world. If it is disabled for the company, the duty mechanism and its indicators do not apply. You do not need to change that setting to follow the player-pilot tutorial.
You now know how to…
Distinguish your avatar's exemption from employee duty rules.
Explain when an employee's duty window starts.
Read a rest-end indication before relying on a scheduled departure.
Keep the simulator schedule and real employee availability separate.
Plan an aircraft and its full crew as shared resources.
Return to the route walkthrough (section 15.1) · Review capacity and weight (section 15.2)
Chapter 16
Coordinate a Multi-Aircraft Network
After operating one work order or regular route, expand by connecting two workable aircraft schedules. The objective is reliable service with enough time, crew and cash to recover from interruptions. Adding departures before proving those resources usually hides the real bottleneck.
Step 1. Review the first operation
Open the work order or regular route from the preceding chapters. Check the last actual flight, the aircraft's current airport, remaining inspection allowance, crew availability and the next scheduled departure. Distinguish a saved route from a generated occurrence and a completed flight.
Use the Cessna example as a training service. Its small cabin and range deliberately limit the first exercise; the same route tools also support regional aircraft and airliners. Chapter 15 includes a real A380 configuration to show the change in scale.
Step 2. Give each aircraft a defined job
Write down each aircraft's starting airport, destinations, crew, fuel stops and intended return position. Begin with two aircraft and schedules that can be understood separately. Avoid allocating the same person to overlapping departures.
For example, one aircraft can operate local passenger legs while another handles a longer corridor. This is a planning pattern, not a claim that any current offer is profitable. Choose actual missions only after checking each aircraft's limits and each airport's suitability.
Step 3. Check every connection in UTC
Compare arrival with the following departure. Include turnaround, rest, refuelling, maintenance and any cargo transfer. A line on a map does not ensure the aircraft, people or freight are ready at that time.
In a work order, examine the required-payload setting. A required item that has not reached the departure can make the order wait; an optional item can be left behind. Use that choice deliberately for a connection whose feeder aircraft might arrive late.
Screenshot placeholder NW03 — two connected schedules. Once two real aircraft programmes are ready, capture their UTC legs and the shared transfer airport. Show the payload's arrival requirement and explain the available connection time. Do not activate overlapping programmes merely to obtain the image.
Step 4. Check infrastructure coverage
Use My FBOs to compare fuel stocks and workshop coverage with the aircraft classes in the network. An FBO suitable for a piston aircraft may not service a jet. Identify an outside workshop where your own network has a gap, and plan access before an inspection becomes due.
At each important airport, identify the fuel type, supplier and likely delivery delay. Keep pending fuel orders separate from usable stock. A profitable route can still stop if its next departure relies on fuel that has not arrived.
Step 5. Validate each load independently
Review passenger classes, cargo and fuel for every leg. Use the weight and crew-duty companion sections of Chapter 15. More seats do not remove payload limits; a longer leg may need fuel that displaces paying load.
Before changing aircraft type, check certificates, copilot and cabin-crew requirements, airport size and the schedule's flight duration again. An airliner is not a larger Cessna with otherwise identical preparation.
Step 6. Introduce the second programme gradually
Keep the second schedule inactive until its aircraft, crew and first load are ready. Validate and save, then activate when the intended start time and operating conditions are correct. Confirm the resulting server status and any generated occurrences.
Screenshot placeholder NW06 — first second-aircraft operation. Capture the validated second programme, activation result and actual first completed leg. Include the aircraft registration in every caption so the two programmes cannot be confused.
Step 7. Review exceptions before expanding again
At each review, resolve waiting cargo, unavailable crew, insufficient fuel and maintenance conflicts before adding capacity. Compare actual revenue and operating costs with Chapter 11's budget. Keep a reserve for a repositioning flight or a delayed payment.
Screenshot placeholder NW07 — recovery from a real interruption. When an actual delay or blockage occurs, capture its message, the corrective action and the resumed status. Use a real event rather than deliberately stranding an aircraft or abandoning an accepted job.
Continue to industry only when the flying network is understandable and funded. Industrial activity adds another set of inputs, workers, stocks and transport deadlines; it should have its own small pilot project.
Chapter 17
Plan Your First Industrial Activity
Industry uses goods, workers and time to produce other goods. A recipe can earn or consume Industry Points; construction has its own separate IP cost. Positive production IP is earned when the cycle completes. Negative production IP is spent when it starts, and an insufficient balance prevents that cycle from starting. Before creating machinery, choose one output and establish how its inputs will reach the site and how its output will leave. Credits and Industry Points are different resources: a large cash balance does not automatically satisfy an IP requirement.
Step 1. Choose one product to understand
Open Industries Encyclopedia, then Production Lines. Select Food Rations for this exercise. The description explains that every worker needs one ration per day to keep working. Rations therefore have an operational use as well as potential market demand.
The Encyclopedia describes recipes and reference prices. It does not purchase goods or guarantee a buyer at the displayed base price.
The captured recipe consumes 8 Aluminium Parts and 6 Mixed Food to produce 200 Food Rations, with 24 hours per cycle and 3 IP per cycle. Read quantities as units of each merchandise, then use their unit weights for transport planning.
Step 2. Convert the recipe into a supply plan
At the displayed ideal rate, one week consumes 56 Aluminium Parts and 42 Mixed Food, producing 1,400 rations and earning 21 IP. That is an uninterrupted full-speed calculation, not a production promise. Construction, missing goods, tired workers and output congestion reduce actual throughput. This food recipe earns IP, but other recipes consume them: the inspected definitions include Travel Token (-250 IP/cycle), Factory Extensions Parts (-100) and Airport Ownership Kit (-3). Check the live recipe and budget recurring consumption as well as the separate construction cost.
Start by budgeting one cycle, then a supply reserve. Identify where both input goods are offered and whether they can be bought at the factory airport. If transport is needed, include its cost, weight and delivery delay. An item owned at another airport cannot simply be counted as available here.
Step 3. Inspect the machine behind the recipe
Click Canning Platform to open its Production Zones detail.
The captured machine costs 150 IP to build, takes 48 hours and occupies 4×4 cells. Its location description says terrain does not affect this machine.
Construction requires 5 Builders, 25 Lumber, 5 Steel Bars and 100 Glass. Staff requirements show three groups of two Workers. Keep construction resources separate from the workforce and materials used during normal production.
The inspected OAIR factory showed 50 available IP. That is below this machine's 150-IP build requirement, even if sufficient credits are available to buy materials. This lesson therefore documents the plan and existing installation; it does not claim a new Canning Platform was built.
Step 4. Budget the complete start
Include construction goods and their delivery, the machine's IP requirement, operating staff, food for those staff, the first recipe inputs, containers and any applicable facility costs. Then add a reserve for continued cycles and replenishment.
For the six workers shown here, six rations per day is the basic food requirement once those workers are active. Count other active workers at the same airport too. A ration-producing factory still needs workers fed before its first output exists.
Step 5. Choose location for the whole activity
For this food example, access to supplies and transport matters more than mineral deposits. Compare airports with your existing network and the market. A terrain-independent machine can still be expensive to supply at a remote location.
Mines and oil wells need a different location investigation because deposits affect efficiency. Read the relevant machine's location explanation before choosing a site. Do not transfer the Canning Platform's terrain rule to extraction machinery.
Screenshot placeholder IP05 — resource survey flight. For a later mining or oil example, load the Ore Detector, follow the game's survey requirements in a suitable simulator flight and capture the actual detector readings with location. Explain that this is an OnAir gameplay illustration; do not invent a rich deposit or use the food-factory screen as survey evidence.
Step 6. Decide how output will leave
Choose whether the first output will be stored, used by your workers, sold or transported. Check the intended buyer or destination before assuming all production becomes revenue. Plan enough output capacity for the interval between collections.
Checkpoint: you can name the product, recipe, machine, construction resources, operating inputs, workers, food requirement, IP budget and destination of the output. The next chapter turns that plan into a factory layout and explains the construction gates.
Chapter 18
Lay Out and Build a Production Line
This chapter uses the existing LFPT Production - Food factory in OAIR. Its initial canvas is empty. We add a Food Mixer, the upstream machine that produces Mixed Food for the ration chain studied in Chapter 17. Adding it to the canvas does not mean it has been constructed.
Step 1. Open the correct site
Choose My Factories, locate the factory and use Manage. Confirm its name and airport. If starting with no factory, use New factory, inspect the location/type choices and their requirements, and confirm only the site appropriate to your plan.
Our existing Tier 1 site has 50 IP and no Food Rations. We did not create this site during the exercise.
Read the activity indicator as well as the tier. The screenshot shows no weekly fee at Tier 1 and a Tier 2 requirement of ten Extension Kits. An upgrade is separate from constructing a machine; leave it until the planned layout needs it.
Step 2. Add the first machine
Select Food Mixer in the machine palette. The machine appears in the production area with its required resources and Build control.
This is the machine actually added in the tutorial. Its missing construction resources are two Builders, ten Lumber and two Steel Bars; the displayed construction requirement is 30 IP.
Use the move control and a valid free cell if placement needs adjusting. Leave room for input and output containers and the downstream machine. Avoid adding duplicates while waiting for the server to finish the first creation.
Step 3. Read settings before provisioning
Open the machine's gear control. Inspect its staff slot, recipe choices, inputs, outputs, production time and log.
The selected “Vegetables and Smoked Fish” recipe takes five Fruits and Vegetables and one Smoked Fish to produce six Mixed Food. It shows 18 hours nominal production time and one produced Industry Point.
Other recipes use different ingredients. If changing the selection, use Update recipe and verify the saved result before buying inputs. The construction materials on the unbuilt machine are a different requirement from these recurring recipe inputs.
Step 4. Bring construction resources to LFPT
Use Trading Hall to buy or arrange delivery of the exact missing materials. Check My Goods at LFPT, not merely company-wide ownership. Chapter 19 explains the stock and worker checks; Chapter 21 covers transport when the goods are elsewhere.
The example machine remains unbuilt. We have not bought its construction materials or claimed a completed construction. The 50 available IP covers the displayed 30-IP machine requirement, but that alone does not satisfy its material requirements or any additional container costs.
Screenshot placeholder FC04 — ready-to-build resources. Obtain the actual two Builders, ten Lumber and two Steel Bars at LFPT, verify their usable location, then capture the resource panel with the Build action enabled and the current IP balance.
Step 5. Start construction and verify its state
When every requirement is satisfied, choose Build and read the resulting progress and ETA. Wait for normal server completion. Do not use staff/debug time-advance controls to illustrate a normal user's workflow.
Screenshot placeholder FC05 — construction and completion. Capture the same Food Mixer during construction and again when built. Include the server's ETA and log entry. A machine icon placed on the grid is not proof of construction.
Step 6. Connect the material flow
Add the necessary input/output containers using the palette, reading their requirements first. Configure each container's merchandise type. For this recipe, plan supplies of Fruits and Vegetables and Smoked Fish, then a place for Mixed Food to go.
Click an output port and then a compatible input port. The canvas highlights compatible targets. Trace the resulting connection in the intended direction; a nearby container is not connected merely because it touches a machine visually. Re-clicking an already wired output can remove the connection, so avoid exploratory clicks on a working chain.
Screenshot placeholder FC06 — connected line. Capture the constructed mixer with correctly typed supply and output containers and visible connections. Open one container's settings in a second image to show its merchandise and output mode.
Step 7. Verify a real cycle
Assign suitable workers, provide food and recipe inputs, and leave sufficient output capacity. Observe the machine state after a normal server update. When it completes a cycle, compare actual input and output stocks and inspect the log.
Screenshot placeholder FC07 — first completed cycle. Record before/after quantities, the production log and the resulting IP change. Do not replace this evidence with the Encyclopedia's theoretical throughput. Only then extend the chain towards a Canning Platform when construction IP and supplies permit it.
Chapter 19
Supply Materials and Look After Workers
A factory can have the right layout and still produce nothing. This lesson checks four separate requirements: construction resources, operating ingredients, workers and food. Use the Food Mixer at LFPT from Chapter 18 throughout, checking the airport after every navigation.
Step 1. Separate the shopping lists
The unbuilt mixer needs two Builders, ten Lumber and two Steel Bars, plus its construction IP. The selected production recipe instead needs five Fruits and Vegetables and one Smoked Fish per cycle. Its staff settings currently show an unassigned Worker slot.
Use a short checklist with one row per material: quantity required, usable quantity at LFPT, quantity elsewhere, quantity in transit and quantity still to obtain. This prevents counting a delivery twice or buying production ingredients while the machine is still missing construction steel.
Step 2. Read the market location before buying
Open Trading Hall, select the material and inspect Supply. Read the distance reference above the board: it may use your nearest industry rather than the factory you are currently provisioning. Set a deliberate airport reference when comparing transport distances.
Compare quantity, unit weight, unit price and total value. Buying cheaper stock far away can cost more once it is delivered. If the material has an unlimited supply option, read the eligible airport requirement and enter the exact receiving airport; do not assume every material has that option.
We used the system supply to buy 30 Food Rations at LFPT for 1,800 Cr., weighing 90 lbs. This purchases food for the site; it does not buy the Food Mixer's construction materials.
Read the product, airport and total before confirming. This purchase was confirmed and the goods retained.
Step 3. Confirm that stock is usable
In My Goods, filter by airport and material. Read the Location column. Goods at another airport, in flight or in transit do not satisfy a requirement for goods on the ground at LFPT. Goods loaded in a parked aircraft may need Unload or Deboard before they are available to the factory.
Use the displayed quantity and total weight to plan movement. A delivery ETA is useful for scheduling, but it remains a pending delivery until the server records arrival. Chapter 21 follows the transport choices.
Step 4. Provide the operating workers
Reopen the machine settings and inspect its staff section. Our Food Mixer says No staff awaiting assignment at this airport and its Worker slot is Unassigned. Buying or transporting the appropriate industrial workforce is separate from hiring a pilot in Crew Market.
The machine's worker is an industrial staff requirement. Hina, hired as a pilot in Chapter 9, does not fill this slot.
Bring the required worker group to the factory airport, use the slot's assignment control, and verify the resulting staff, availability and efficiency. Follow the actual group quantity shown by the selected machine rather than assuming every machine needs one person.
Screenshot placeholder MW04 — workforce assignment. Capture the available group at LFPT, its selection in the Food Mixer and the resulting staff display. Include the food/fatigue indications. Do not present an unassigned slot as a staffed machine.
Step 5. Maintain food on site
The factory header shows Food Rations and offers a cart shortcut to the Trading Hall. At capture time LFPT has zero rations. Each active worker needs one ration daily, so budget for the airport's entire active workforce and the replenishment delay.
In the observed Food Rations board, system supply costs 60 Cr. per unit at eligible airports of size 2 or above. Recheck the actual purchase quote before committing. A prepared purchase is not stock: verify the completed transaction and the factory's updated ration count.
My Goods now shows 30 rations at LFPT, 3 lbs each and 90 lbs total. The other rows belong to older company activities.
The mixer remains unbuilt and unstaffed, so this is a stock reserve, not evidence of active workers being fed. Once staff are assigned, divide the available rations by the airport's actual daily workforce requirement and set a replenishment margin.
Step 6. Plan relief before exhaustion
Read worker fatigue and efficiency in machine settings and the Industries Dashboard. Use the relief control to examine replacement options and cost. The available choices can include flying staff yourself, ground/water transfer or automatic relief; choose according to the actual quotation and location.
A relief already travelling is not a fresh group already working. Avoid ordering duplicate replacements while an earlier one is pending. If flying the relief, use the corresponding mission and register the actual flight normally.
Screenshot placeholder MW06 — actual worker relief. When fatigue warrants relief, capture the current group, quote, chosen transport and final replacement. For a simulator delivery, add the mission and registration evidence; leave those images pending until the flight is completed.
Step 7. Check the machine after replenishment
After a normal server update, verify that the original blocker has cleared. If it remains idle, inspect recipe inputs, connections and output capacity instead of buying another worker blindly. The next chapter distinguishes purchases, customer contracts and your own supply demands.
Chapter 20
Buy Goods, Take Contracts and Publish Demands
The industrial market supports three different actions. Buying supply makes goods yours at a location. Taking a delivery contract commits you to bring goods to a customer. Publishing a demand makes you the customer and commits your money to obtaining goods. Decide which role you intend before pressing an action button.
Step 1. Inspect supply
In Trading Hall, select a merchandise and use Supply. Read airport, seller, available quantity, unit price and weight. Check the distance reference and any radius or price filter. An empty filtered board does not mean there is no supply in the world.
Chapter 19 demonstrates a completed system purchase: 30 rations at LFPT for 1,800 Cr. Its result is stock at LFPT. A purchase at another airport would require a separate transport plan.
Step 2. Compare a customer's demand with your capacity
Switch to Demand. Inspect the buyer, airport, remaining quantity and unit price. Remaining quantity accounts for existing deliveries and commitments; the original requested quantity is not necessarily still available to you.
Before Take Contract, identify how you will obtain and deliver the quantity. Include purchase/production cost, total weight, transport, available aircraft, fuel, crew and the deadline. A high unit price alone does not make a contract suitable for the Cessna.
Step 3. Read the commitment before signing
Enter only the quantity you can deliver and review the confirmation. Contracts run for seven days, with a penalty of 10% of the undelivered value if they expire. A signed contract cannot simply be cancelled. Do not sign one just to explore its next screen.
Screenshot placeholder TC03 — first suitable contract. Select a real demand supported by an executable supply and transport plan. Capture the demand, quantity and confirmation, then the signed row in My Contracts. No contract was signed during this inspection.
Step 4. Track delivery in My Contracts
Open My Contracts. Read reference, product, airport, delivered quantity, status and expiry. Use its goods and Trading Hall shortcuts to investigate missing stock.
The tutorial company has no contract in progress at capture time. An empty register is not evidence of a completed delivery.
Matching goods on the ground at the contract airport are handed over by the server automatically. Verify progress and payment rather than looking for a manual delivery button. Goods elsewhere or still aboard/in transit may need to reach the required usable state first.
Screenshot placeholder TC04 — actual contract settlement. After delivering the matching goods, capture the contract progress and payment. Match the reference and quantity across the images; partial delivery is not full completion.
Step 5. Publish a demand when you are buying
Use My Demands when you want other operators to deliver to you. Select merchandise, quantity, price and delivery airport. Read the total charge and the stated price ceiling before submitting.
The capture shows no active demand. Preparing a form is separate from submitting it to the market.
The whole demand is paid up front. Its Committed amount represents money not yet converted into delivered goods. Publishing does not guarantee a carrier will accept it, so do not depend on it for an immediate production start.
Step 6. Understand cancellation
The quantity display distinguishes delivered goods, units under contract and units not yet contracted. Cancelling refunds only the uncontracted portion. Existing carrier contracts survive cancellation; their quantities are not refundable simply because you changed your mind.
Screenshot placeholder TC06 — funded supply demand. When a real factory requirement justifies one, capture the completed form, upfront charge and active demand. Later show delivered versus contracted quantities. Do not publish a demand against which you expect to sign your own contract; the server refuses that.
Step 7. Reconcile goods and money
For purchases, verify My Goods. For delivery obligations, verify My Contracts and Cash Flow. For incoming orders, verify My Demands and the actual goods received. Keep these records separate so stock, receivables and prepaid supply are not counted as the same asset twice in your operating plan.
Chapter 21
Move Industrial Goods to Where They Are Needed
Industrial stock belongs to a location. This chapter follows the decision from goods already owned to goods usable at their destination. Buying something does not automatically deliver it to your factory.
Step 1. Identify the stock and destination
Open My Goods, find the merchandise and read quantity, unit weight, total weight, airport and Location. Use the airport/material filters to isolate the intended row. Our company holds a historical unit of Aluminium Parts at KTUS and the newly bought rations at LFPT.
Do not move the ration reserve away from LFPT while provisioning that factory. We use the older Aluminium Parts row only to inspect a transport quote.
Step 2. Compare ground transport with flying
For goods at an airport, choose Transport to inspect truck/boat transport. Enter the exact destination and quantity. The example quotes moving one Aluminium Parts unit from KTUS to KPHX at approximately 512 Cr. and 5.3 hours.
This quotation was cancelled without ordering transport. The stock remains at KTUS.
Compare the quote with the whole cost of flying, including any aircraft repositioning. A ten-pound item does not automatically justify a dedicated flight. Conversely, a time-sensitive or inaccessible destination may need a different solution.
Step 3. Confirm and track an actual transfer
When the quote suits a real requirement, confirm Transport. Check that My Goods shows the resulting transit status and destination. Treat goods as unavailable during transit; wait for arrival before using them for construction or promising them as already delivered.
Screenshot placeholder GT03 — completed ground transfer. For a genuine material requirement, capture the accepted quote, in-transit row and arrived stock. Include timestamps and quantity. The KTUS quote above is not proof of a completed transfer.
Step 4. Prepare an aircraft shipment
To fly the goods, select an aircraft at their airport and prepare dispatch. Ensure the relevant factory-goods visibility setting is enabled. Select the actual merchandise or generated transport mission and inspect its quantity and weight in the load.
Check fuel and aircraft limits with crew aboard. Larger industrial units can exceed a Cessna's capacity even when only one unit is requested. Split quantities only when the interface supports it and the unit itself fits; do not assume one heavy unit can be divided into arbitrary lighter parcels.
Screenshot placeholder GT04 — goods loaded for flight. Capture the stock before loading, dispatch with the selected industrial goods, aircraft registration and full weight check. Use a larger suitable aircraft if required and explain why the Cessna exercise no longer fits.
Step 5. Fly and register normally
Complete simulator tracking and registration as learned in Chapter 3. For an AI operation supported by the world, follow the actual server flight status. A route preview, saved work order or selected cargo does not prove transport occurred.
Screenshot placeholder GT05 — actual freight flight. Capture tracking, arrival and accepted registration for the same shipment. Keep this placeholder until a real flight has been performed.
Step 6. Make goods available after arrival
Return to My Goods and inspect Location. If goods remain aboard the parked aircraft, use the appropriate Unload or Deboard action. Verify the intended quantity is at the destination airport, then check the factory's resource panel or the customer's contract progress after a normal server update.
Screenshot placeholder GT06 — arrival to usable stock. Show the aircraft-held row, unloading/deboarding and resulting ground stock or automatic contract delivery. Explain where the goods went if the server immediately consumed them for a contract.
Step 7. Automate only a proven movement
After completing one shipment, consider a work order or a factory output transport mode. Verify destination, threshold and capacity and decide whether a missing load should make the aircraft wait. A saved automation must preserve the same physical location and weight checks as the manual operation.
Chapter 22
Monitor and Improve Industrial Operations
Once a line is operating, review what limits its next cycle before adding another machine. More equipment increases output only if materials, workers, food, connections and collection capacity can support it.
Step 1. Open the Industries Dashboard
Read available and total earned Industry Points, then the alert count. In this tutorial the dashboard shows 50 / 50 total earned and no current alerts.
The Food Mixer is still unbuilt. “All clear” here does not prove that a production line is complete or profitable; inspect its construction state in My Factories.
Step 2. Resolve the actual blocking reason
For a production alert, use Manage to reach the named factory. Read the machine's state and log. Check construction, recipe, staff, food, inputs and output capacity in that order. Buy only what resolves the identified shortfall.
The dashboard distinguishes a halted machine from low materials, tired workers and container alerts. Two alerts can describe one cause: an empty supply container can explain the downstream machine's halt. Resolve the upstream shortage before treating them as unrelated failures.
Step 3. Understand stock alerts
An end-of-line container filling up suggests goods are not leaving quickly enough. A supply container being full can be intentional; a mid-chain buffer reflects different conditions. Inspect where the container sits in the chain before changing capacity or alert settings.
Use the container's settings to review its output mode and alert preference. Do not silence a warning merely to clear the dashboard. Verify that storage, sale or transport is doing what you intended.
Step 4. Read fatigue and food together
Low worker efficiency calls for a relief plan, while insufficient rations calls for food at the airport. A replacement already in transit needs time to arrive. Check current staff and pending relief before ordering another group.
For food, compare available stock with all active workers at that airport and the replenishment interval. Keep enough margin for delivery delay rather than replenishing only when the count reaches zero.
Step 5. Compare theoretical and actual output
Use the Encyclopedia's nominal recipe as the baseline and the machine log as evidence of actual cycles. Calculate how much usable output appeared over a defined interval and identify idle time. Construction time and replenishment gaps must not be counted as full-speed production.
Screenshot placeholder IM05 — measured production review. After the first real cycles, capture the machine log, input/output stock and IP change over a stated interval. Explain any gap from the nominal rate. Do not treat the planned 1,400 weekly rations as already produced.
Step 6. Improve one constraint at a time
If inputs are repeatedly empty, improve delivery before adding output storage. If output remains full, improve collection or sale before adding machines. If workers are the constraint, address food and relief. Recheck costs before upgrading the factory tier.
Wait for the normal server update after a change. Refreshing continuously does not accelerate production. Use Industry notifications to follow events and references; use leaderboards as examples of scale, not proof that copying another company's layout will suit your own logistics.
Step 7. Keep the site active
Read the factory's activity state and any removal deadline. Review idle sites deliberately instead of forgetting construction drafts. Before any dismantling, examine the confirmation and consequences for assets and goods; this tutorial does not dismantle its Food Mixer or factory.
Chapter 23
Plan Basecamps and Maintain Owned Airports
An FBO, a basecamp and an owned airport are different things. An FBO is a facility at an airport. A basecamp creates a small operating location from an aircraft carrying a construction kit. Owning an existing airport creates another set of rights, income and recurring kit requirements.
Step 1. Choose the feature that meets the need
Use an FBO for facilities at an existing field. Investigate a basecamp for a genuinely remote operating location. Investigate airport ownership when its costs and traffic model fit your network. Do not buy an Airport Ownership Kit expecting it to be a Basecamp Construction Kit.
Step 2. Check basecamp eligibility
Open Basecamps and read your quota before planning deployment. The company's level limits the number it can own. Basecamps remain size 0, so verify aircraft compatibility rather than treating them as unrestricted airports.
OAIR has no basecamp in this capture. No remote site was deployed for the tutorial.
Step 3. Prepare and fly the construction kit
Find the correct kit in Trading Hall and plan its delivery to a suitable aircraft. Verify its full weight in dispatch. Fly to the intended site, respecting the game's separation from existing airports and the aircraft's landing requirements.
After landing with the kit aboard, open Install Basecamp. Verify the selected aircraft, actual position, placement and exclusion circles, elevation, orientation, six-character identifier and name. Read the current validation messages before installation. The kit is consumed by successful deployment.
Screenshot placeholder RS03 — actual deployment flight. Capture kit loading and weight, real arrival at the site, the valid installation form and the created basecamp. This requires a simulator flight; do not create an imaginary remote location from an unrelated airport screenshot.
Step 4. Inspect the created site
Open its detail page and verify owner, coordinates, elevation and aircraft. If configuring scenery, preview it in the simulator and keep objects within the allowed area before saving. Then plan fuel, supplies and any FBO/workshop facilities separately.
Screenshot placeholder RS04 — usable remote base. Show the same site after deployment, the aircraft present and any facilities actually built. Do not imply that a basecamp automatically includes a fuel tank or workshop.
Step 5. Review an existing owned airport
Open Owned Airports. Our existing example is EGPR — Barra, size 1, with 11 Airport Ownership Kits on site and a weekly rent of two kits. The next displayed payment is 15 September 2026 at 13:29 UTC.
This airport predates the tutorial. Its traffic and income are historical company activity, not flights completed in these chapters.
Check the on-site stock against the due date. Kits at another airport do not satisfy this payment. Replenish before the reserve runs out and investigate any at-risk status immediately.
Step 6. Read the income correctly
The capture shows 16 AI flights and an estimated next subsidy of 960 Cr. Passenger and cargo counters are displayed for information; the page explicitly says the subsidy is based on flights. Do not multiply all traffic counters into additional income.
Compare the recurring kit cost and transport with actual receipts. Owning more airports creates a supply obligation at each location. Keep those obligations in Chapter 26's routine review.
Step 7. Keep release and deletion deliberate
Release hands back an owned airport. Basecamp deletion has its own quotation and migration consequences for aircraft, people and facilities. Read these actions as real changes to the network, not as preview controls. No release or deletion is part of this exercise.
Chapter 24
Work with a Virtual Airline and Partner Companies
Cooperation becomes easier after you can dispatch and account for your own company's activity. Before taking shared work, establish whose aircraft, employees, jobs and money you are using.
Step 1. Inspect membership and roles
Open the VA console. Our example uses the existing OA Roles Test VA, code OATRV, with OAIR as its one founder member.
This is an existing test VA with zero recorded flights in the capture. We did not create another VA or send applications during this exercise.
If not already a member, inspect the available VAs and their requirements before applying. Creating a VA is a separate company-management commitment with starting equity; joining an existing one does not require creating a duplicate organisation.
Step 2. Identify the operating company
For roles that permit it, Work as switches operations to the VA. Read the visible company indication before each purchase, hire, job acceptance or dispatch. In VA context, assets and expenditure belong to the VA rather than automatically to your personal company.
Return to personal-company context before continuing the personal Cessna exercise. Never infer the payer from the aircraft's familiar registration alone.
Screenshot placeholder VA02 — authorised VA operating context. When ready to perform a real VA operation, capture the Work as indicator, the VA-owned aircraft and dispatch. Show the return to the personal company afterwards. No shared expenditure is demonstrated here.
Step 3. Check permission to use assets
Inspect your role and the aircraft/employee permissions granted to your membership. A listed aircraft is not necessarily one you may use. Ask the VA's manager to resolve access rather than changing another member's allocation while troubleshooting.
For administrators, role pay models and job-loading permissions need deliberate configuration. Read whether a figure is a percentage, hourly amount or weekly amount. A value of 10 in a percentage field represents 10%, not ten credits.
Step 4. Follow assigned work
A dispatcher may assign a VA job to a member. Check its assignment and loading restrictions before dispatch. Verify aircraft, crew, load, fuel and registration just as for a personal-company job.
Screenshot placeholder VA04 — assigned job completed. Capture a genuinely assigned VA job, permitted loading, actual flight registration and resulting VA activity. A personal-company flight is not evidence of a VA flight.
Step 5. Inspect partnerships separately
Open Partnerships. The company has no active partners in this capture; the Received tab shows one item requiring inspection by the owner if relevant.
A partnership is an agreement between companies in the same world. It is separate from VA membership. Read the current available features and terms; this area is still evolving.
Step 6. Send invitations only when intended
Use Company Lookup to identify the right company before proposing a partnership. Verify the airline code, world and any accompanying message. Sending an invitation contacts another operator; it is not a private draft action.
Screenshot placeholder VA06 — agreed partnership. With the owner's explicit approval to contact the chosen operator, capture the prepared invitation, sent status and eventual accepted relationship. No invitation or message has been sent for this tutorial.
Step 7. Review shared obligations
Check outstanding assigned jobs, role payments and shared asset availability regularly. Leaving a VA, removing a member or dissolving a partnership has operational consequences. Keep those actions outside the first cooperation exercise unless there is a real reason and the appropriate authority.
Chapter 25
Approach Special Missions and Flight Tools
Special missions add objectives to a flight you already know how to prepare and register. Learn one new activity at a time, keeping the aircraft, weather and route straightforward while you understand its extra conditions.
Step 1. Read the mission before accepting
Inspect its category, aircraft restrictions, departure, objective, deadline and scoring conditions. A rescue is not an ordinary passenger transfer with a different icon. A survey requires the correct equipment and a real flight over the relevant area. A tour can have its own sequence and eligibility rules.
Return to the first-flight checklist: aircraft, crew, airports, fuel, load and simulator connection still apply. Special equipment and passengers also contribute weight.
Step 2. Prepare a rescue as a separate exercise
In the Freelance job selection, choose an eligible small aircraft and the Rescue category. Inspect whether the incident has an exact location or a search area, its terrain and landing zone. Read the actual aircraft/category gate rather than assuming every fleet aircraft can be used.
The rescue workflow returns victims to the departure airport. Identify how you will find the site, land suitably and carry the added passengers home. Keep sufficient fuel and payload allowance for the whole operation.
Screenshot placeholder SM02 — rescue selection. When the company mode and an eligible aircraft permit the exercise, capture a real offer and its map, including exact/search indication and return airport. Do not change the company's current mode merely to produce this image while its cooldown is active.
Step 3. Follow the live mission status
During a real rescue flight, read the mission status card through outbound, search/homing, landing and boarding phases. Boarding requires the landing-zone, ground and speed checks to be satisfied together. If it is unavailable, read which condition is missing rather than repeatedly clicking.
The boarding countdown and resulting passenger load are part of the mission. Verify completion before returning to base, then register the flight and inspect its result.
Screenshot placeholder SM03 — rescue sequence. Capture the actual search/status panel, incident found, valid landing/boarding conditions, completed boarding, return and registered result. These images require a real simulator flight and cannot be replaced by a route preview.
Step 4. Verify simulator scenery and equipment
Where an activity uses scenery objects, check the relevant simulator's asset installation and settings. Use the supplied scenery test when appropriate and read any event-feed failure. A missing visual object and an unmet mission condition are not necessarily the same problem.
For an Ore Detector, verify it is in the aircraft load, then follow the detector's in-flight requirements and read the real deposit values. Chapter 17 leaves the survey illustrations pending until such a flight occurs.
Step 5. Use tracking checks to diagnose a blocked start
Read the tracking conditions individually: date, fuel, payload, model, simulator settings and location. Correct the failed condition and check it again. Do not assume that a connected simulator means its aircraft and load match the OnAir dispatch.
If returning from a work-order leg, verify that the prefilled aircraft, route and crew are the ones intended. Keep the same registration through dispatch, tracking and the final report.
Step 6. Use assistance deliberately
Weather, flight-plan, ATC and sound/voice options can support the exercise. Read each feature's current availability and configuration rather than treating all assistance as automatically enabled. Keep reminders audible if you depend on them for deadlines or connection interruptions.
This existing settings capture illustrates configuration, not a completed special mission.
Step 7. Recover and register
If the simulator connection or server is interrupted, read the saved-flight and recovery information. Preserve the local record and follow the offered recovery path. Do not delete it or start another flight just to clear the warning.
Screenshot placeholder SM07 — actual recovery outcome. If a real interruption occurs, capture the message, available recovery action and successful registration of that same flight. Keep this conditional; deliberately disconnecting is not required to complete the tutorial.
Chapter 26
Review, Stabilise and Grow Your Company
The learning sequence ends with a repeatable review. Before adding another route, aircraft or production line, establish that the current commitments can finish and the next operating period is funded.
Step 1. Confirm context and urgent work
Read the active company, world and personal/VA context. Review pending jobs, running work orders, regular-route occurrences and contract deadlines. Distinguish a draft, an accepted obligation, an operation in progress and a completed result.
Deal first with the next time-sensitive requirement. A profitable future route does not rescue a contract that cannot be delivered before its current deadline.
Step 2. Check aircraft and people
For the next departure, verify location, status, inspections, failures, configuration and crew. Check rest, training and transport before counting an employee as available. Reopen dispatch for the actual fuel and load calculation.
For the tutorial company, keep N5454S, Hina and the Academy C172 group as separate records: owning the aircraft and saving a crew preset does not mean a flight has run.
Step 3. Check facilities and supplies
Inspect FBO construction, usable fuel and pending deliveries. Review factory inputs, food, staff, output and activity. Check owned-airport kit stock at the airport where payment is due.
The tutorial's EDHL FBO has construction stages, LFPT holds a 30-ration reserve, and the Food Mixer remains unbuilt. Those are specific checkpoints to revisit, not completed production capacity.
Step 4. Reconcile the money
Read Current Cash, then use the ledger to explain significant changes. Compare operating performance over consistent periods and read the Balance Sheet's report date. Include recurring wages, aircraft charges, loans and facilities in the cash reserve.
Treat unsold output, outstanding contract payments and available cash as different things. A good-looking inventory total does not pay an imminent fuel invoice until it becomes spendable cash.
Step 5. Review actual results
Use flight records, contract progress, factory logs and transactions to assess what happened. Compare the same operation across those records using dates, references and aircraft registrations.
Screenshot placeholder RG05 — complete operating review. After the tutorial's actual flights and first production cycles, capture their registered results and financial entries. Add a short comparison with the original estimates. Leave this pending while those operations remain unperformed.
Step 6. Choose one next improvement
Select the constraint that most affects reliability: missing crew, long repositioning, insufficient fuel coverage, unsuitable job loads, poor input supply or uncollected output. Improve that constraint before adding another dependent activity.
Use a small trial and compare the result over a defined period. Expand a route when its actual demand, capacity and operating costs support expansion; expand industry when supply and collection can keep the additional machine productive.
Step 7. Leave a clear handover
Before ending a session, note active commitments, their deadlines, construction and delivery ETAs, and the next required action. Leave no ambiguous confirmation open. If another operator uses the same company or Companion, state which actions were completed and which were only quoted.
The appendices provide concise checklists and routes back to the relevant lessons. Return to them when adding complexity, and keep the flight-dependent placeholders visible until real evidence replaces them.
Chapter 27
Operational Checklists and Learning Paths
A. Before accepting work
Confirm the company, world and personal/VA context.
Read all legs, quantities, passenger classes, deadline and penalty.
Identify a suitable aircraft and available qualified crew.
Check departure location, fuel access and maintenance allowance.
Budget repositioning, operating costs and recurring commitments.
Accept only the quantity and work you can actually perform.
A. Before departure
Verify aircraft registration, route and alternate.
Recheck crew, selected cargo/passengers and destination.
Check fuel, total weight and payload limits together.
Read each simulator tracking condition and correct failures.
Start the intended operation once and verify the resulting status.
A. After arrival
Finish tracking and register the actual flight.
Verify job or contract progress, including all remaining legs.
Read aircraft and crew location, status and next availability.
Reconcile actual payment and charges before repeating the plan.
A. Before leaving the company
Note upcoming deadlines, scheduled departures and deliveries.
Check fuel, rations, production inputs and ownership kits.
Record maintenance/construction ETAs and unresolved blockers.
Close or resolve open confirmations and save intended edits.
B. Troubleshooting by symptom
Symptom
First checks
Return to
No suitable jobs visible
Source, airport, filters, range and weight assumptions
Chapters 4, 8, 13
Aircraft cannot start
Status, maintenance, crew, route, fuel and weight
Chapters 8–10
Work order waits
Required payload at departure, aircraft/crew availability
Chapter 14
Route occurrence missing
Saved/active state, operating day and UTC timing
Chapter 15
Goods owned but unavailable
Actual airport, aboard/transit status, unloading
Chapters 19, 21
Machine will not build
Local materials and construction IP
Chapter 18
Machine will not produce
Built state, recipe, staff, food, inputs, connections, output space
Chapters 18, 19, 22
Contract payment missing
Correct goods on the ground at the contract airport, progress and deadline
Chapter 20
Cash falls despite revenue
Acquisition, recurring commitments, operating charges, period selection
Chapters 11, 26
Airport ownership at risk
Kits at that airport and next payment/arrears
Chapter 23
VA asset cannot be used
Operating context, role and asset/job permissions
Chapter 24
Tracking cannot begin
Individual tracking-condition messages
Chapters 3, 25
C. Working glossary
Term
Meaning in this manual
Freelance
Flying supplied work before managing the full company operation
Advanced / Career
Company-management mode with its assets and commitments
Company Job
Work accepted for the company to operate with its resources
FBO query
Saved criteria used to generate offers; not an accepted mission
Work order
Ordered legs and loading actions for one aircraft, with player/AI behaviour subject to world rules
Regular route
Repeating service definition that generates scheduled occurrences
Dispatch
Preparation of the aircraft, crew, route, fuel and load
Registration
Submission and acceptance of the actual flight result
IP
Industry Points; construction uses points and production can earn or consume them
Supply
Goods offered for purchase at a location
Demand
A buyer's funded request for delivery
Contract
A signed obligation to deliver a quantity by a deadline
FBO
Facility at an airport; assets and services need their own configuration
Basecamp
Deployed size-0 operating location created with the appropriate kit
VA
Virtual Airline, with shared resources and role-based permissions
UTC
The common time reference used to compare schedules and deadlines
D. Choose the next learning path
Objective
Sequence
Learn simulator-linked flying
Chapters 2–3, then 4–5
Operate a small company
Chapters 6–11, completing a real first job before expanding
Build repeatable flying
Chapters 12–16
Start industry
Chapters 17–19, then 20–22 as supply and transport require
Support remote operations
Chapter 23 after proving supply and aircraft suitability
Cooperate with other operators
Chapter 24 after learning personal-company dispatch
Add special activities
Chapter 25 after a normal flight can be completed reliably
Maintain the whole operation
Chapter 26 and Appendix A at each session
Screenshots containing dates, prices, registrations or company figures record an observed example. Recheck live values when following the lesson. A labelled screenshot placeholder describes evidence still to be captured and must not be read as an action already completed.
Continue learning
Continue learning
Review your operations, then use the Handbook and Reference for the rules and controls you need.