
Lay Out and Build a Production Line
This chapter uses the existing LFPT Production - Food factory in OAIR. Its initial canvas is empty. We add a Food Mixer, the upstream machine that produces Mixed Food for the ration chain studied in Chapter 17. Adding it to the canvas does not mean it has been constructed.
Step 1. Open the correct site
Choose My Factories, locate the factory and use Manage. Confirm its name and airport. If starting with no factory, use New factory, inspect the location/type choices and their requirements, and confirm only the site appropriate to your plan.
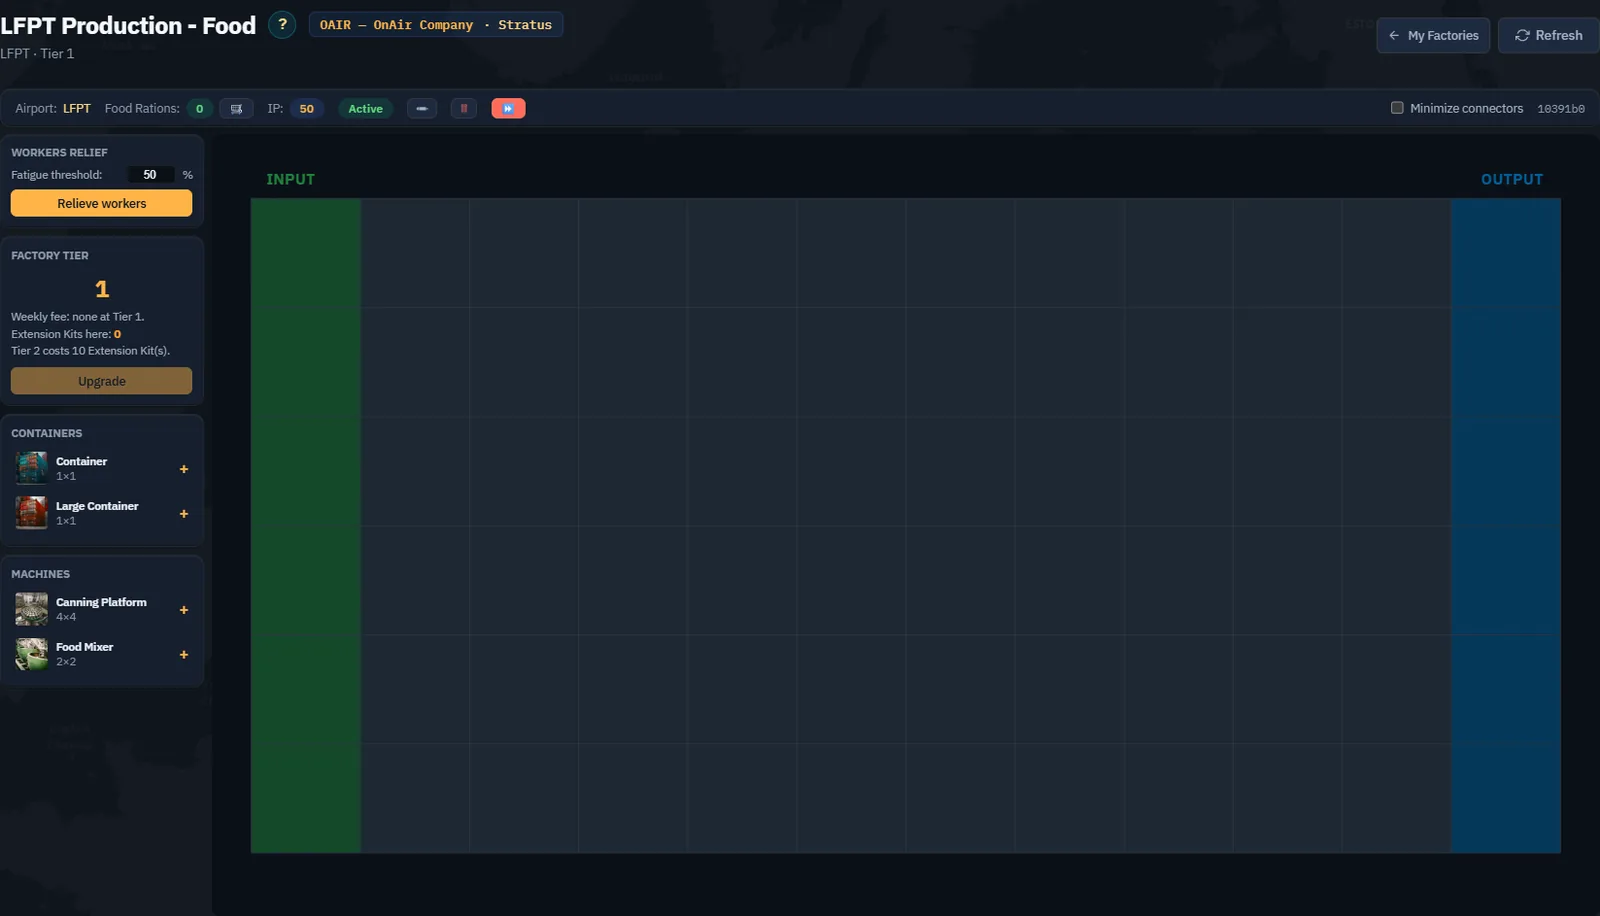
Read the activity indicator as well as the tier. The screenshot shows no weekly fee at Tier 1 and a Tier 2 requirement of ten Extension Kits. An upgrade is separate from constructing a machine; leave it until the planned layout needs it.
Step 2. Add the first machine
Select Food Mixer in the machine palette. The machine appears in the production area with its required resources and Build control.
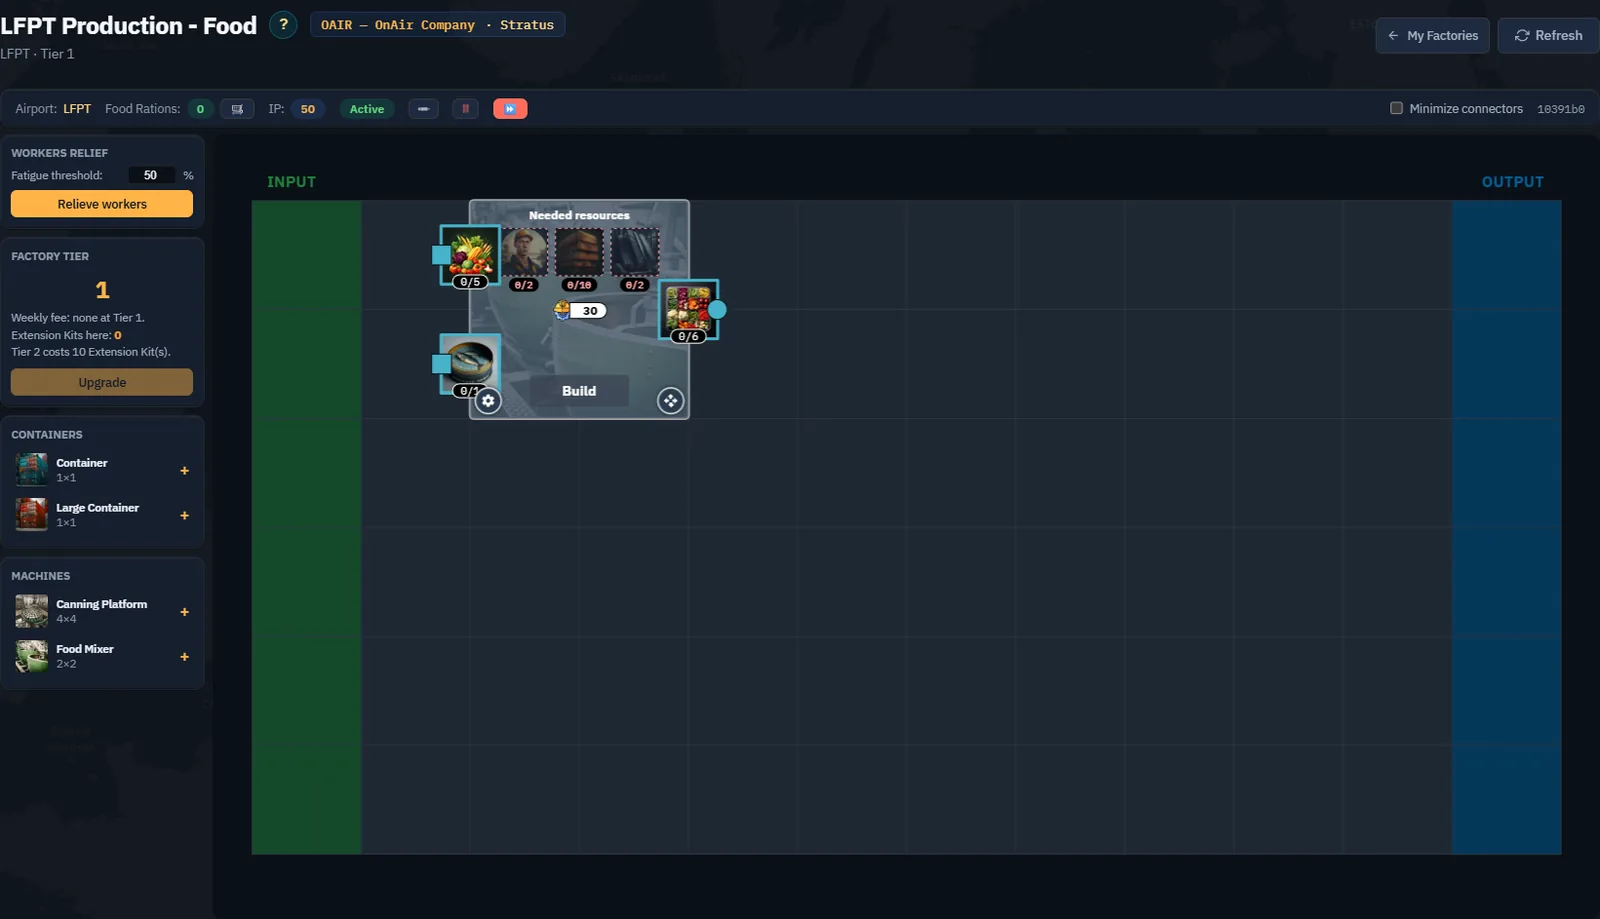
Use the move control and a valid free cell if placement needs adjusting. Leave room for input and output containers and the downstream machine. Avoid adding duplicates while waiting for the server to finish the first creation.
Step 3. Read settings before provisioning
Open the machine's gear control. Inspect its staff slot, recipe choices, inputs, outputs, production time and log.
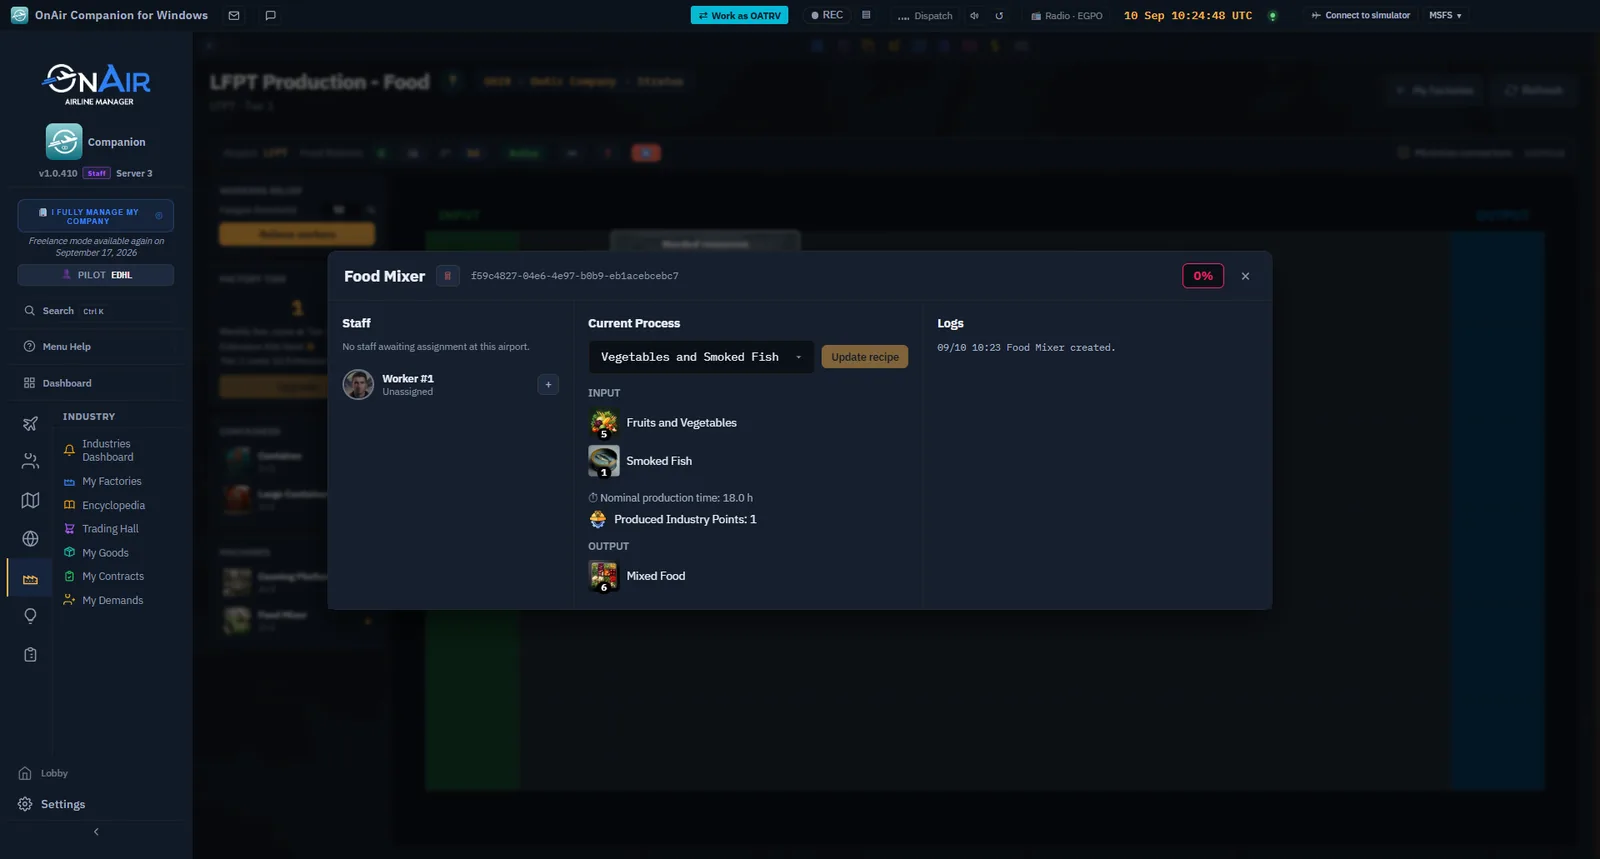
Other recipes use different ingredients. If changing the selection, use Update recipe and verify the saved result before buying inputs. The construction materials on the unbuilt machine are a different requirement from these recurring recipe inputs.
Step 4. Bring construction resources to LFPT
Use Trading Hall to buy or arrange delivery of the exact missing materials. Check My Goods at LFPT, not merely company-wide ownership. Chapter 19 explains the stock and worker checks; Chapter 21 covers transport when the goods are elsewhere.
The example machine remains unbuilt. We have not bought its construction materials or claimed a completed construction. The 50 available IP covers the displayed 30-IP machine requirement, but that alone does not satisfy its material requirements or any additional container costs.
Screenshot placeholder FC04 — ready-to-build resources. Obtain the actual two Builders, ten Lumber and two Steel Bars at LFPT, verify their usable location, then capture the resource panel with the Build action enabled and the current IP balance.
Step 5. Start construction and verify its state
When every requirement is satisfied, choose Build and read the resulting progress and ETA. Wait for normal server completion. Do not use staff/debug time-advance controls to illustrate a normal user's workflow.
Screenshot placeholder FC05 — construction and completion. Capture the same Food Mixer during construction and again when built. Include the server's ETA and log entry. A machine icon placed on the grid is not proof of construction.
Step 6. Connect the material flow
Add the necessary input/output containers using the palette, reading their requirements first. Configure each container's merchandise type. For this recipe, plan supplies of Fruits and Vegetables and Smoked Fish, then a place for Mixed Food to go.
Click an output port and then a compatible input port. The canvas highlights compatible targets. Trace the resulting connection in the intended direction; a nearby container is not connected merely because it touches a machine visually. Re-clicking an already wired output can remove the connection, so avoid exploratory clicks on a working chain.
Screenshot placeholder FC06 — connected line. Capture the constructed mixer with correctly typed supply and output containers and visible connections. Open one container's settings in a second image to show its merchandise and output mode.
Step 7. Verify a real cycle
Assign suitable workers, provide food and recipe inputs, and leave sufficient output capacity. Observe the machine state after a normal server update. When it completes a cycle, compare actual input and output stocks and inspect the log.
Screenshot placeholder FC07 — first completed cycle. Record before/after quantities, the production log and the resulting IP change. Do not replace this evidence with the Encyclopedia's theoretical throughput. Only then extend the chain towards a Canning Platform when construction IP and supplies permit it.